
Planking the decks of the ship is one of the most important areas of the build. The deck is usually the first thing people notice, and any inaccuracies or mistakes are going to be picked out immediately.
The Santa Maria has a number of decks, three of which will be visible on the completed ship model. While I’m planking the hull, I also started work on planking the smallest of these decks, the fore deck. This will give me an opportunity to experiment with which pattern, color, and methods I want to use for the entire ship. If the smaller deck doesn’t turn out the way I like, I can sand it down and re-do it without too much trouble.
Over the course of history, planks have been nailed down a wide variety of ways and there is no current documentation to display exactly how planks were placed in the 1400’s. Therefore, I have researched as much as possible, and have determined what I consider the most likely planking pattern for the Santa Maria.
This drawing is from “Historic Ship Models” by Wolfram ZuMondfeld.
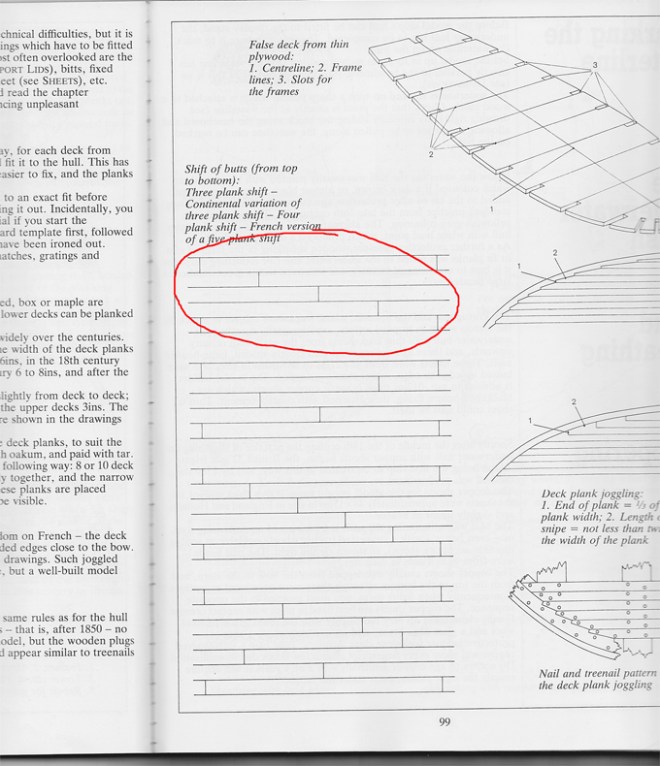
Based on what research I could find, plank boards from this era were almost always made from oak, and in the 1400’s they would have almost certainly been about 12″ wide with each plank approximately 12′ long. Based on this, my guess is that a “three butt shift” would have been the probably pattern. This means that three planks would have separated each “butt” or where the two planks come together.

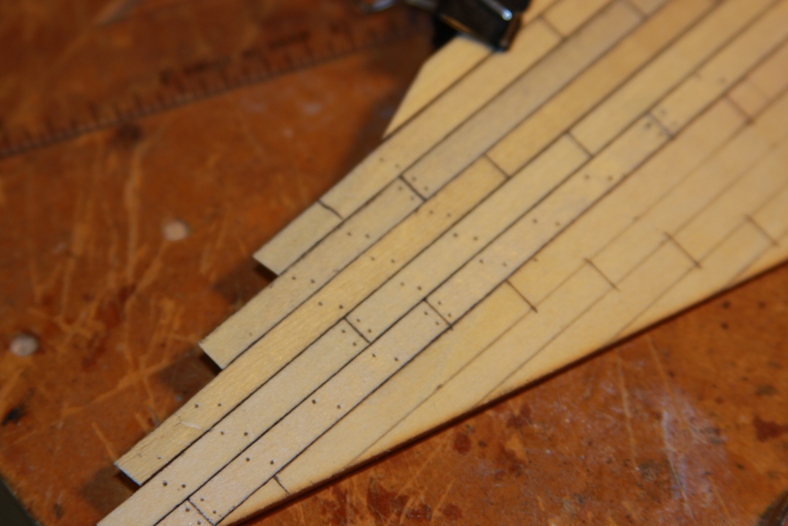
First, I measured and drew out the proposed pattern on the false deck. The ship’s scale is 1/65, so if each plank was 12′ long on the original, it needs to be about 42mm on my model.
I then cut each plank and glue it down over the top of the drawn pattern. After gluing each plank down, I used a .5mm mechanical pencil to mark the treenails. The “tree nails” were small dowels used in place of what would presently be nails. This pattern was the likely treenail schematic for deck planks that were wider than 11 inches. My original plan was to drill tiny holes then fill them in, but I discovered that poking the hole with the mechanical pencil then breaking off a tiny bit of the lead into the hole worked very well.

Once all the planks were laid, the deck is bordered with walnut. I sanded the deck thoroughly with 600 grain sandpaper and stained it with “weathered oak” color stain. When the stain dries it will require another sanding. To maintain the aged look of the deck, I will sand more toward the center of the deck where the sailors would have had more opportunity to scrub, while the edges that collected water and didn’t receive as much attention would remain a little more worn and darkened.
There is much more work to be done on the foredeck including stanchions, railings, and a carved head beam that was used to ram other ships. More to come on the foredeck…
