
Following the same pattern and methodology as the foredeck, I started planking the main deck. It’s much easier to plank a deck before it is attached to the hull, so I cut an additional false deck to plank. The original deck that came with the kit was attached to the hull to stabilize the bulkheads and the hull.
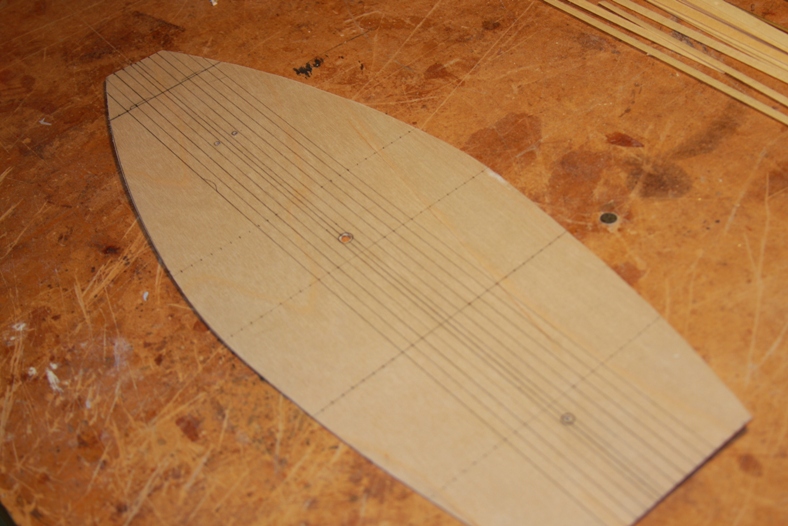
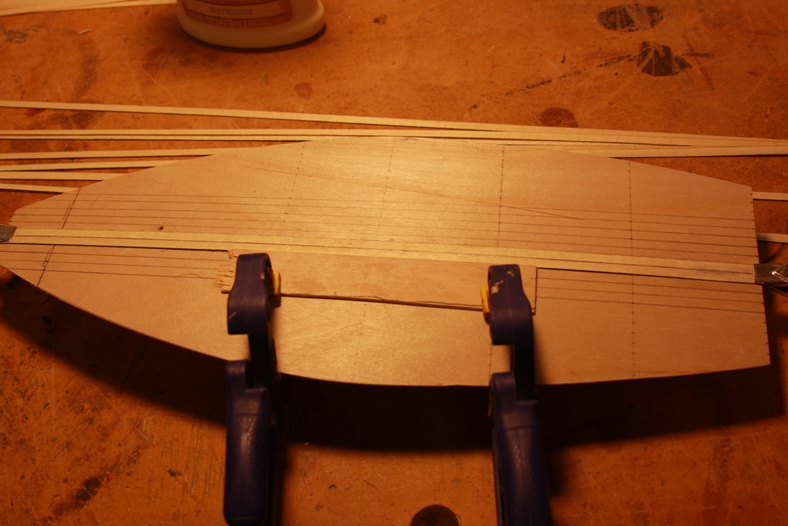
Planking starts by measuring down the centerline of the deck splitting it into two equal halves. The deck is then planked from the center outward by measuring and gluing each plank.

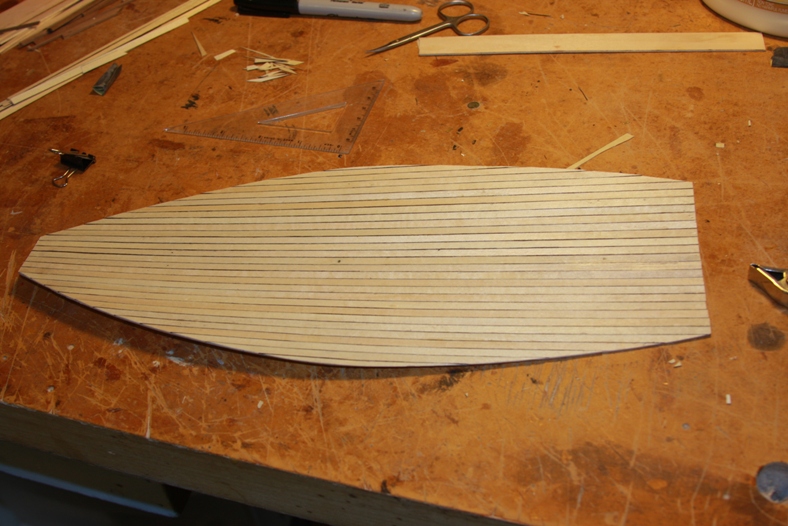
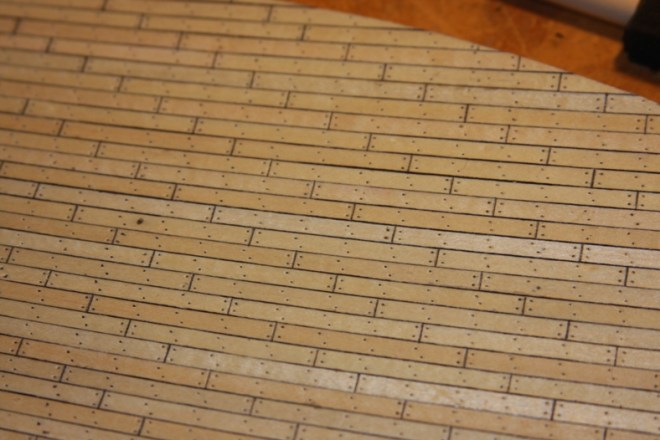
Deck planks for ships were also “caulked” with tar-like material between each board. This kept the deck watertight. To simulate this effect, I lined each plank with a black sharpie.
It’s very important to make sure that each plank is exactly parallel to the center and pressed together as tightly as possible to the other planks. To achieve these “closeness” I glued each piece, clamped it at the ends, then used an additional scrap piece of wood to press the planks together and then clamped that down as well.
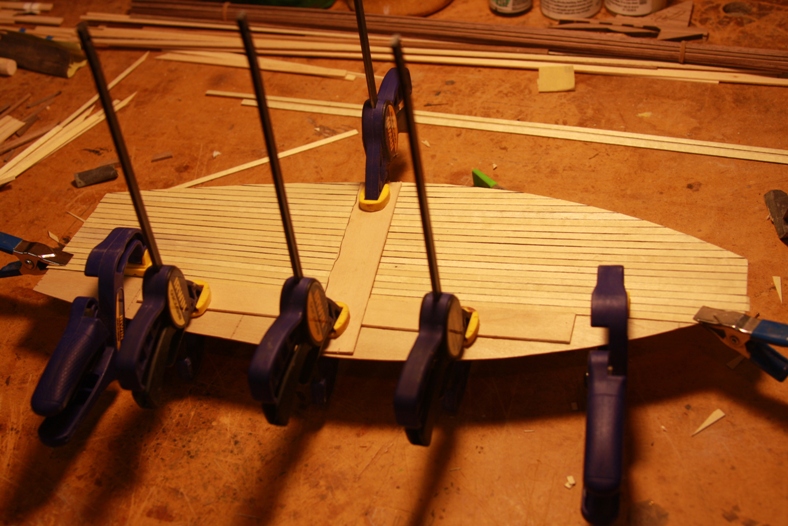
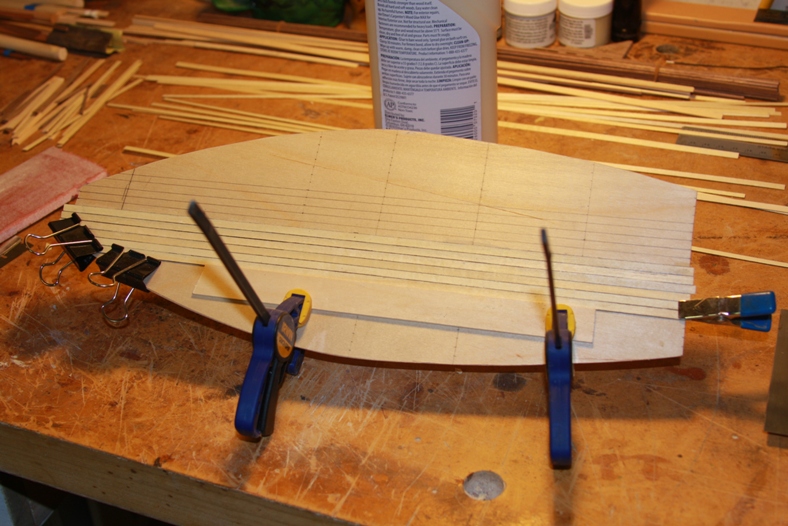
Planking is an extremely tedious process as each piece has to be indivually “caulked” with the sharpie, measured, cut, then glued and placed. The next piece cannot be placed until the previous piece is comletely dry or the builder runs the risk of the entire decking being pushed out of alignment.
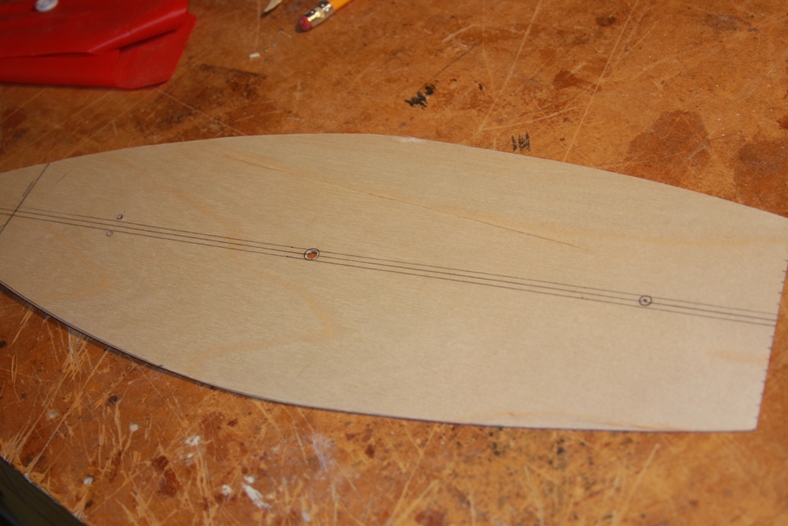
An important aspect of accuracy is simulating the “butt pattern” for the deck. That is the pattern in which each board is placed and “trenailed” (or nailed) into place. These methods varied greatly depending upon the time period and country of origin from which the ship was built.
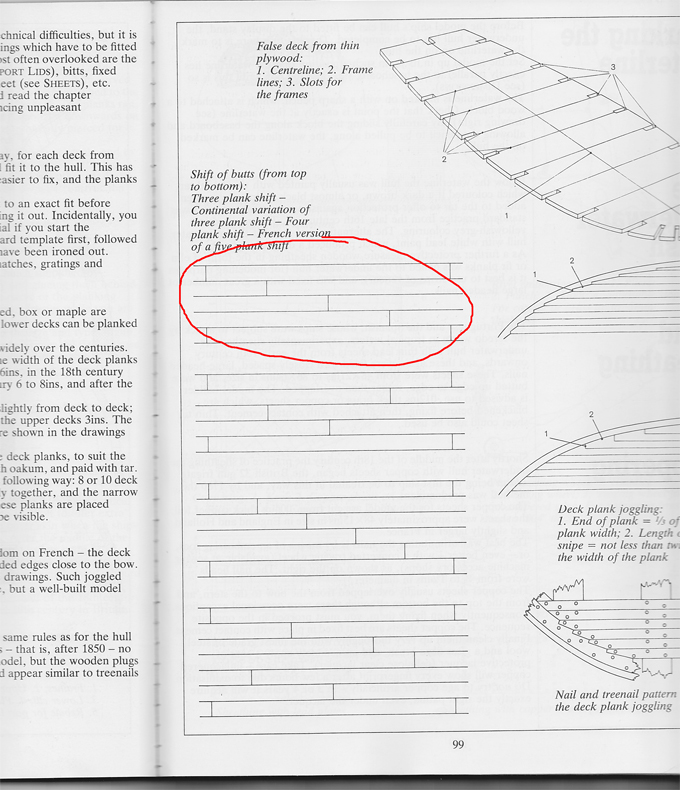
Since (as mentioned several times) there were no detailed records of how the Santa Maria was built, I had to use the mostly likely butt-pattern based on available research outlined above.

There are a couple of options to achieve this effect when planking. one can either cut the planks to the length desired then glue them down, or one can glue each plank it’s full length then simulate the butts. Because of how thin these planks were, I chose the latter. (Note: With my previous build The San Juan Nepomuceno I chose the former method and cut each plank to length).
After the planks were laid, I gave the deck a very light sanding. Part of the difficulty of planking with the super thin strips like this is you’re very limited with how much sanding you can perform. I then marked the butt pattern with a .5mm mechanical pencil.
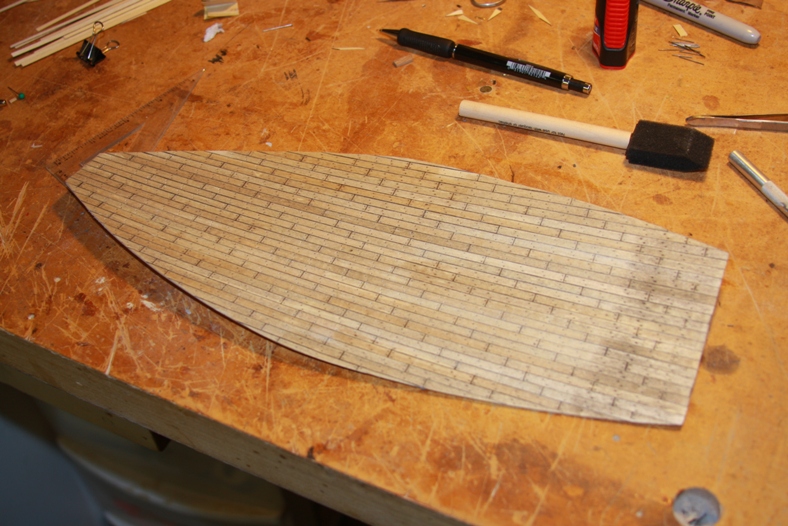
“Trenails” were small wooden dowels used to “nail” down the deck. To simulate these trenails I followed the same procedure as with the Foredeck and ‘drilled’ the holes with the .5mm mechanical pencil. Each hole is precisely marked.
After the butt-pattern and trenails are marked, I once again used the same method as the foredeck to achieve the desired color. The deck was most likely oak. To achieve a aged oak color, I gave the deck a very light coat of diluted “cherry” stain. Then I went over the top of that with a more substantial coat of “weathered oak” stain.
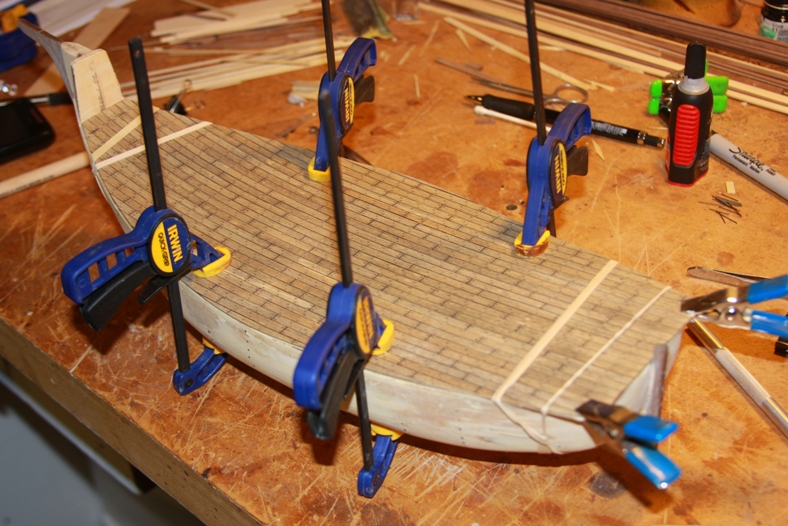
Finally, I mounted the deck on the hull and am ready for the bulwarks.
