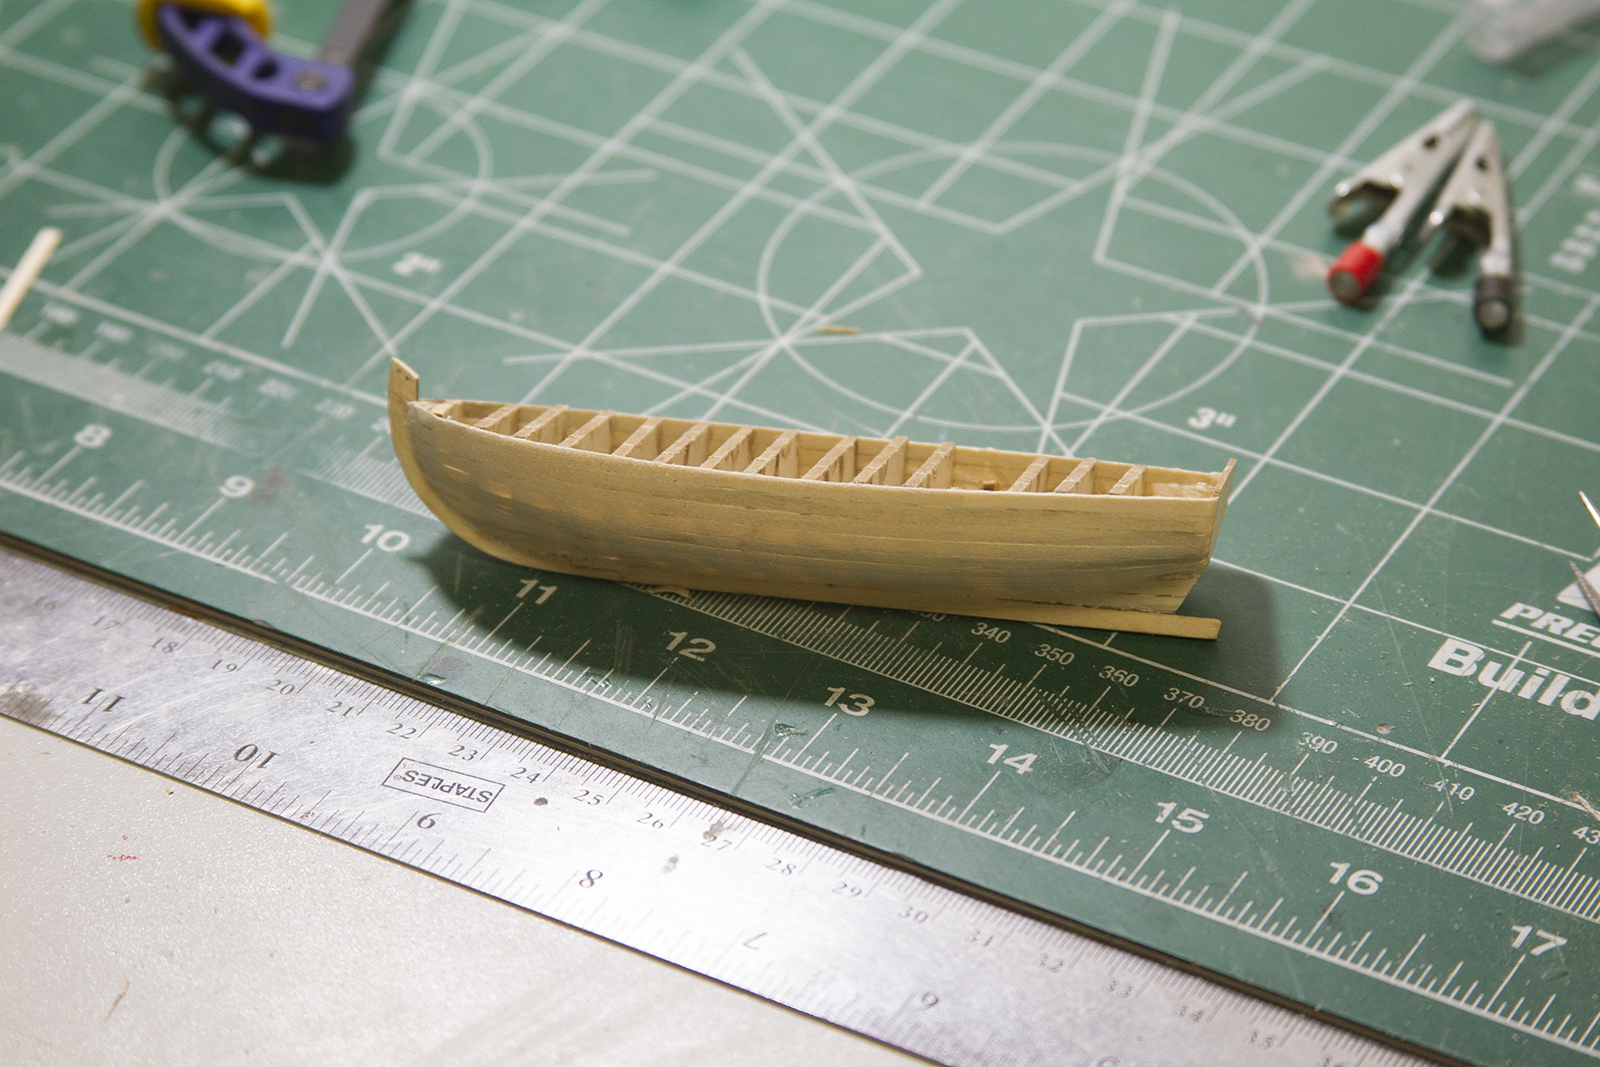
The USF Confederacy most likely had a minimum of four smaller boats secured on board. However, the model representation will have just two small boats mounted on the skid beams across her waist. There will be a 22′ longboat, and a 26′ pinnace.
This post represents at least couple of weeks of work. Because it’s obviously slow-going, I started on the small boats at the same time as the anchors and other details and worked through them simultaneously. I will say – I was quite pleased with how the small boasts are laser cut and put together. Each keel, false keel keel and bulkhead are laser cut on a sheet of parts. The good news is, there are plenty of extra parts available on the sheets. This is good because the parts are all very delicate and I’ve snapped off and had to recreate quite a few along the way.
Each small boat is facilitated by a “plank on bulkhead” type framing just as the larger ship is built. However, the center of each bulkhead is then removed, just revealing the inside framing. I’ve always struggled with coming up with small boat bulwarks, and inevitably end up with uneven hulls. Don’t get me wrong – I still came up with uneven hulls – but at least they were closer than I’ve been able to do before. I’ve constructed a few of these small boats, and this is by far the easiest method that I’ve come across thus far.

Although I initially started with both boats – I ultimately finished off the longboat first before moving on to the pinnace. It’s a bit tricky to get each bulkhead lined up on the keep properly with the same amount of space along the framing. As a result, I ended up using CA glue (superglue) throughout the process.
After the bulwarks are in the place, the planking begins. As with the larger boat, this is a slow and repetitive process. Each basswood strip is measure, cut, soaked, bent with a heat source, then mounted. As there is only one layer of planking here, one must be quite careful because there isn’t much room for error – the planks are very thin and only a limited amount of sanding can be performed. In fact, you will notice in the some of the shots (with light behind the boat) how thin some of the areas became as they were evened out.
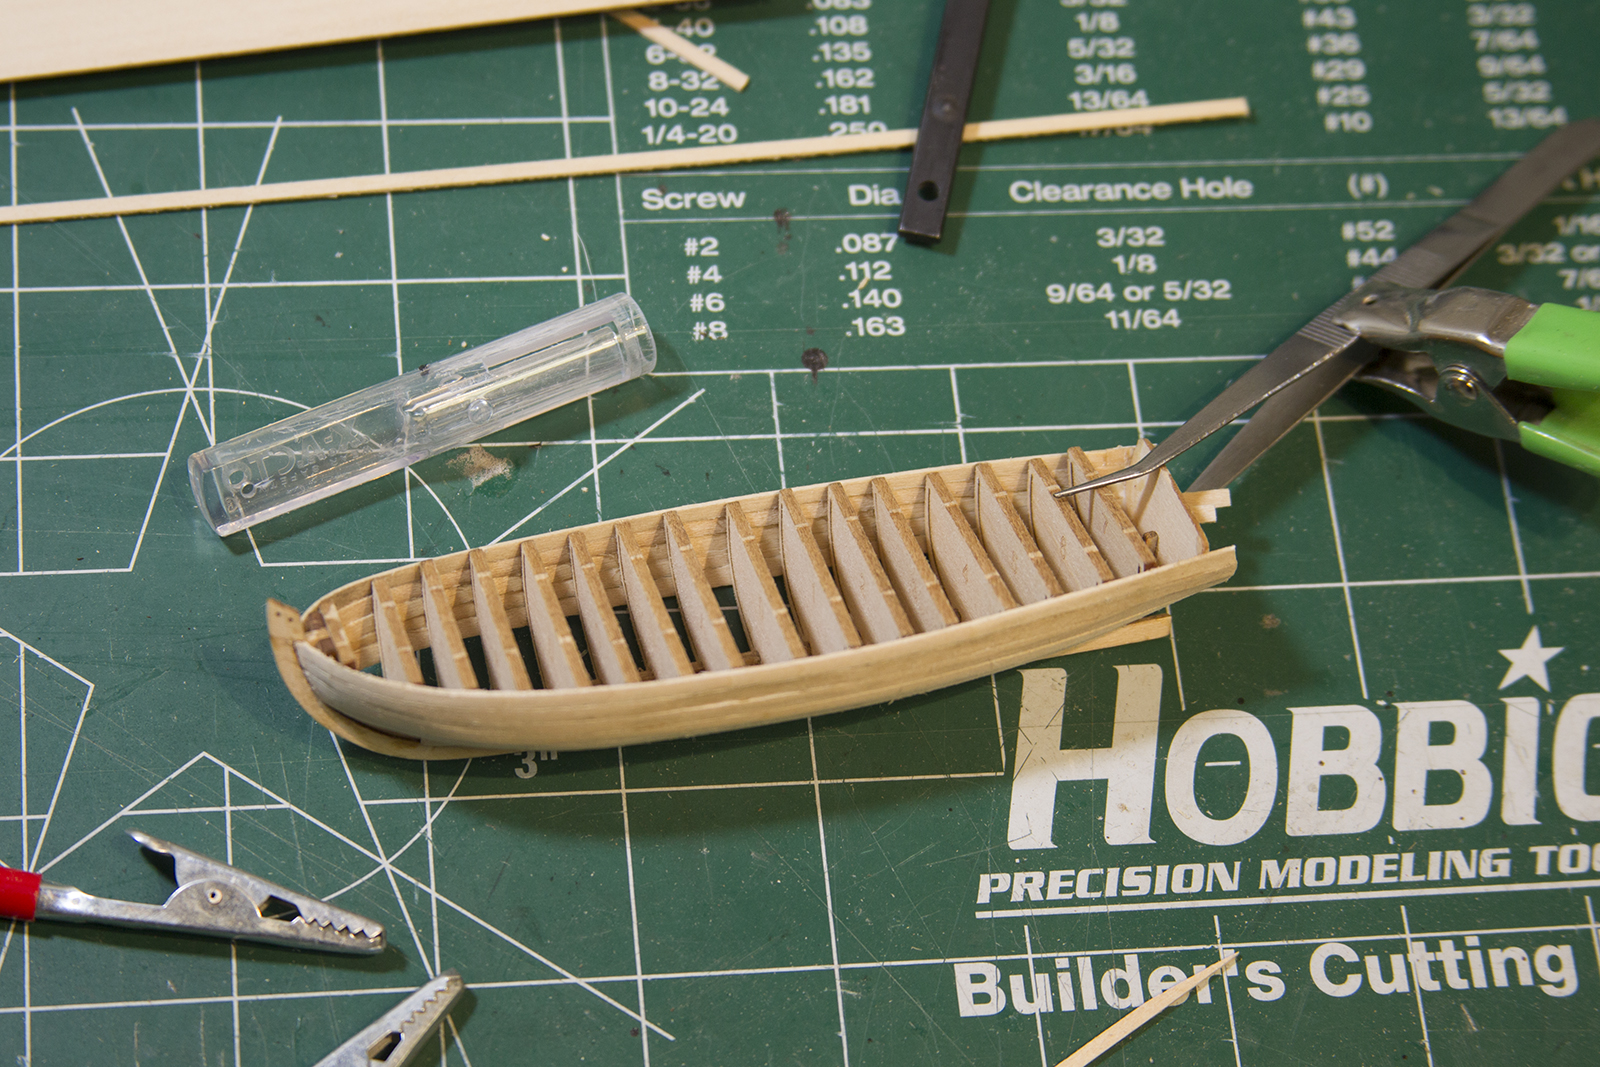
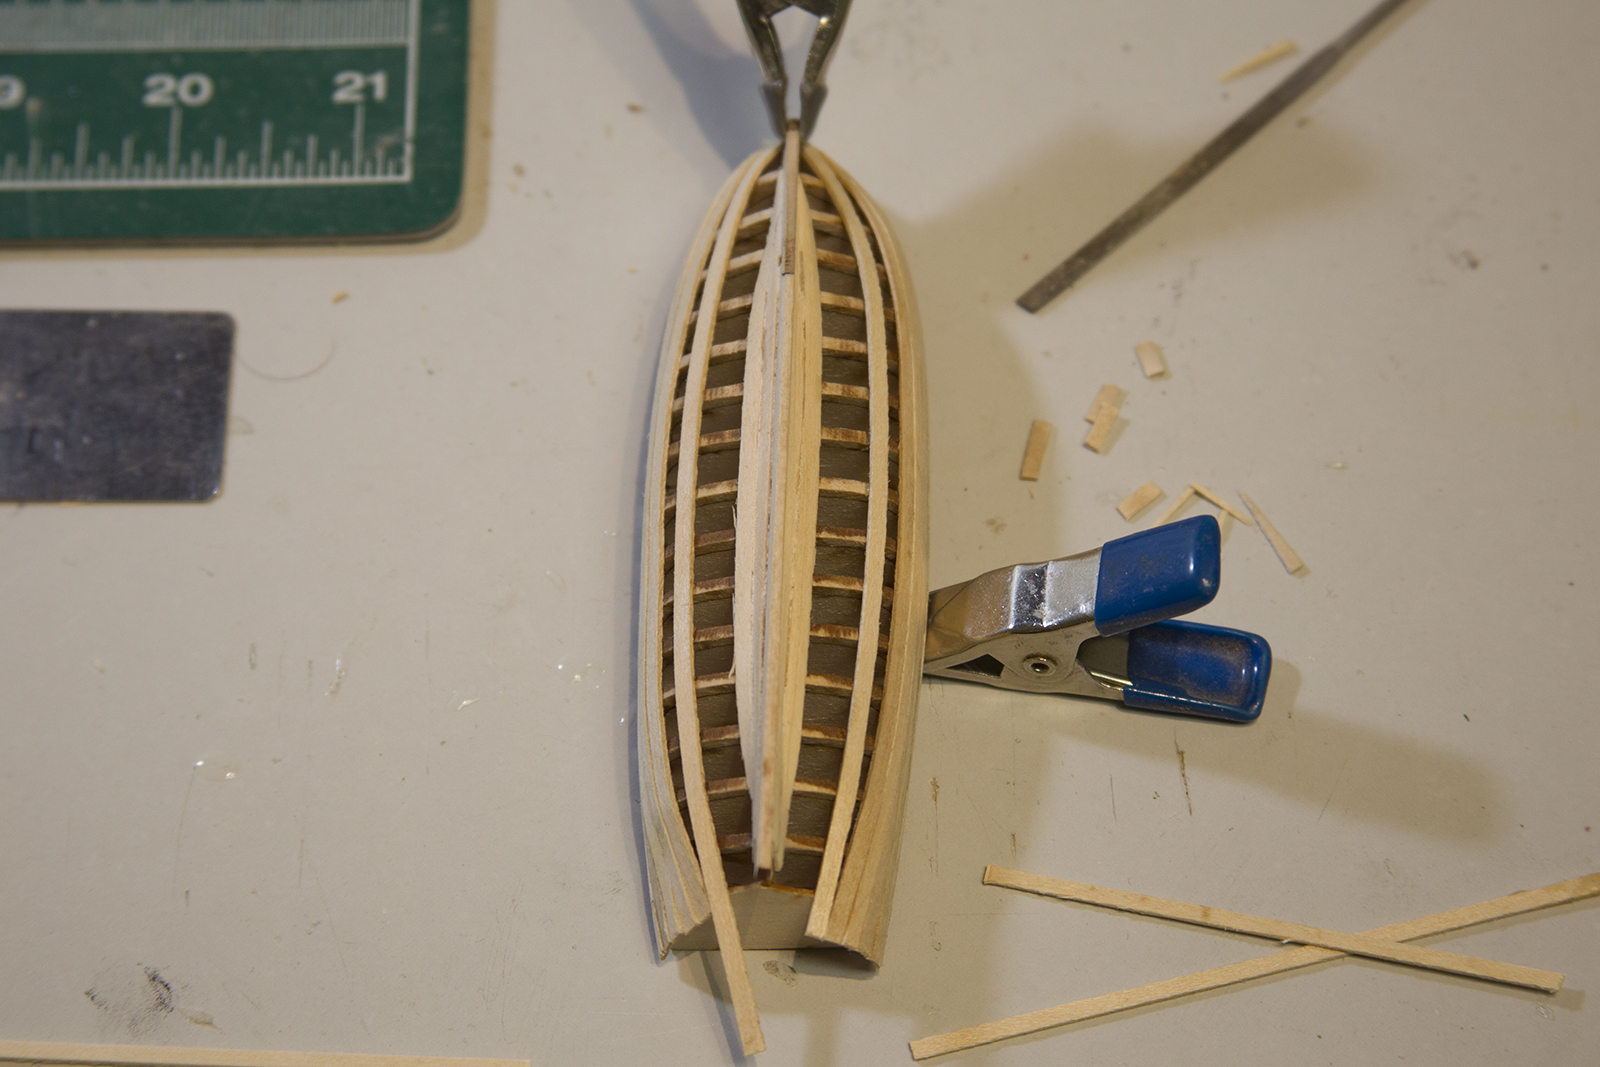

After the longboat is planked, it was time to pull out the bulwark centers. MAN what a sketchy job that was. I tried ‘filing’ off the edges (*as recommended in the instructions) with my smallest needle file, and that was a pretty quick failure. Then I sliced a tiny bit at a time using a super sharp X-acto knife. A little bit more success, but still difficult. It took about two thousand delicate slices to get through. So finally, I put a super thin blade on my Dremel, put it on it’s highest speed, and cut through the edges. No matter what method I used, I inevitably snapped off at least a few of the frames and had to re-glue the tips back on. Then, sanding the frames inside and evening out all of them was a very slow, tedious process as well.
My solution for that was a very fine sand attachment on the dremel that had a rounded cone-shaped and some very careful sanding.
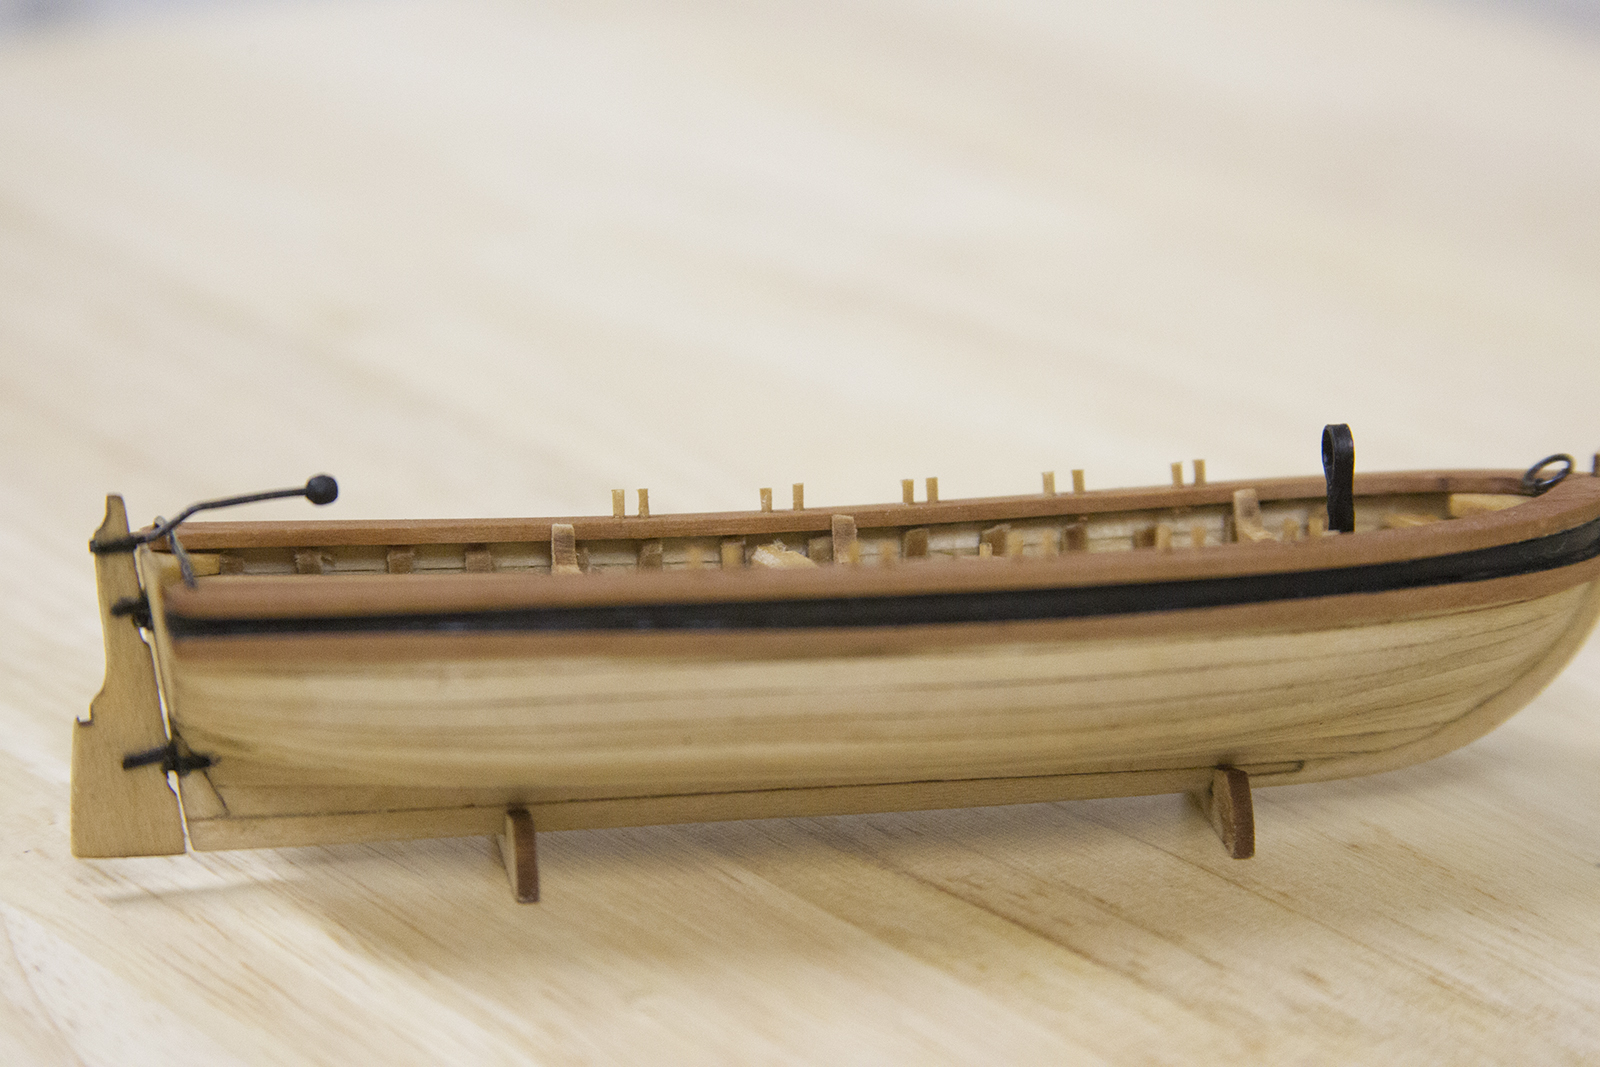
In keeping with my earlier idea to bring the center of the ship together artistically with the deck, I used Swiss Pear for the cap rail and moulding – the same wood used to plank all the decks of the ship. Obviously, the Swiss Pear is about a million times more dense than the stock basswood, so I had a number of failures.
Honestly, I blame them on impatience. I outlined the cap rail then tried to use a Dremel attachment and some other ideas to cut through the Swiss Pear quicker. Just like we always seem to learn – it ultimately takes longer trying to come up with a “short-cut” than it does just to be patient. The solution here – draw out a template onto the Swiss Pear, and cut with a sharp blade. Sure, you have to go over the cut about 50 times to get through the dense wood, but it’s worth it in the end. Then it’s all about sanding and matching.


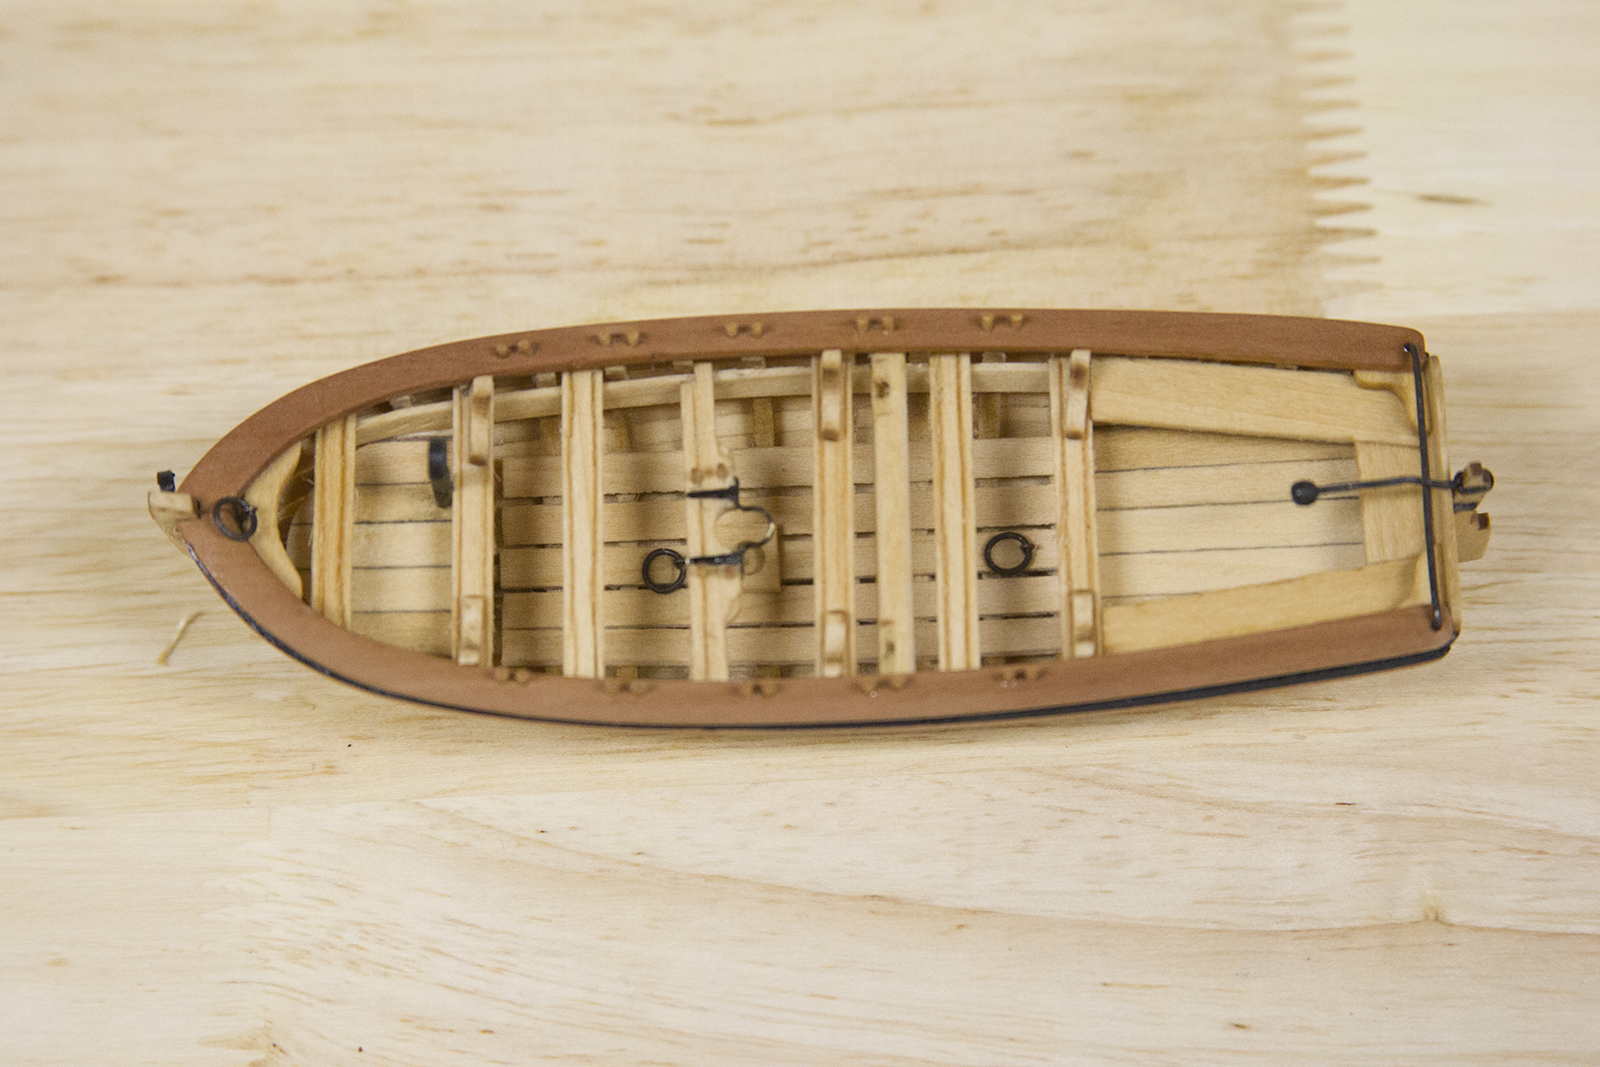
Moving on to the inboard details. Most of these things are pretty straightforward. The floorboards are strips of basswood measured and glued in making sure there is enough space between for drainage. The seats are strips of basswood planked together with “caulking” in between simulated with pencil lead. I just planked six or seven strips together at about 6 inches long so I’d have enough wood to work with for both small boats.

The risers (two strip along to side) are added as well as the “thwarts” or seats. Each of the seats is measured and ‘scored’ with a gouge along the edge. It was pretty tricky getting a good score along the edges of the seats. I wish I’d have taken a picture of it, but my method was to pinch sharp tweezers (you can actually see the tweezers I used in the photo below) together with a small piece of wood between them to keep the ends a consistent distance apart. Then I dragged one tip along the outside of the strip of I wanted to score as a guide – while using the other tip to score the wood.

One seat is slightly wider, and is home to the mast hole as well as four belaying pins for rigging the small sail. To create the belaying pins (and oar locks later) I used the same method as “trenailing” the hull or deck. I sanded down an already small diameter dowel, then inserted it into predrilled holes.
The rear seats, knees (small braces along the inboard hull and frame), and windlass are added to the boat. The rigging rings that were used to mount and unmount the ship are also added after being put together and blackened. The two rings on the front seat and bow of the ship are bowsprit rings – folded strips of brass that are moulded around a dowel to create a ring, then glued together and inserted into the boat.
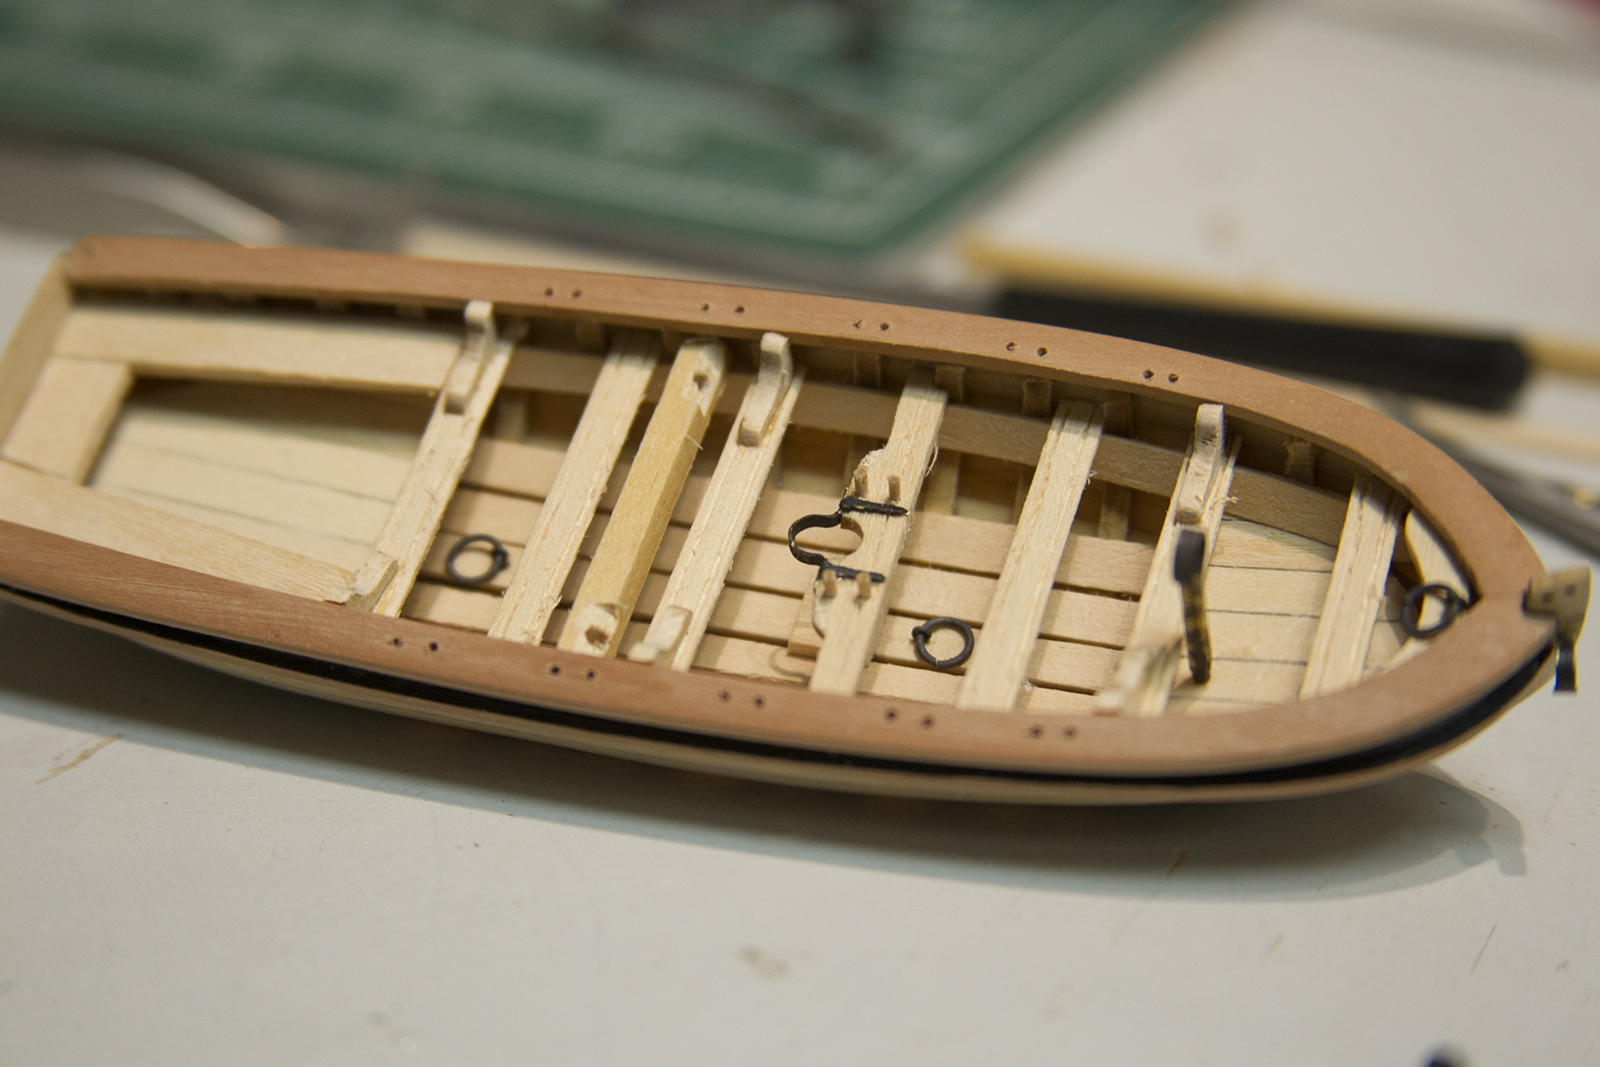

As I mentioned – the oar locks are added the same way as the belaying pins and trenailing a hull. I gently sanded down a dowel by mounting it in my Dremel as a makeshift lathe, then glued the end into each hole in the cap rail and snipped it off. The instructions call for these to be made out of wire then painted to match the wood. However, my primary reason for using a dowel instead – is my general inability to properly match paint to the wood color that the basswood ends up being after it’s stained. I do also feel as though the natural looking wood does look a bit better than paint would as well.


Finally, the rudder is added and mounted with more blackened strips of wood. A couple of the final steps include the rudder handle as well as a traveler bar at the rear of the ship – both constructed with 22 gauge black wire.