Although they’re often obscured by ratlines, deadeyes, and miscellaneous other fittings and decorations, the gun ports are a highly visible aspect of the ship that can often set the tone for how the entire model presents itself. So planking the gun ports is an area of particular emphasis for me. The plans that come with the Peg kit merely have one using the same walnut planks as the hull and running them all the way up to the top. This is not an option I chose for a few different reasons: First, on late 1700s HMS vessels, the gun ports and other areas are painted and decorated. Painting walnut (a darker wood) is more challenging and I still haven’t decided exactly what I want to paint and leave natural wood.
In addition, according to the original Admiralty plans from the National Maritime Museum in London, the planks along the gun ports are not all the same size.

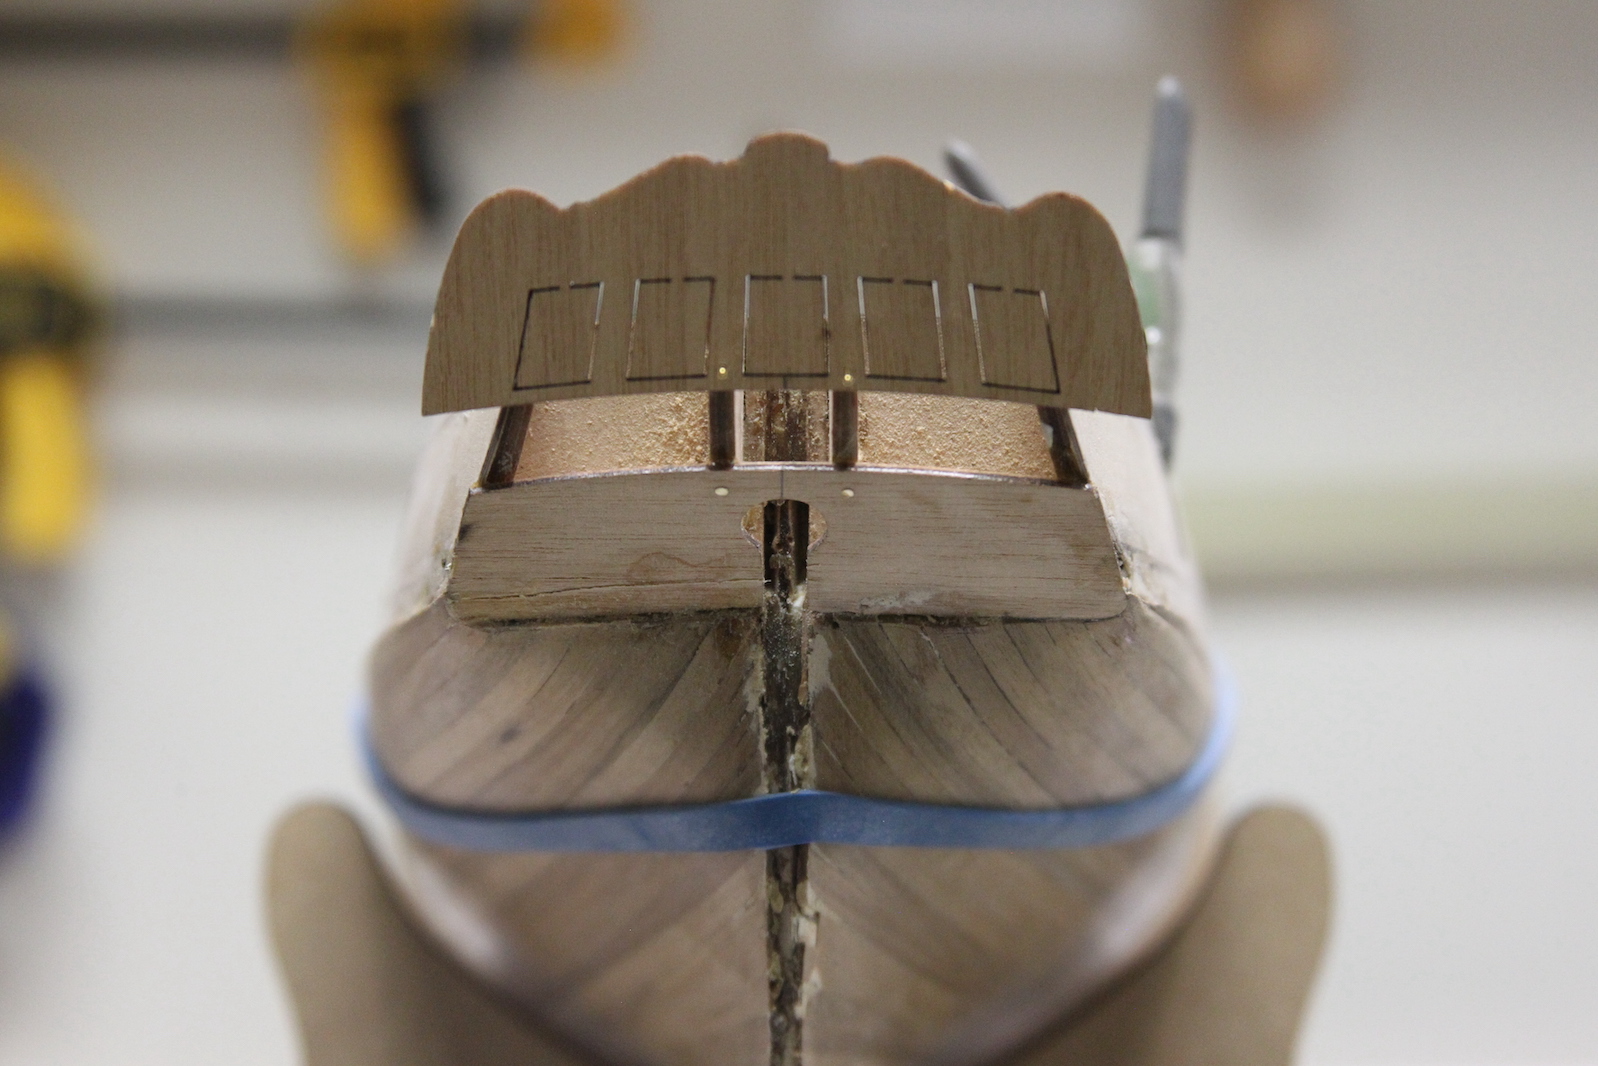
Given all that, exactly how to plank the gun ports and fit the main wale (a section of the planking that sticks out further and marks the waterline) has been giving me fits. I’ve been looking through books and other builders’ logs and and have been agonizing over what to do here until I realized that the stern / transom area on the kit is a little bit of a debacle. Not only does it not really line up very well, but it doesn’t appear to create the proper shape based on the NMM plans. Not to mention there are some weird gaps and an oversized hole for the helm port.
Since I re-created the stern post and needed to remount that anyway, I abandoned the kit parts and re-planked the counter. This gave me the chance to carve out a much more size-appropriate helm port and also get a better view of how my main wale and bulwark planking would line up.


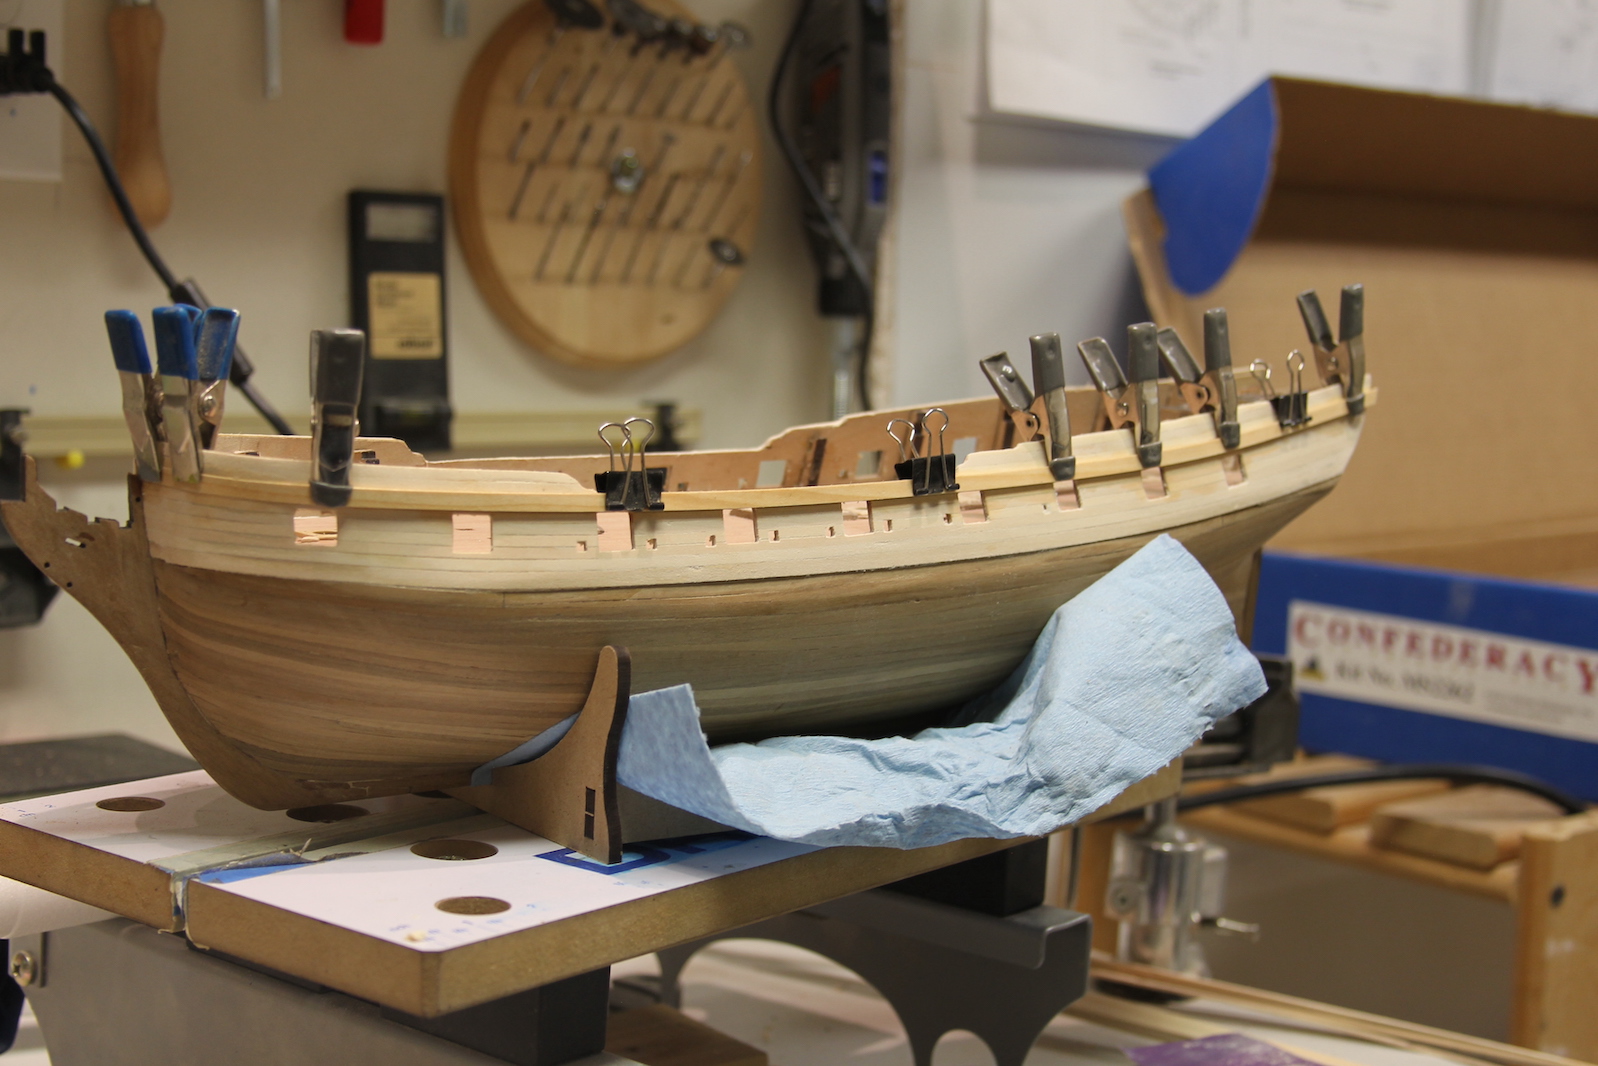
Once the transom was adjusted, I started laying out what the gunport planking would look like. As I mentioned, I wanted something lighter than the walnut so I’d have more painting (or not painting) options, so I’m using basswood. It’s not my favorite of course, since it’s soft and difficult to get precise around the gun ports and sweep ports, but it’s what I have on hand and it’ll most likely end up getting painted anyway.
At any rate – laying out the gunport planking made me quickly realize that my lines were way off. Following the prefab gunport parts when I laid down the second layer of planking gave me a much more significant dip along the water line than makes sense (or matches the NMM plans above). I soaked and shaped the sheer strake and held that in place so I could sort out how many planks I’d need and where’d they’d go. The sheer strake protrudes from the others and marks the line along the top of the gunports. It’s a very prominent visual aspect and needs to be correct – which is why I used it as my guideline for the sweep of the ship. Then I marked out the bow with pencil as to where the ‘black strake’ and main wales should line up. Oddly, the ‘black strake’ isn’t actually black, but runs along even with the bottom of the main deck and will allow for the scuppers – the holes that drain water off the sides of main deck. Once both the sheer strake and black strake are held in place along the preferred line, you can see the nasty gap where the second layer planking starts. Yikes. Thanks what I get for blinding following the gunport and forgetting to look ahead far enough into the plans and anticipating. I filled the gap with strips of walnut. I wasn’t super concerned about look here as this section will eventually be covered by the main wales. As you can see in the fourth photo – much smoother lines and more consistent with the NMM plans.


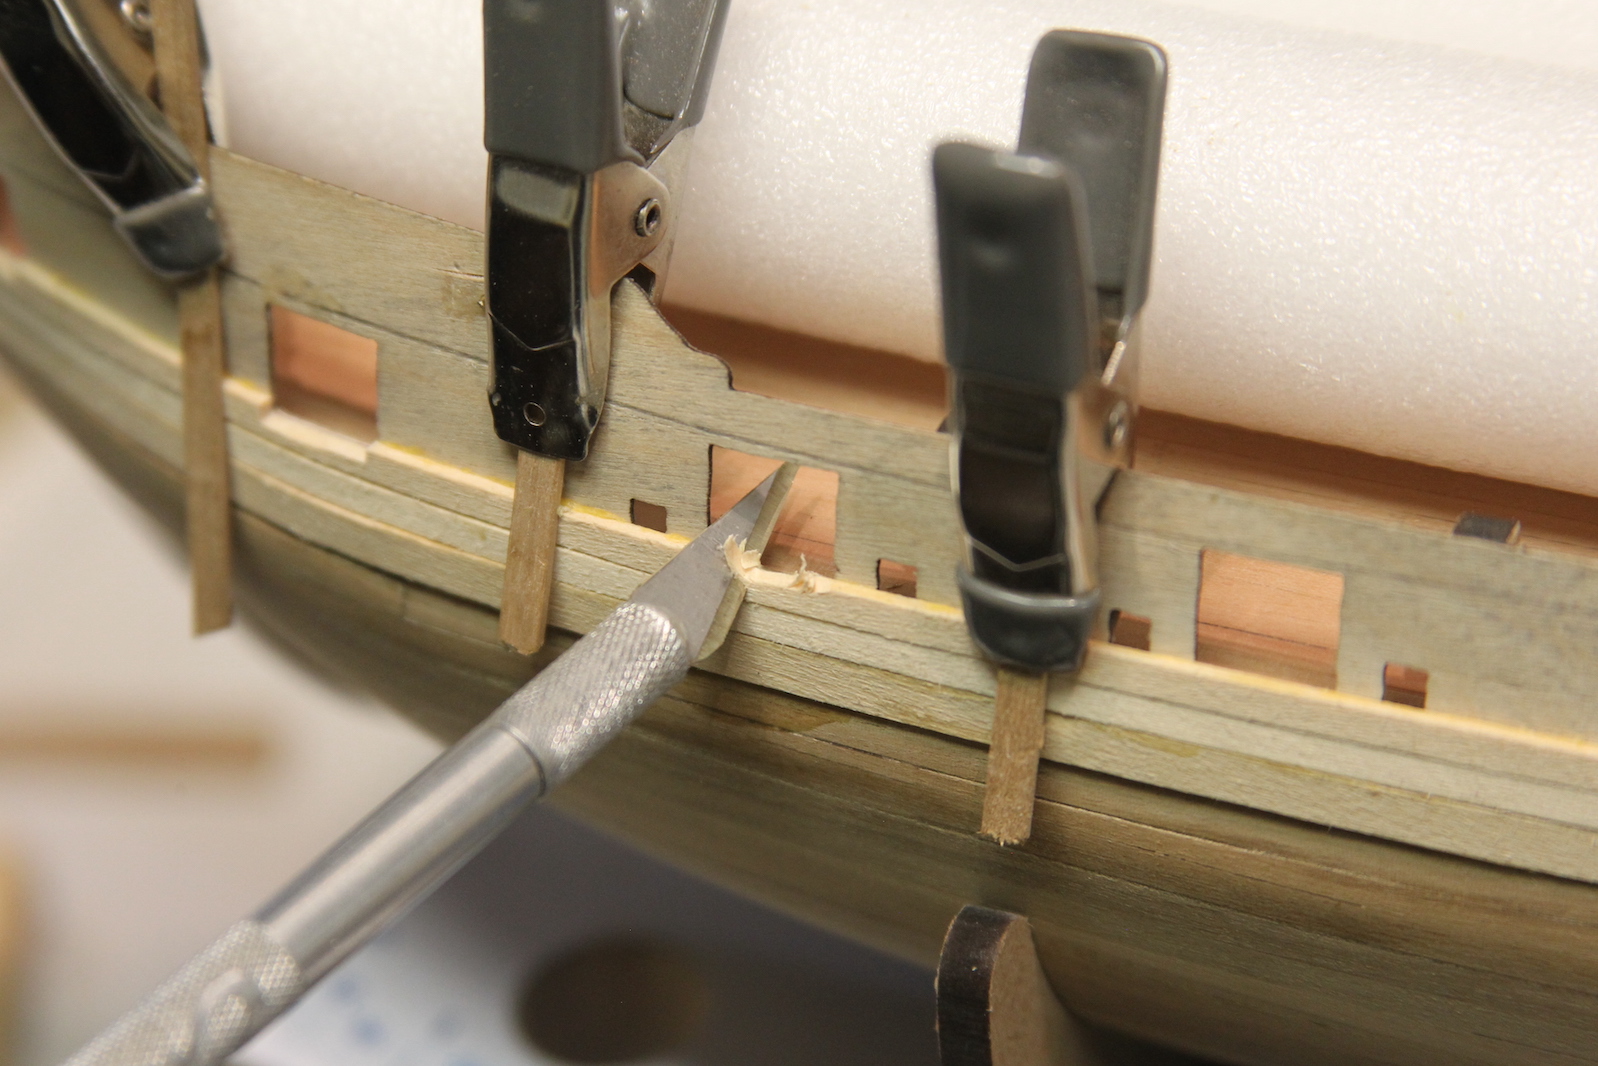
After getting the black strake sorted and mounted, I worked my way up mostly following the NMM Plans. Since I’m not cutting my own planking strips I couldn’t necessarily scale them exactly to the planking plans from the NMM, instead I adjusted the math to work with the sized planking strips that I was using – 5mm for the sheer strake and 3mm for the ‘tweeners’ along the gunports. After soaking and shaping, I laid one (sometimes two) strips all the way across before I carved out the gun and sweep ports. To me, this is easier than planking from port to port and ensures evenness across the whole thing.


The sheer strake (mentioned above) actually protrudes further out from the sides than the rest of the planks, but then blends in and becomes even at the bow of the ship. This is a tricky little endeavor to get right and make look natural. To get the sheer strake to protrude out then fall into and blend into the rest of the planking, I cut out a section near the bow, doubled up on it, then blended it in. Finally, I sanded the thickness way down so it didn’t jut out too far and look awkward.