
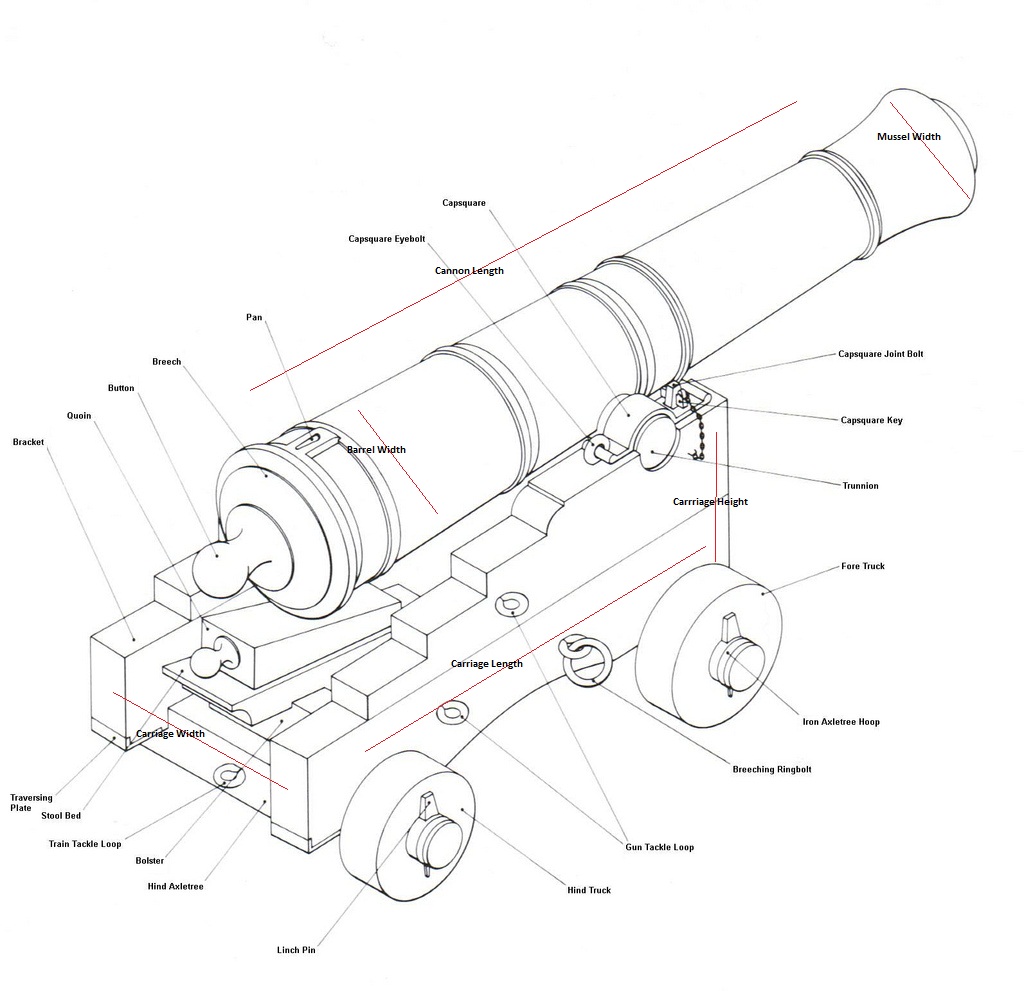
One of the most prominent features of almost any Age of Sail vessel is the armament. The guns and carriages always immediately draw the eye and so it’s pretty important to get the right amount of detail and accuracy. Here’s an illustration courtesy of castyouranchor.com
Once again (sounding like a broken record), the fittings that come with the kit are quite fine, and are both detailed and accurate. However, I wanted to go the extra mile with this vessel, and ordered guns and carriages from one of my favorite suppliers – the Syren Ship Company run by master ship builder Chuck Passaro. Along with the guns, I ordered the period correct emblems as well.
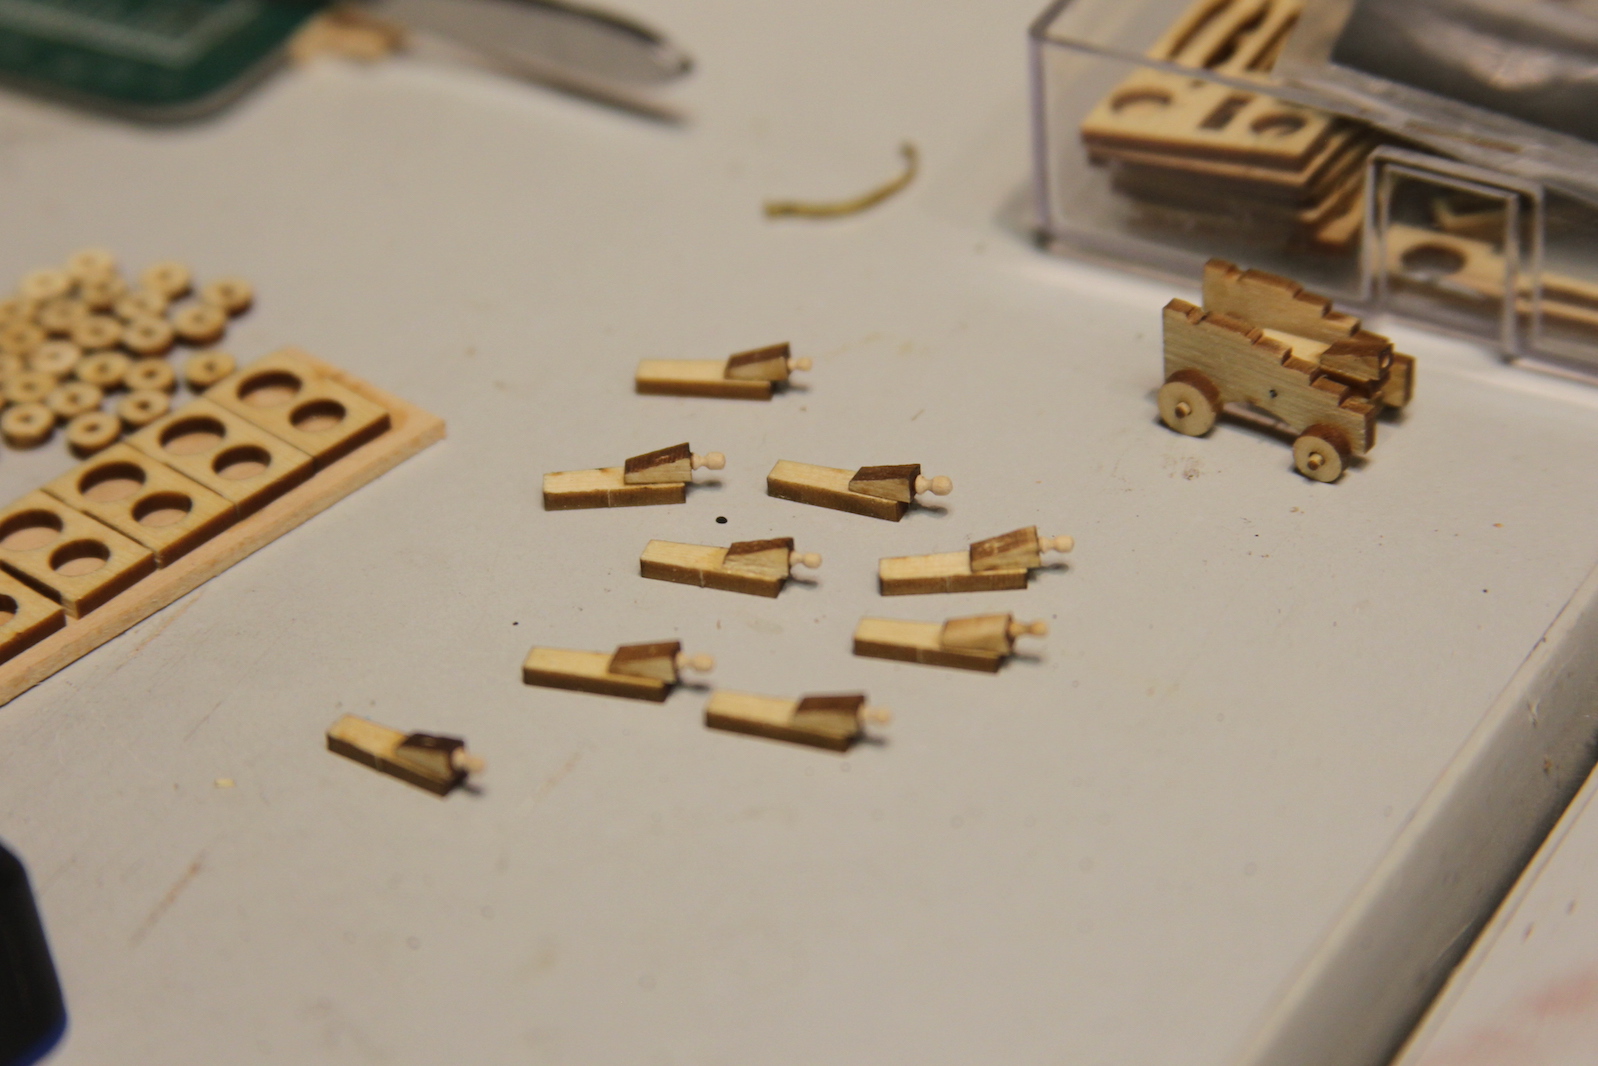
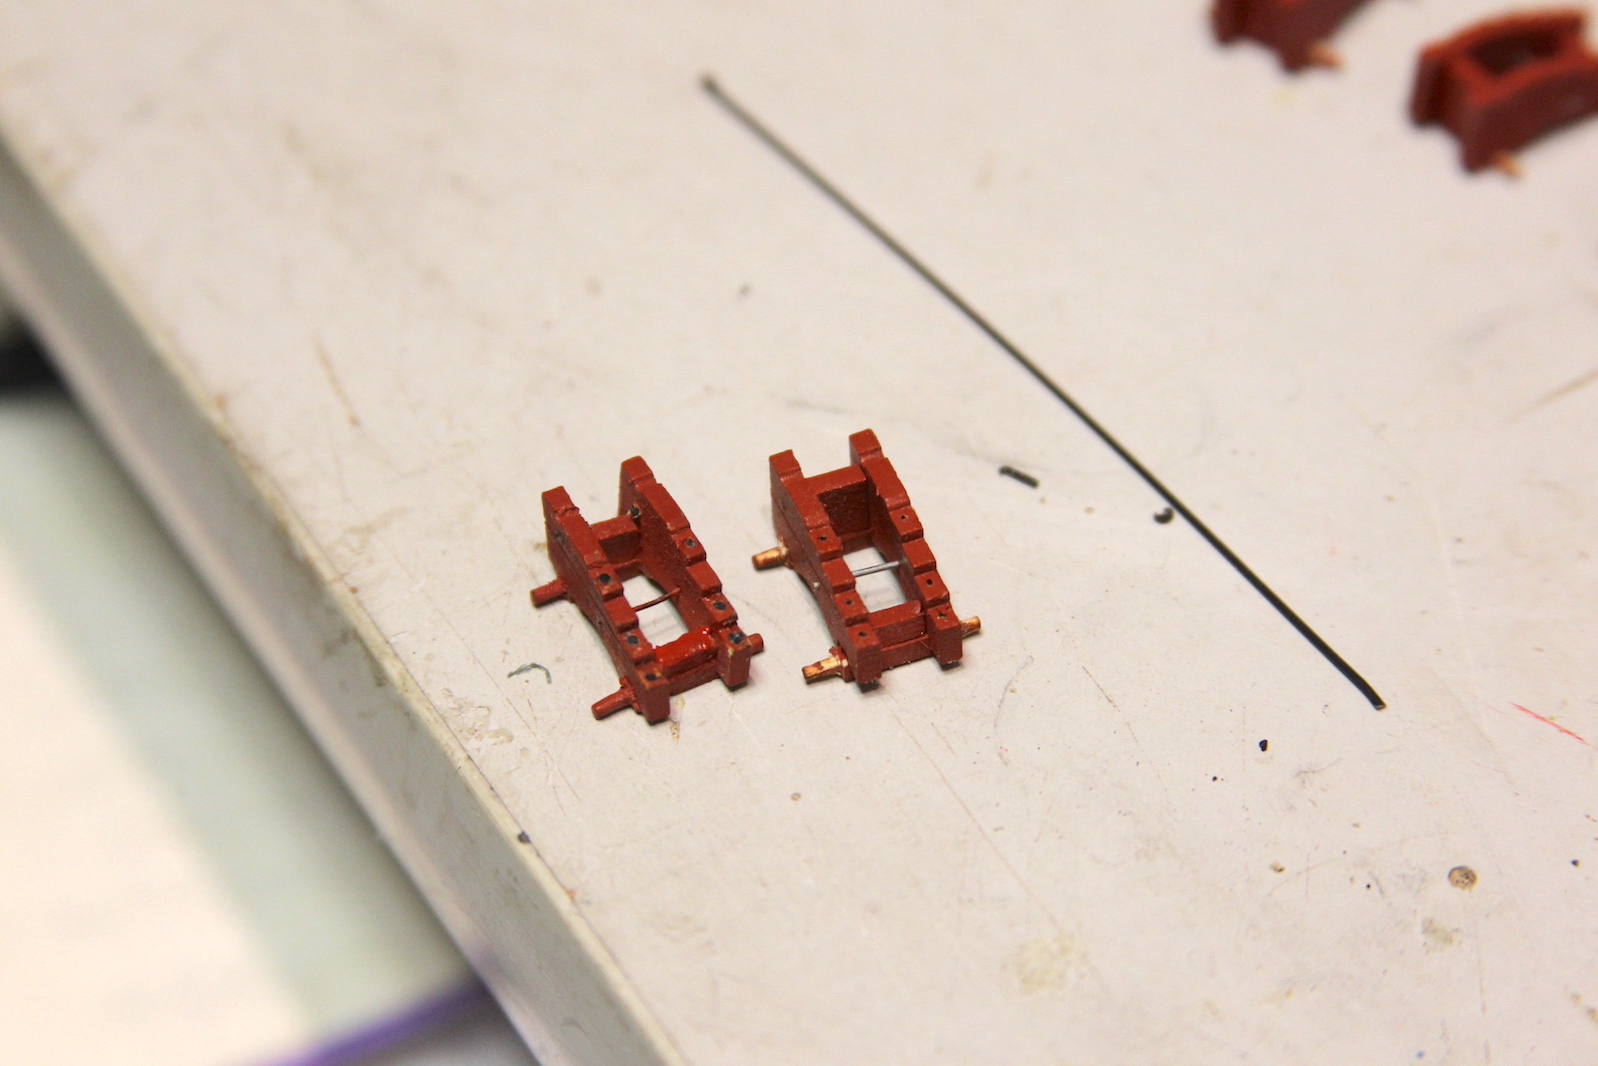
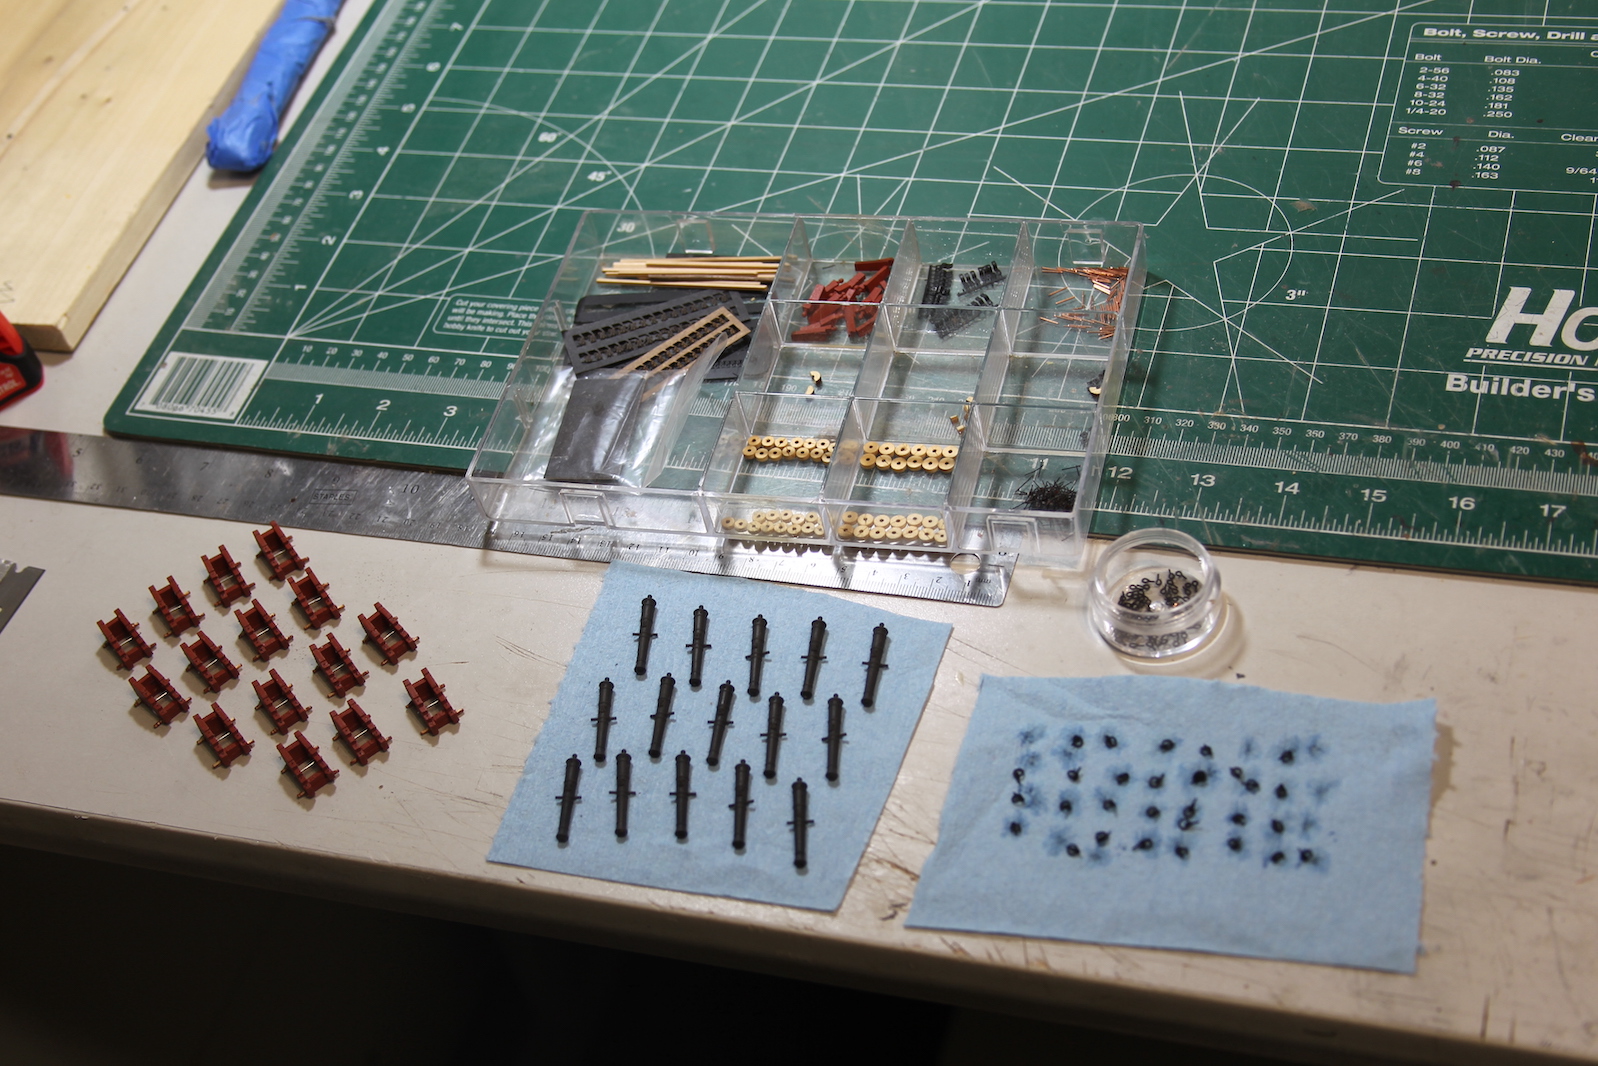
The pegasus features 14 six-pounders on the main deck, which begs for an assembly-line style of production when fixing/weathering the guns and putting together the carriages. I created an assembly jig out of leftover scraps for the actual carriage builds. A jig is essentially a piece of equipment that allows you to align and build something the same each time. I also used the boxwood pieces from which the carriages came as a jig that allows me to score the sides of the carriages and the wheels – as in reality they were multiple pieces framed together and not one-piece sides.
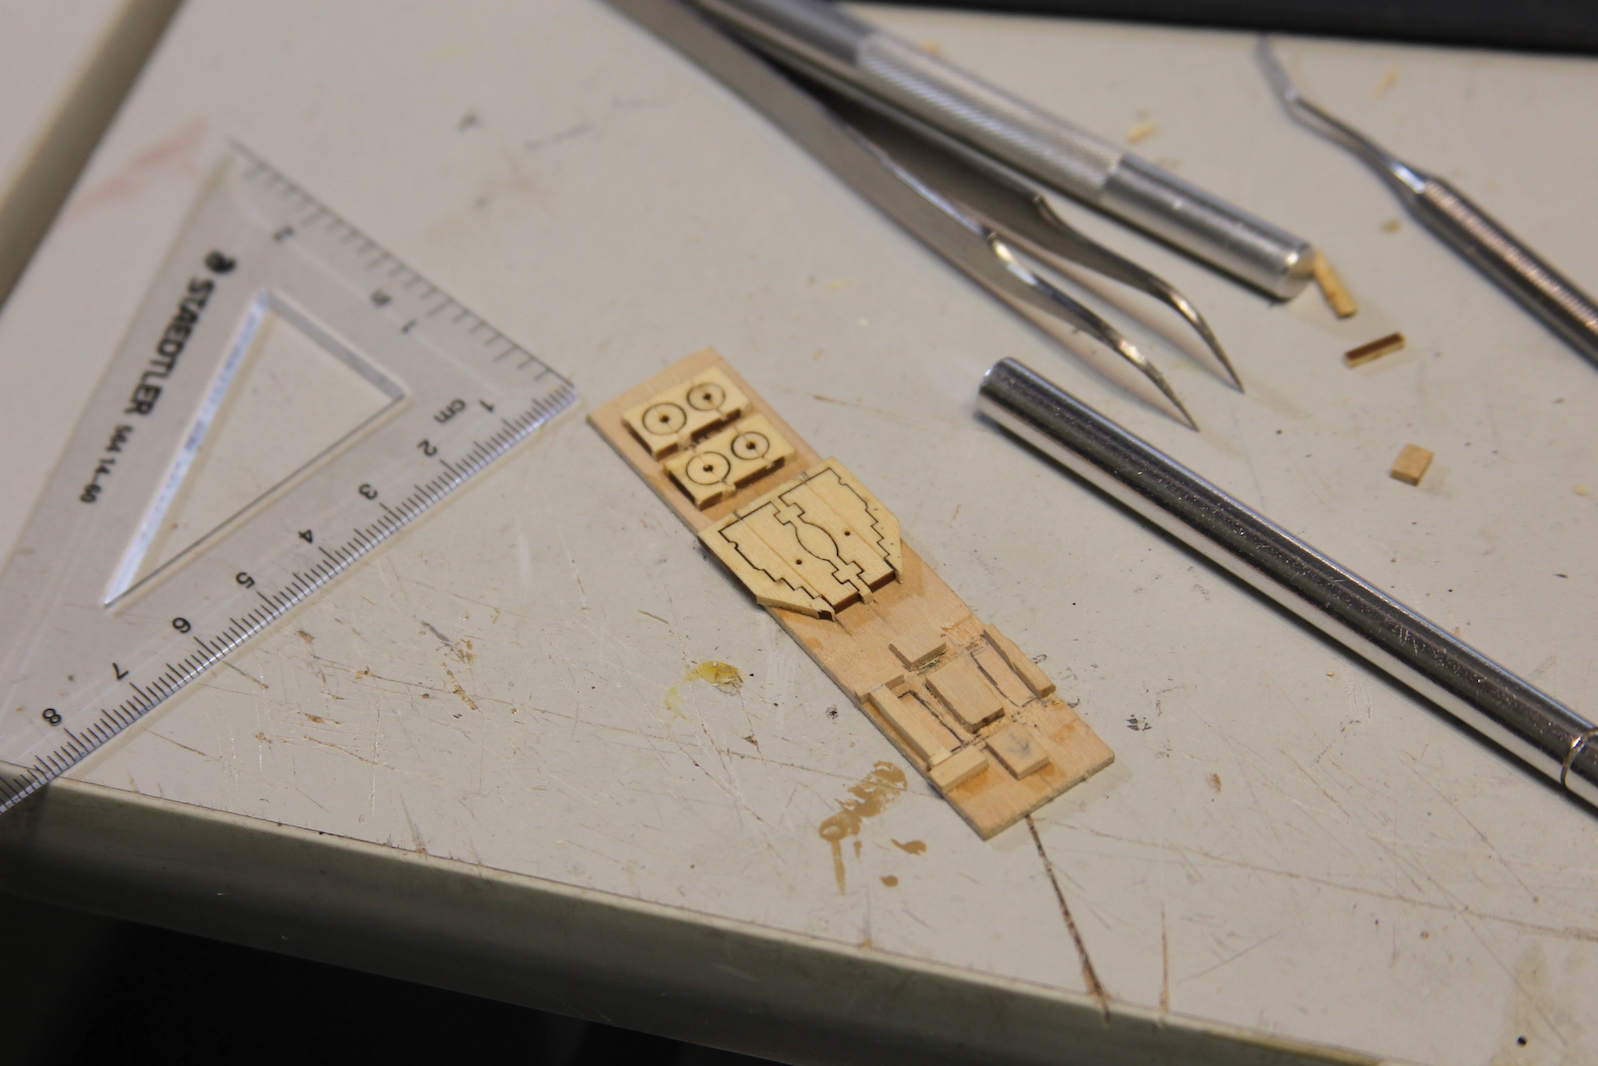
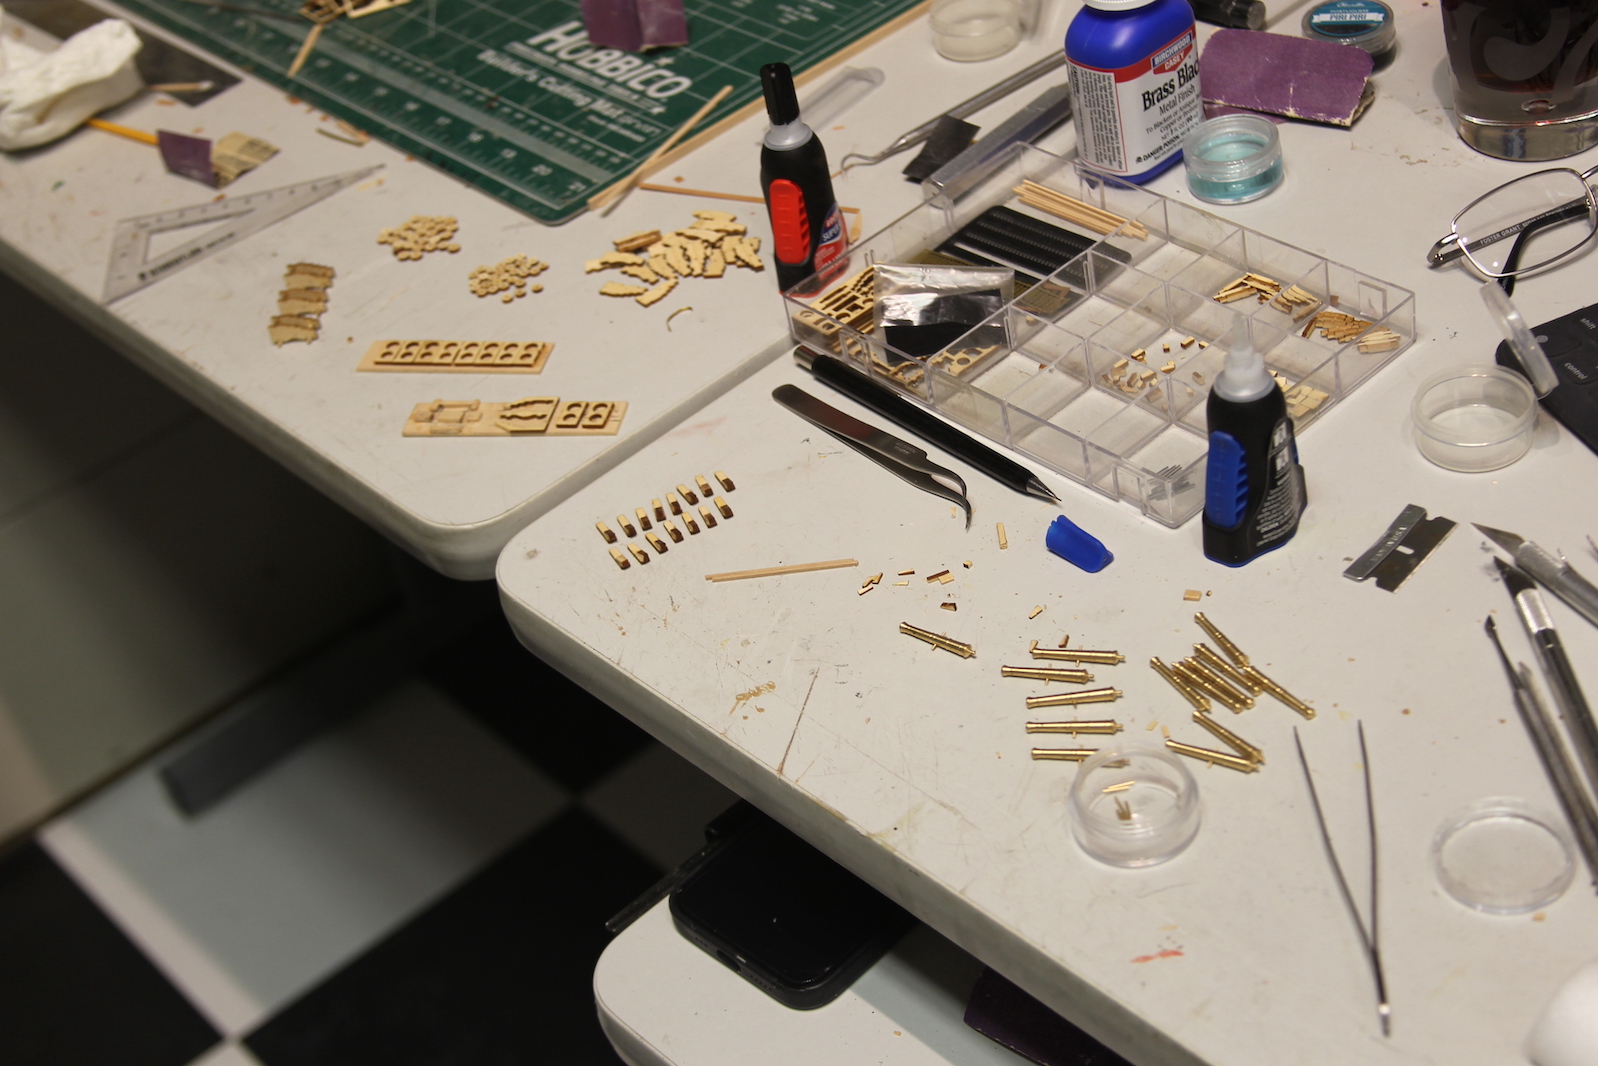
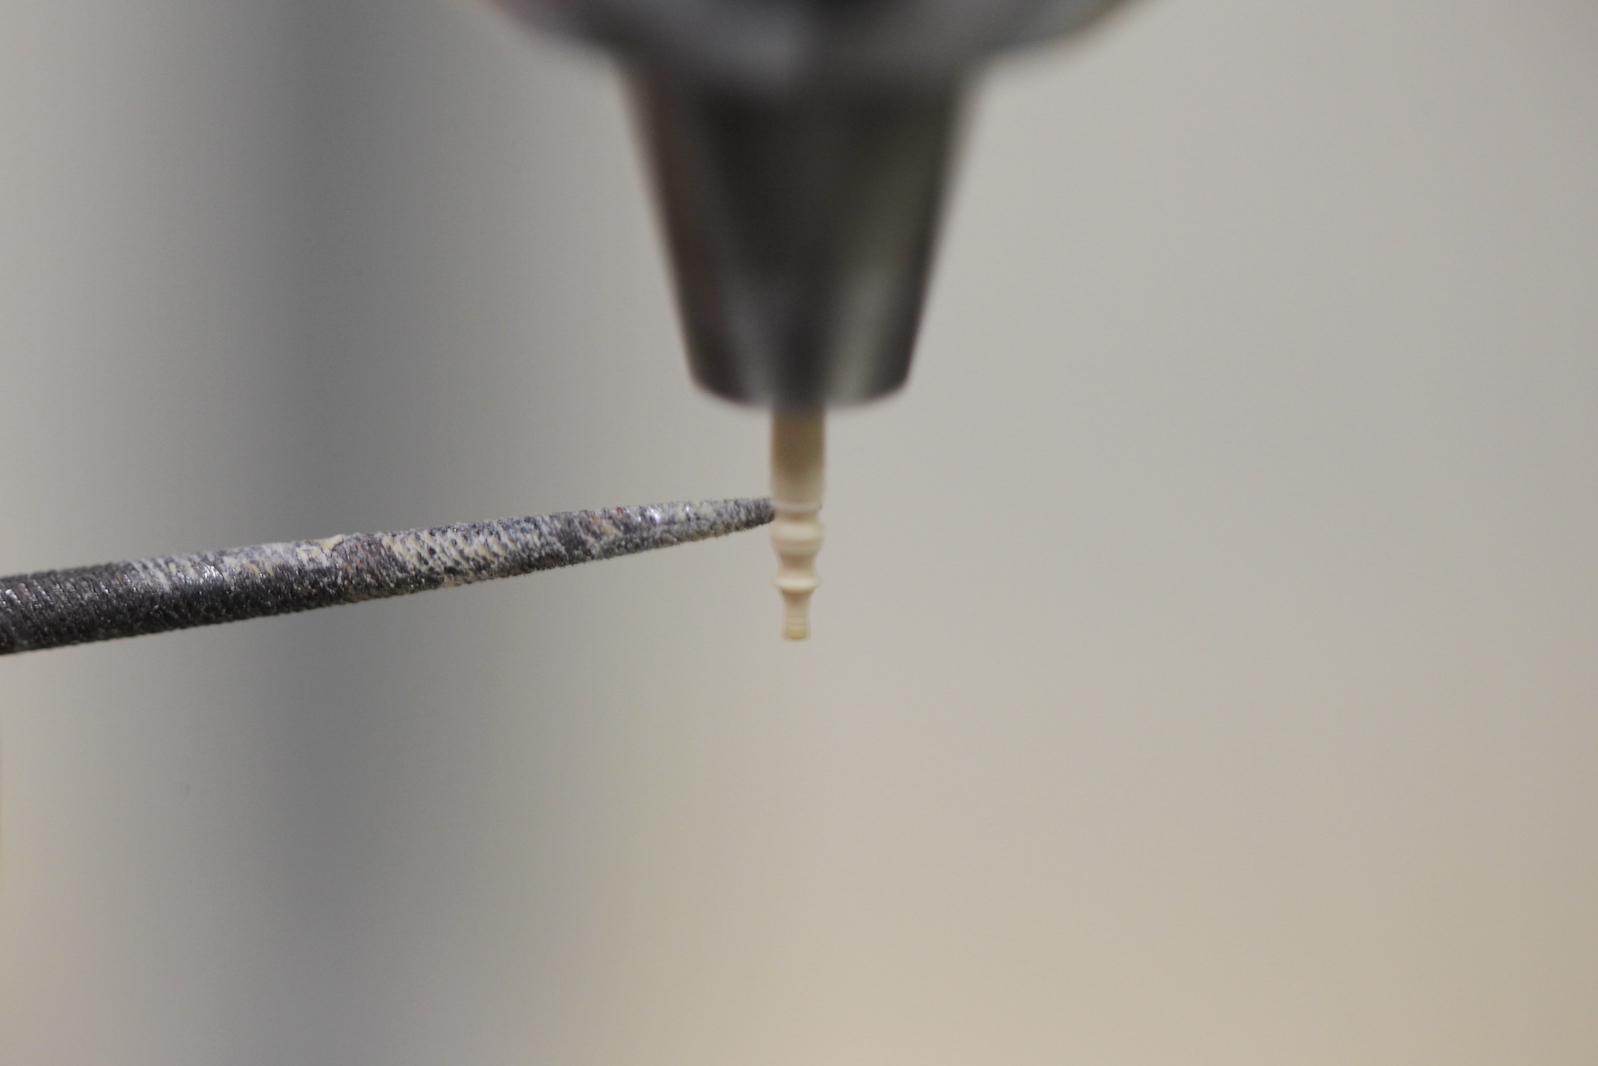
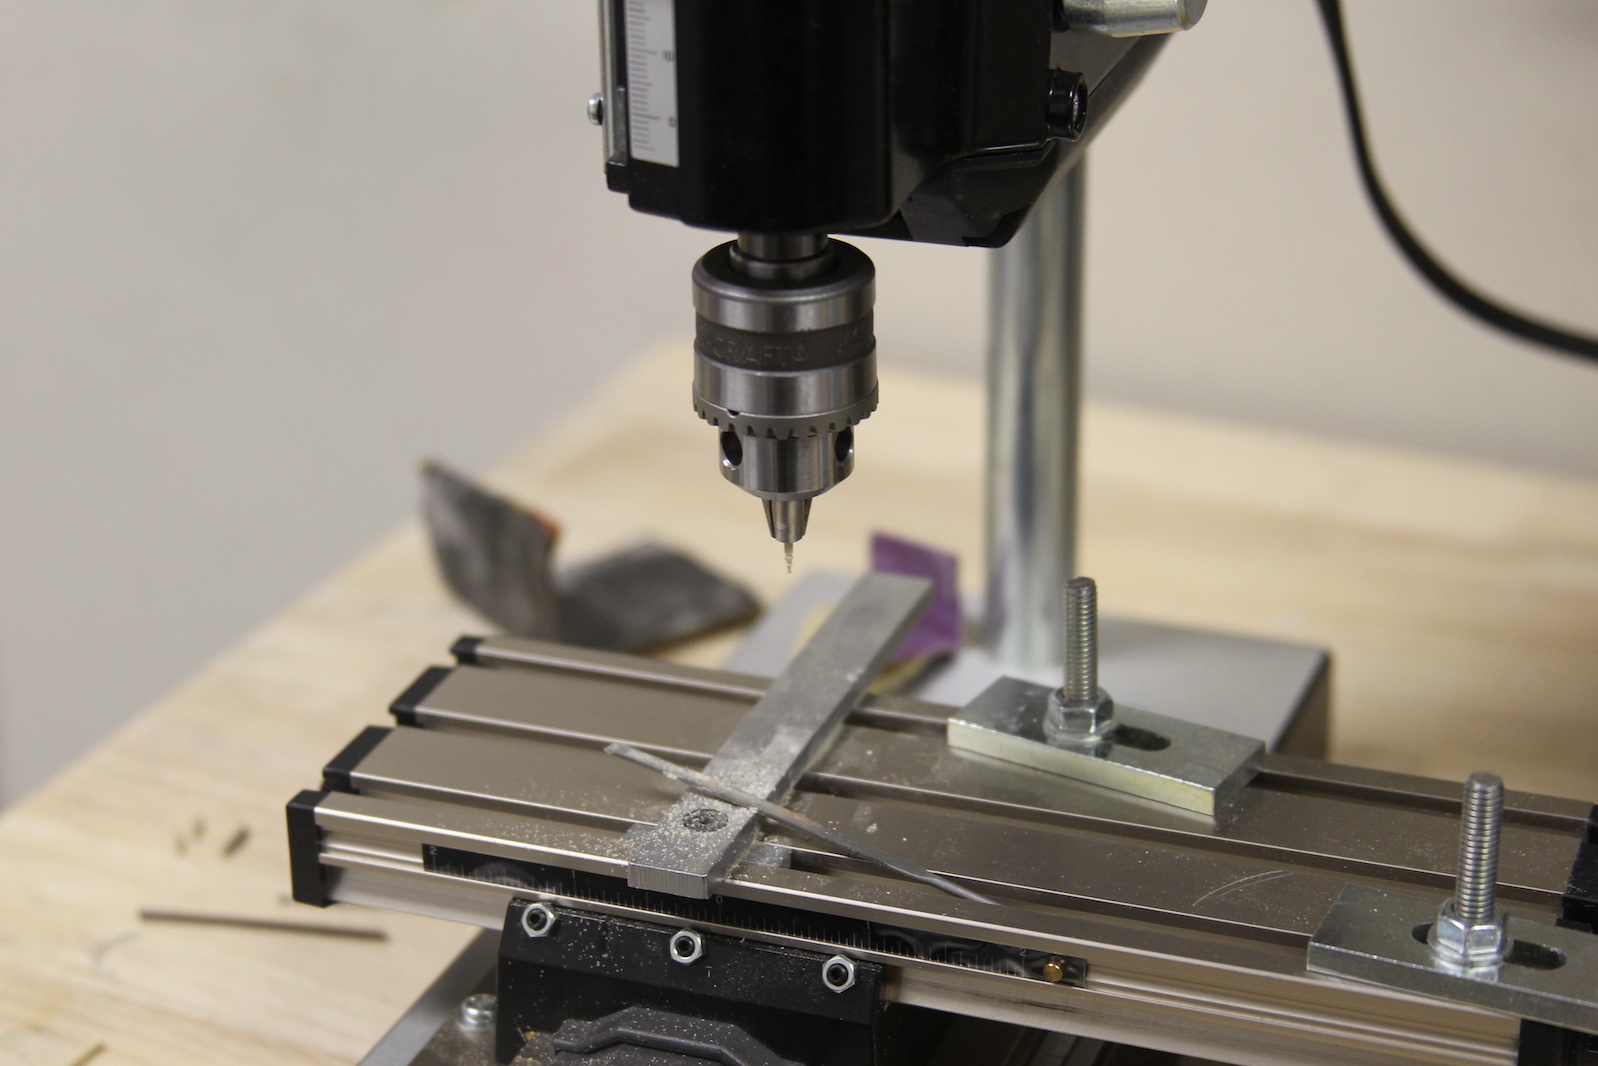
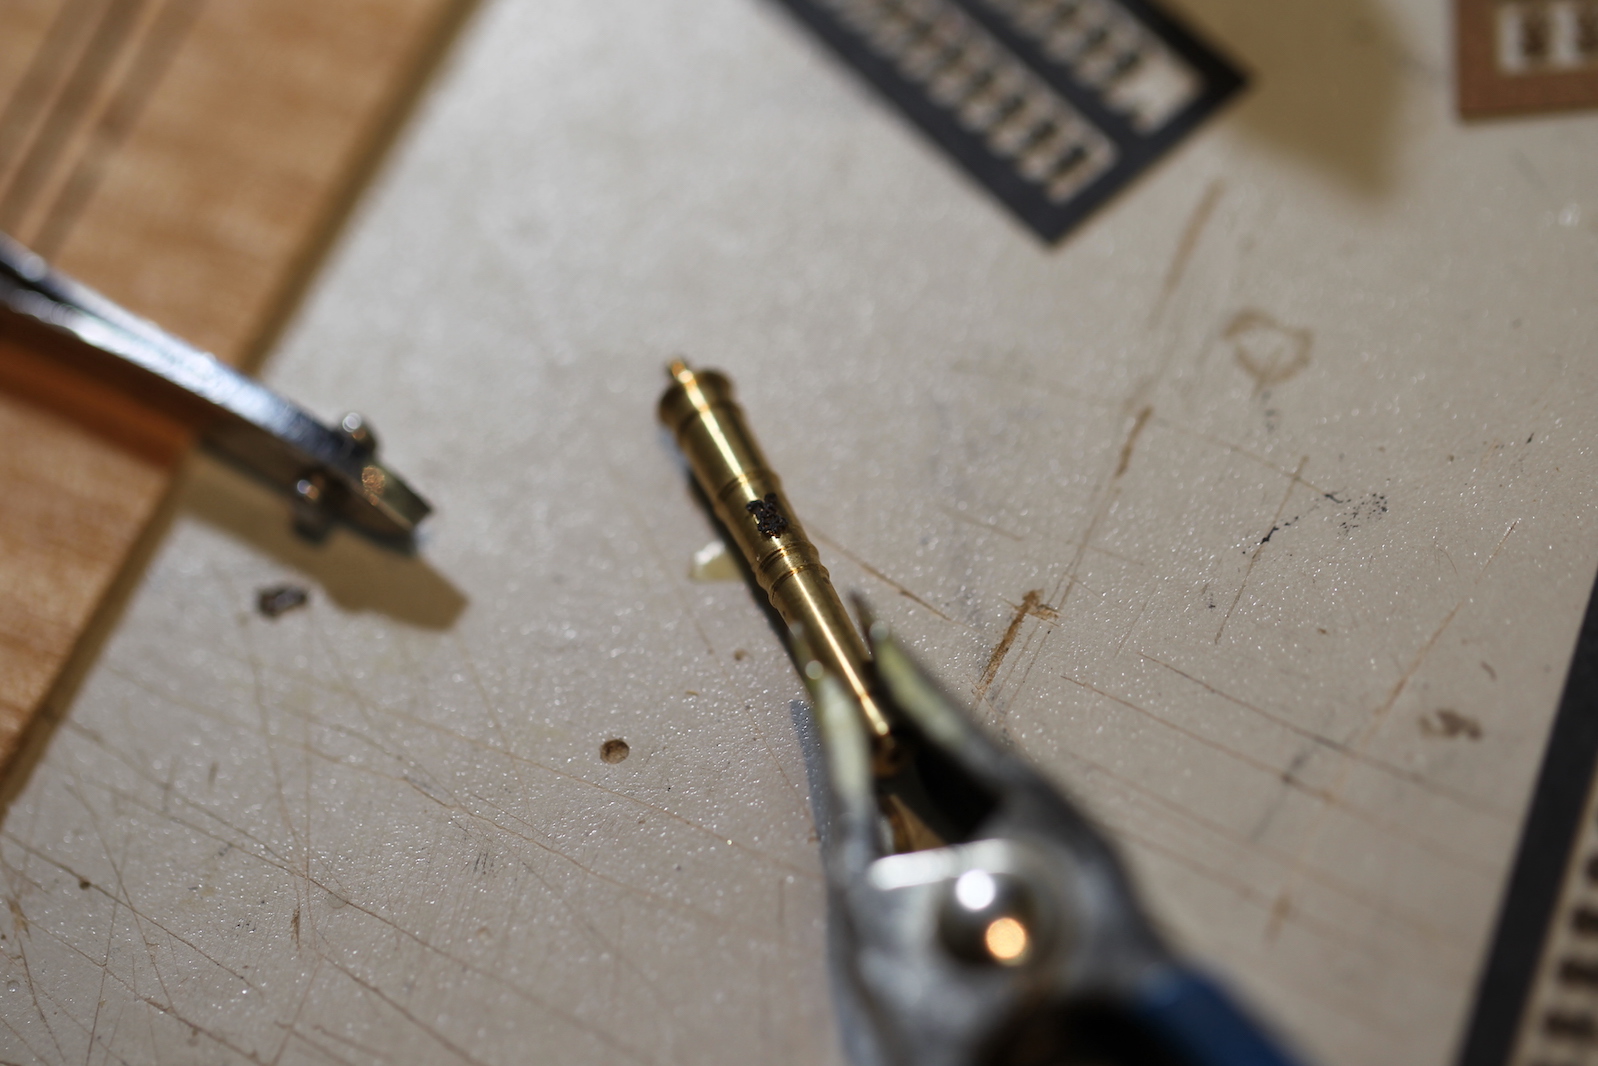
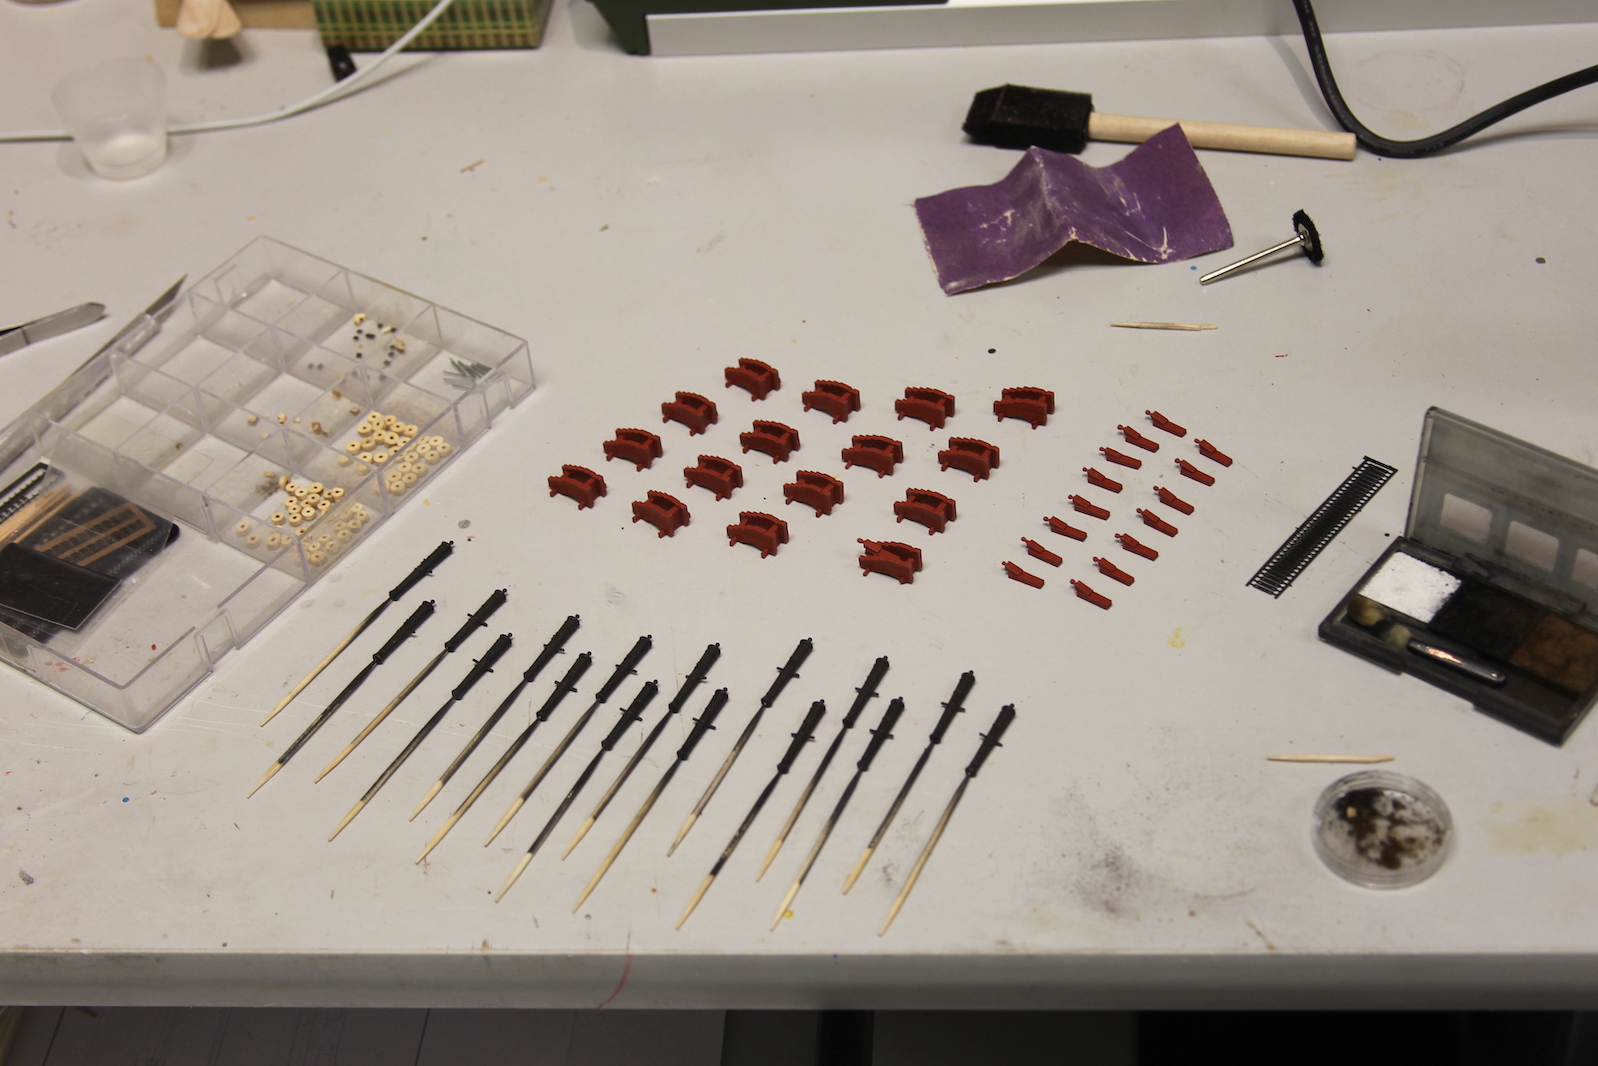
As you can see from the above picture, the cannons are turned brass – so require quite a bit of work to get them to look authentic. But first – we’ll talk about the carriages: I assembled most of the parts individually but did not glue all of them together. First, I wanted to figure out how to create the “quoin” (see illustration above) that adjusts the height of the cannon. I cut some extra boxwood down into strips – boxwood is important again here because of it’s density which allows you to carve or sand very small pieces without it falling apart in your hands. I fed about 3 or four inches up into the drill press, exposed a quarter inch at a time, lathed out a quoin and cut it off, then pulled the boxwood down another quarter inch and repeated the process. The fourth picture is my process for sanding down the char (the leftover burn marks that occur when pieces are laser cut) off the wheels. I have a devil of a time keep them round when I do it by hand, so I inserted a bamboo toothpick into my chalk and put the wheel on. I then VERY gently hold my fingernail against the wheel to get it to spin (rather than push it hard onto the tooth pick) and then barely brush it up against the edge 200 grit sandpaper that’s hanging over the table. Couple of important notes: the Dremel is on is lowest speed, and it’s important not to do it against a hard surface, but rather let it brush against a flap of sandpaper.

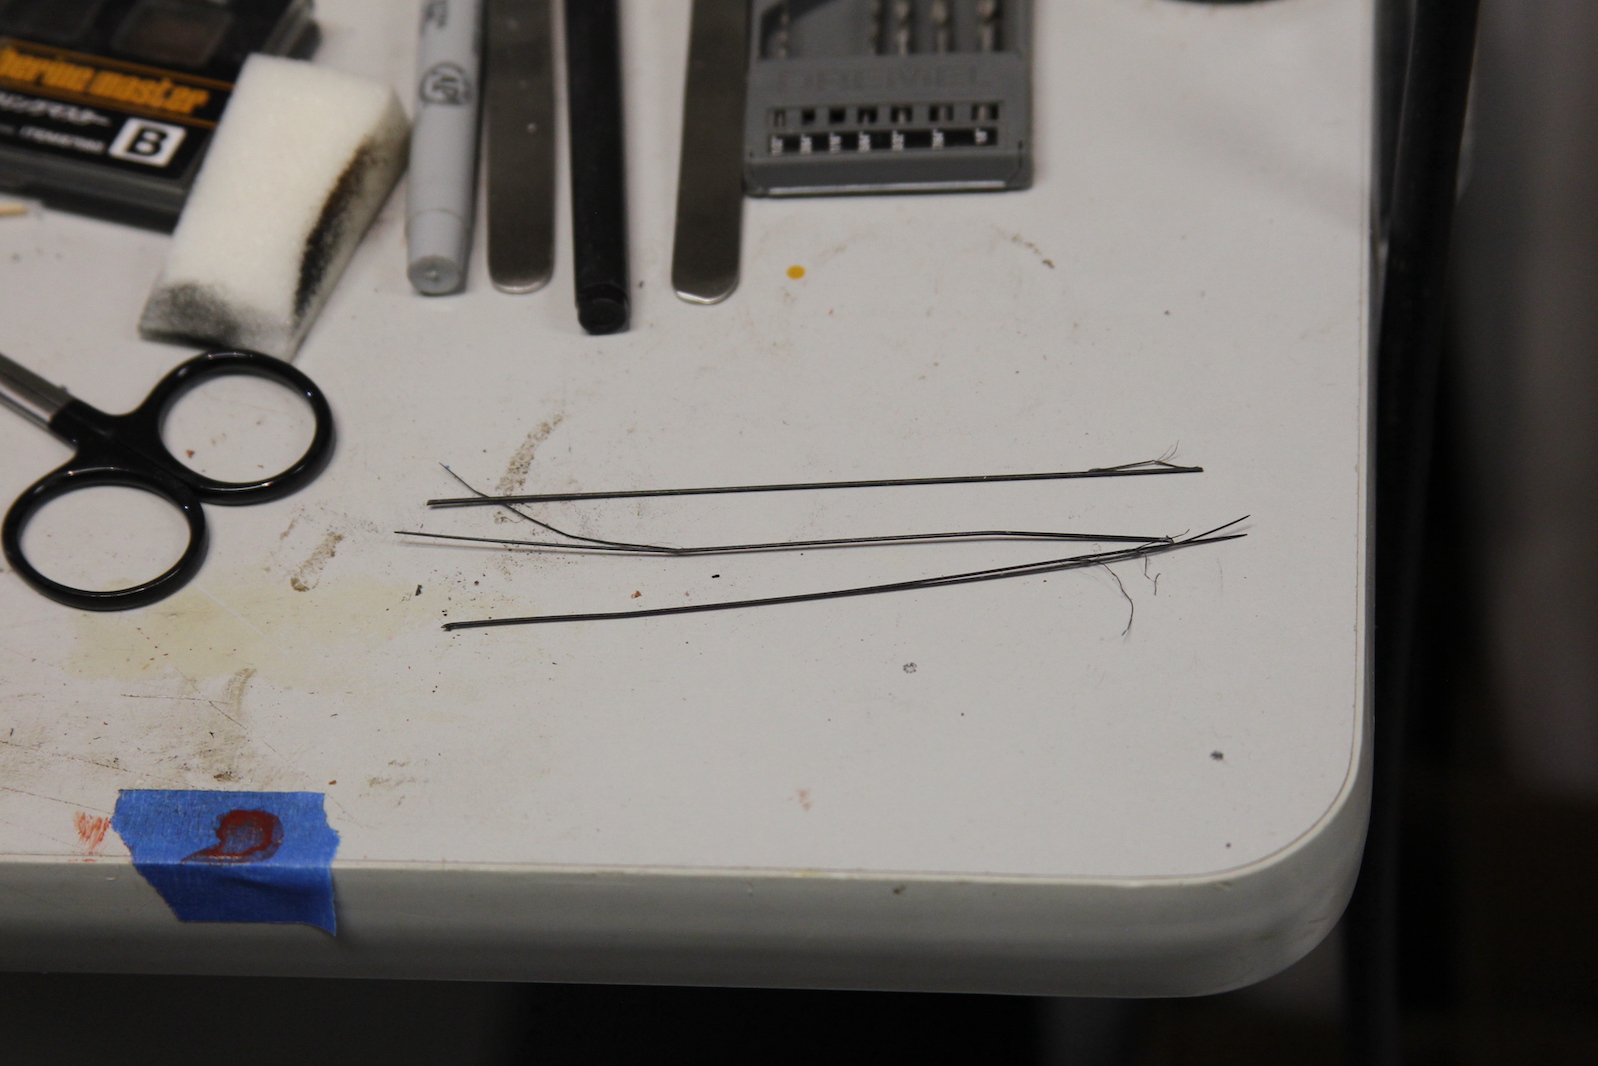
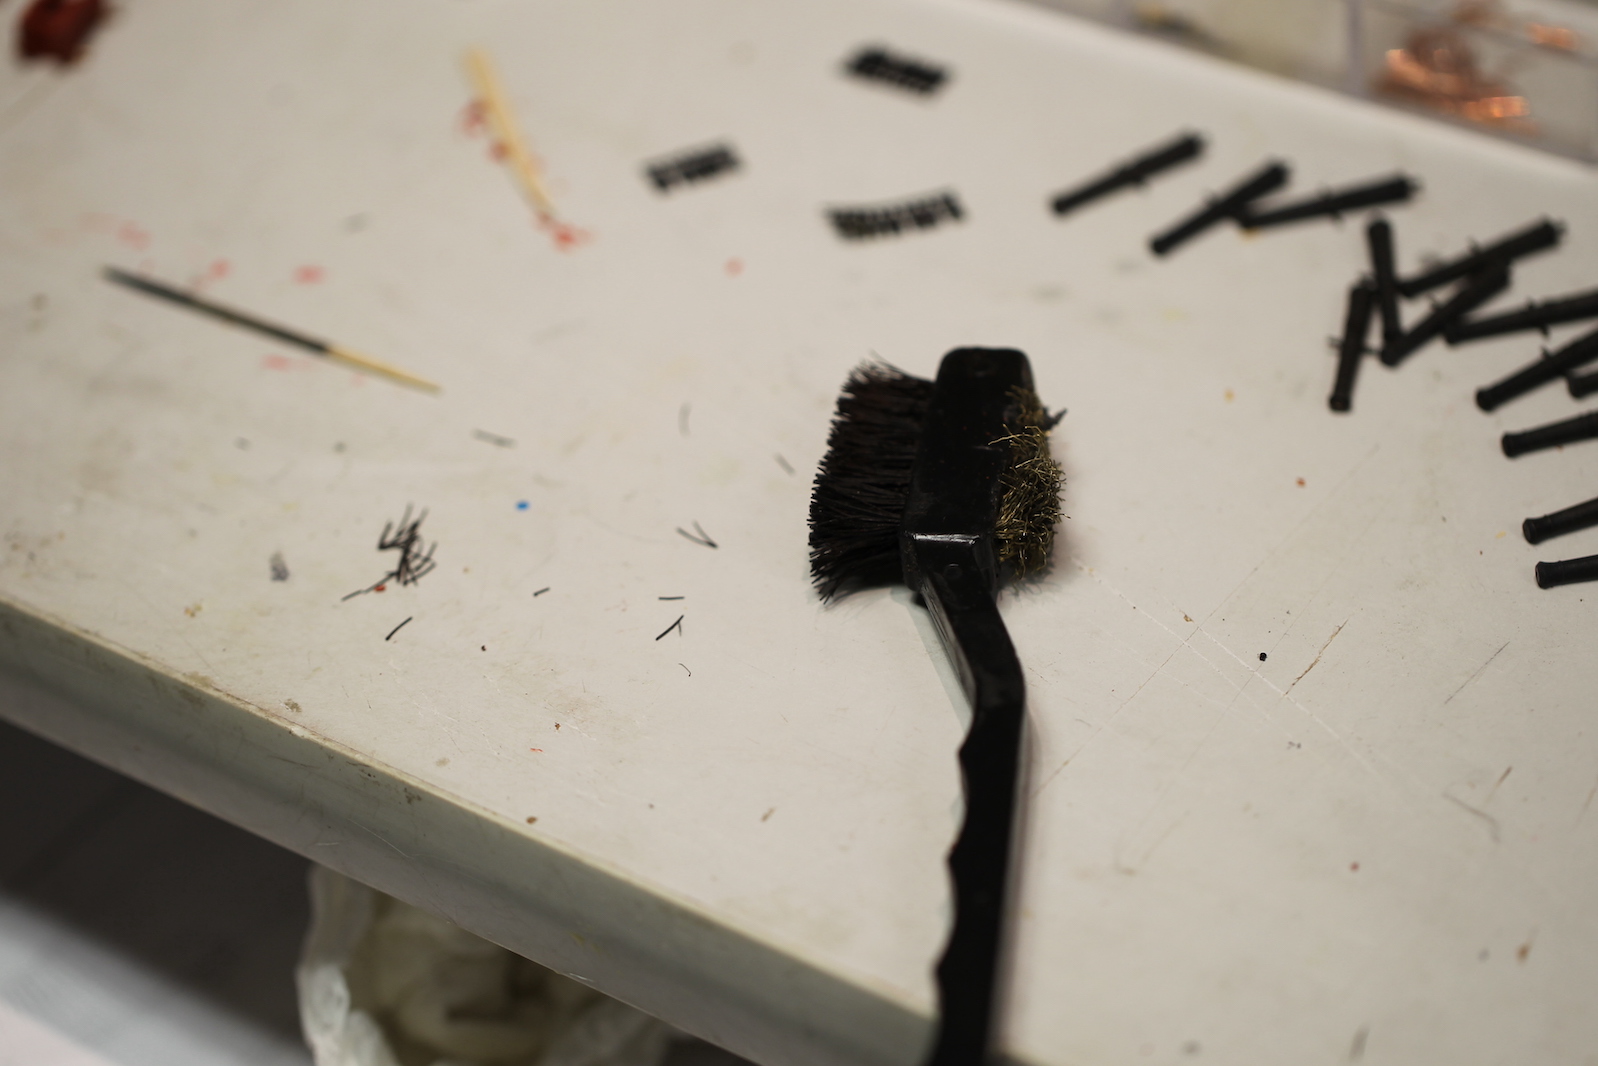
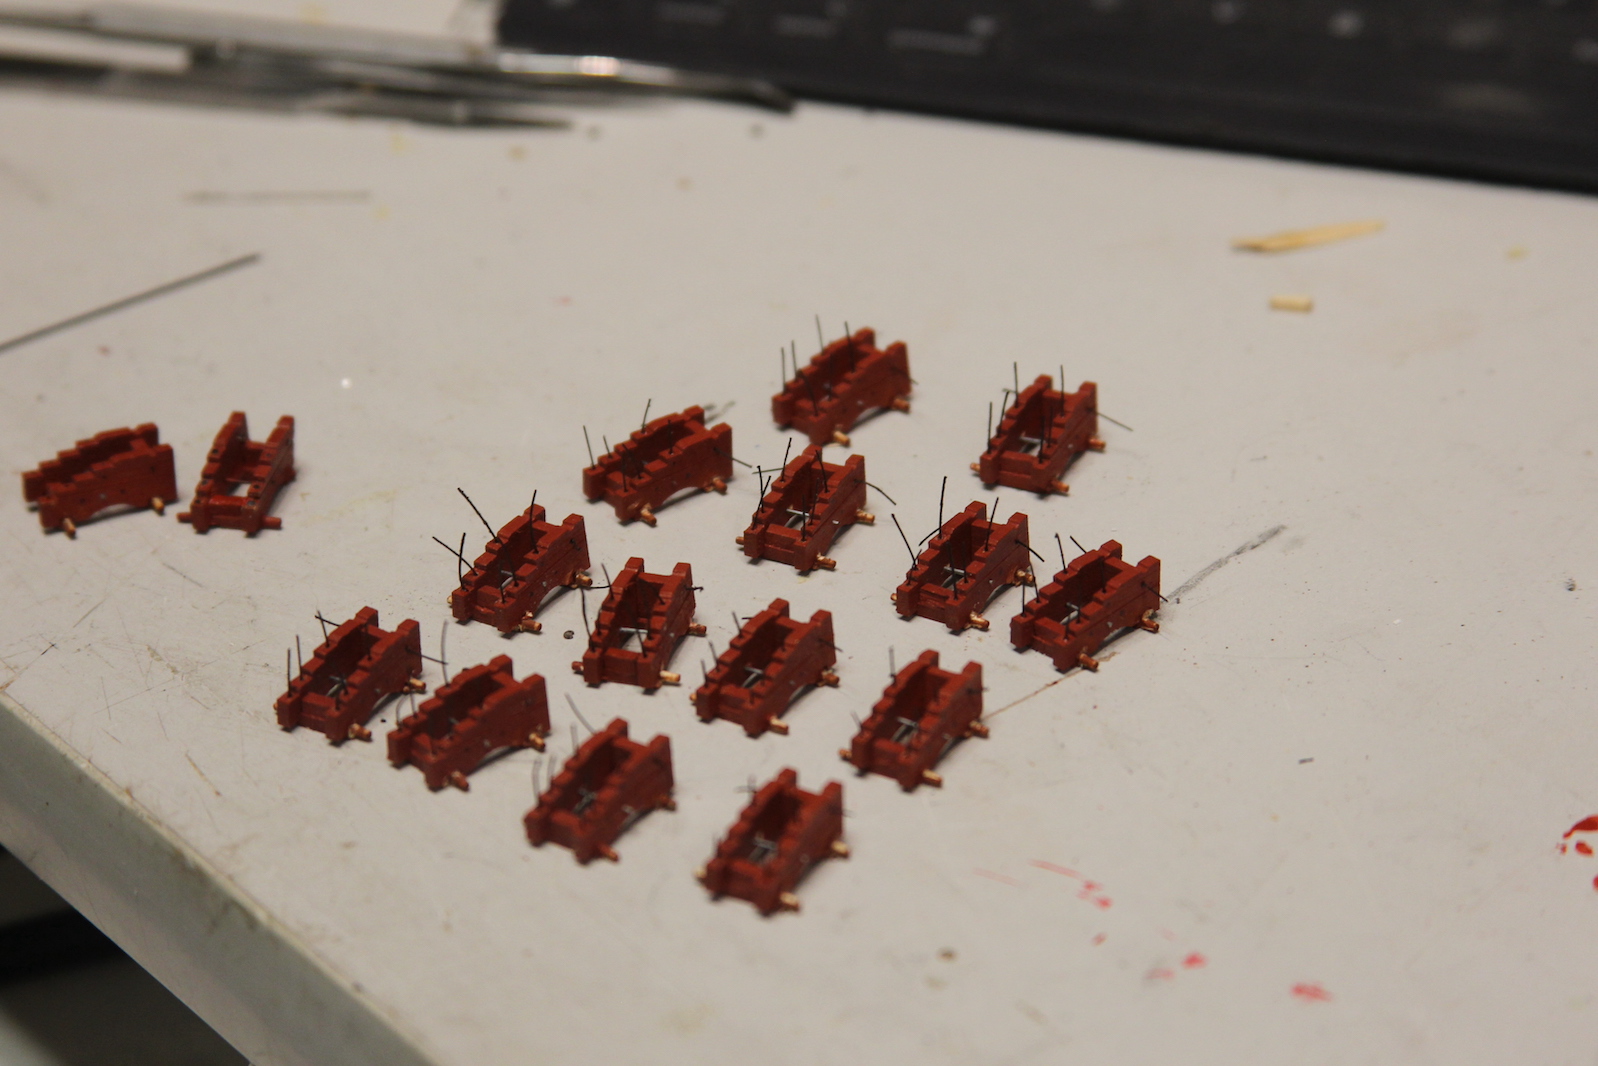
After the main parts of the carriage are assembled, they’re painted with Red Ochre using an airbrush to get as even a coat as possible while still being able to see the defined areas. The carriages are held together with bolts – so it took a little bit of noodling to figure out how to simulate those bolts – pins, wire, or nails would just be too big and difficult to blacken. So I settled on hard monofilament from a brush. My first attempt was pulling strips from an old broom in the garage, but I felt they ended up being too big and appeared out of scale. Second attempt is from an old golf club brush. Here are the two attempts side by side, then the carriages with the bush bristles glued in making them look “hairy”.
After that – it’s time to get the guns ready for mounting. The guns start out as shiny turned brass, so need to be weathered to look authentic. Step one is gluing the tiny (and quite fiddly) little emblems to the guns and drilling out a hole in the pan for lighting the cannon. I chemically blackened the brass and then sanded off much of the soot – returning them to brass, but leaving some of the blackening in the crevices and lines. This is an extra step that I liked during my experimentation phase as it ends up giving a little extra texture/variance to the end look that appeals to me. I then airbrushed all the guns with a mixture of Vallejo’s brand of black and grey black thinned down with a black wash. This gives a nice color and the thinness allows the emblems and details to stand out really nicely without getting pounded down with paint. This first shot is pre-weathering.
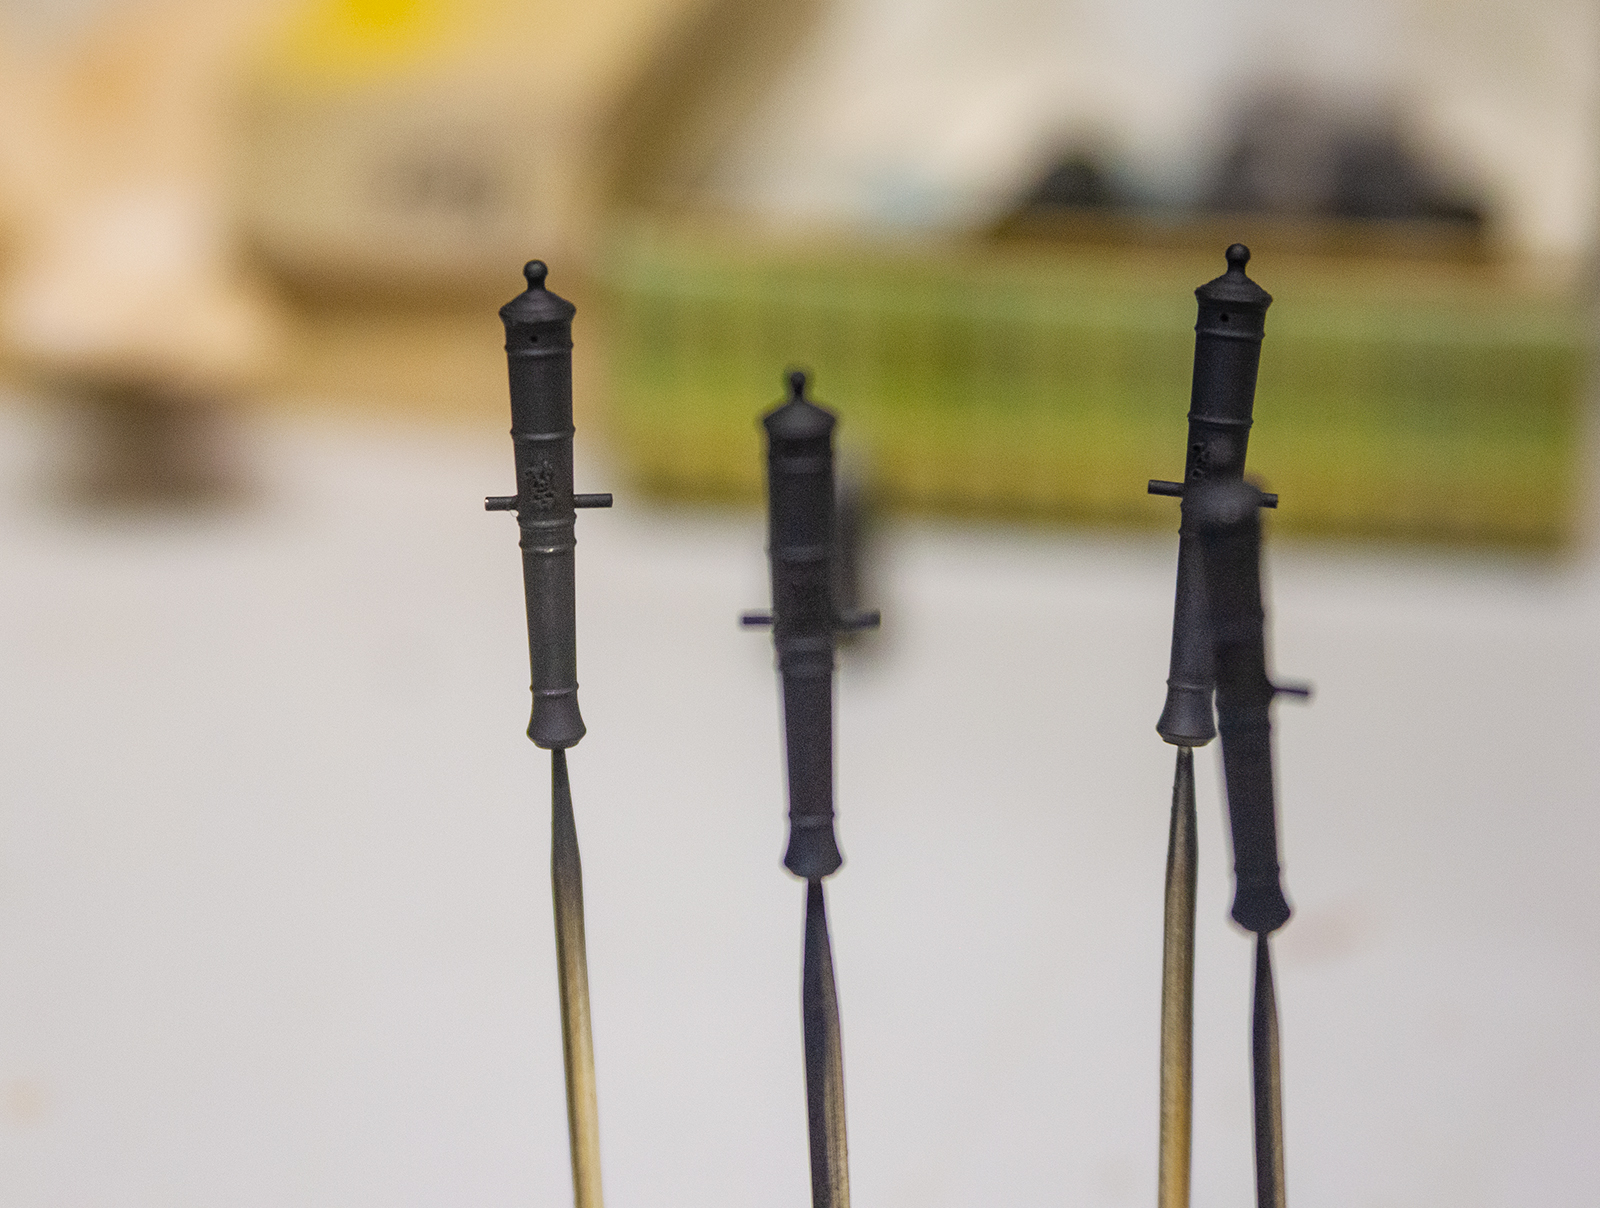
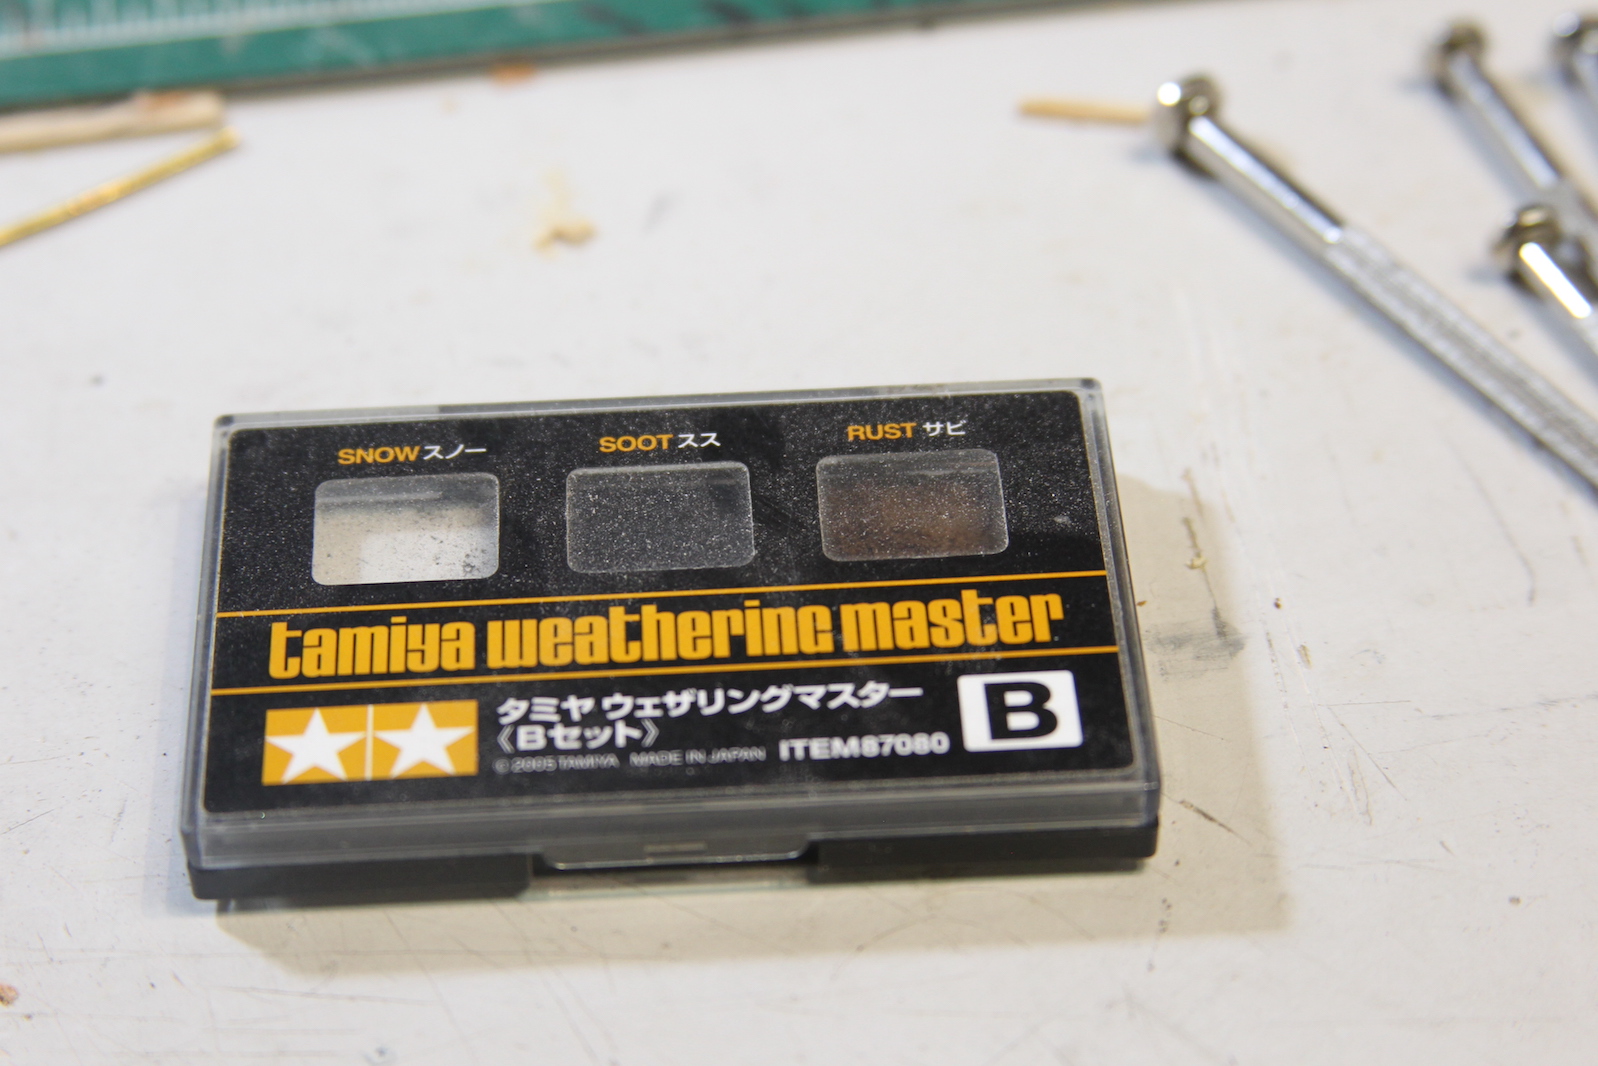
Finally, Tamiya is my preferred weathering product and I gave each gun a light brush of “soot” to dull the paint, then “rust” to bring out the edges. My goal is to give the guns some character but not make it look as though the crew has neglected their duty in maintaining the equipment.

After the guns are prepared, it’s back to the assembly line to put it all together.
Wheels and quoins are mounted onto each carriage followed by a series of eye bolts that will facilitate the rigging later. The eyebolts are chemically blackened then touched up with paint. The middle eye bolts have rings attached which will hold the breaching rigging. The guns themselves are then mounted and bolted down using the same “bristles” from the brush to serve as bolts.
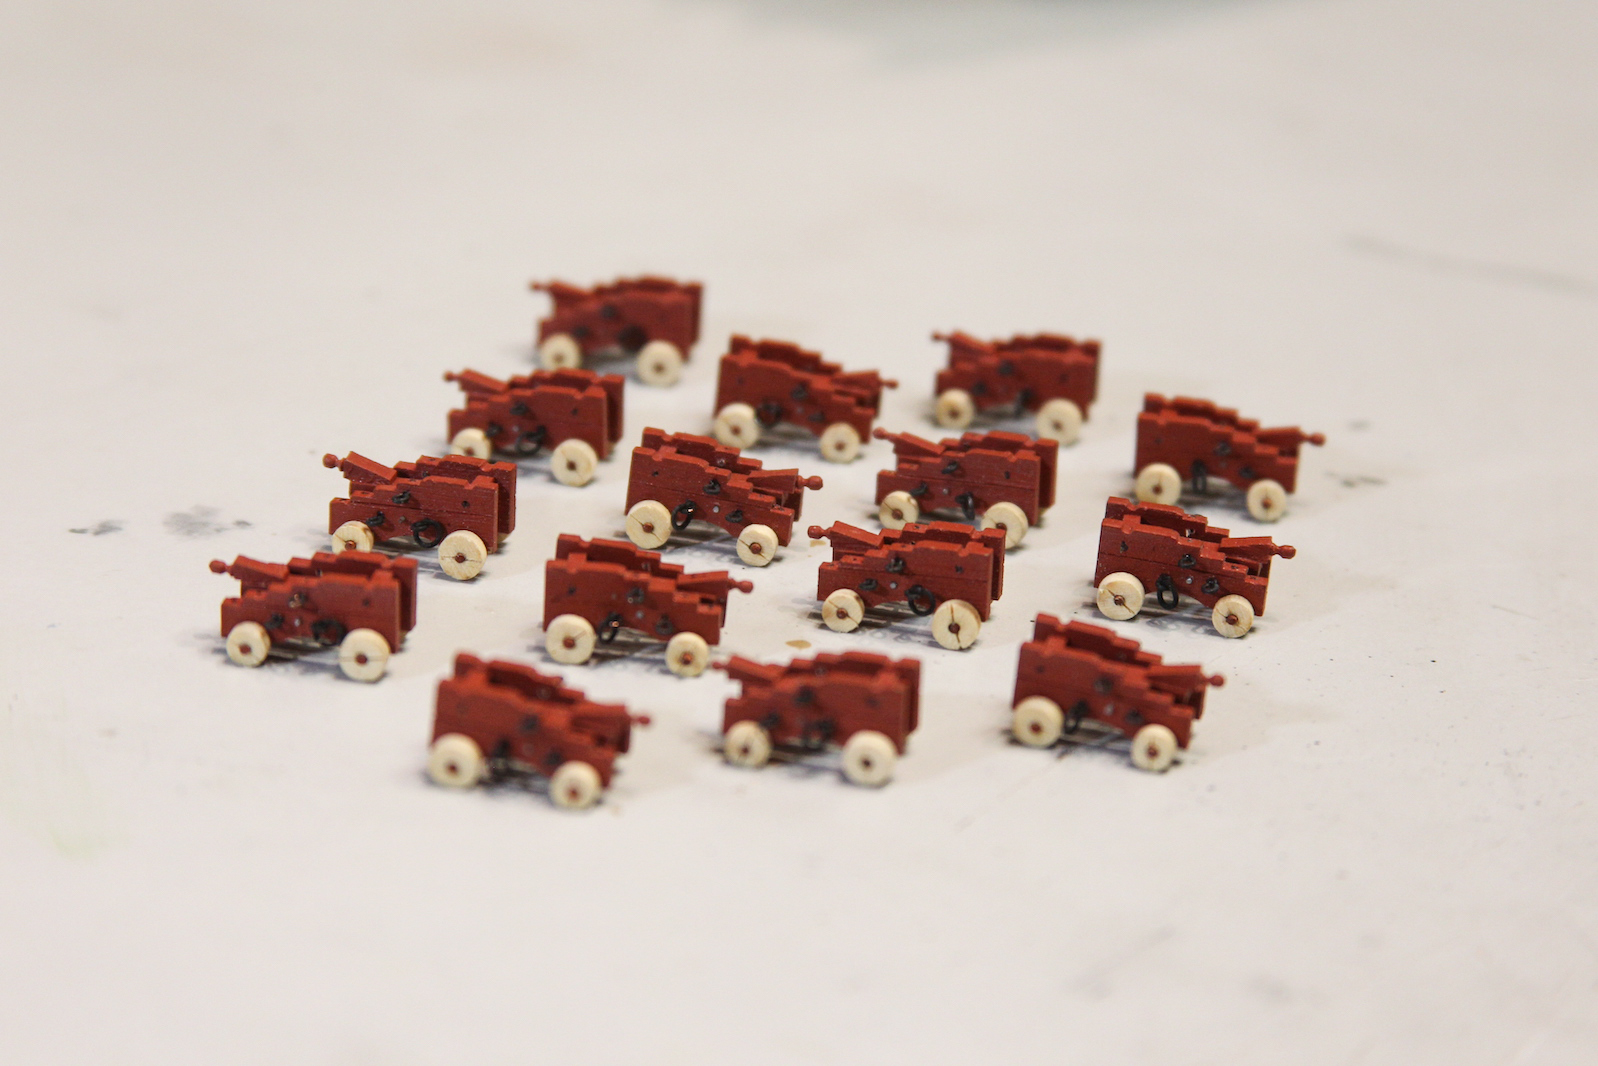

Here’s a close up shot of the final gun/carriage combination nice and weathered. The guns are all set aside until I can get some rigging put together, then they’ll all be mounted to the main deck later along with the other main deck fittings.


Working on rattlesnake. Do not like cannons assemblies ( lazercut wood, no real instructions) any suggestions for good cannons scale 1/16th ?
LikeLike
Hi there! Thanks for the comment. There are a few places out there to pick them up – ModelExpo has some difference sizes. But my favorite place is Syren Ship Company run by Chuck Passaro: https://syrenshipmodelcompany.com/turned-brass-cannon.php Chuck also has some new resin cannons in different sizes that I have not used, but are getting great reviews.
LikeLike