
One of the most interesting (to me) aspects about ships in this time frame is that it marked the beginning of sheathing the hull in copper. Pioneered by the Royal Navy in the 18th century, coppering the hull was an effective way of protecting the wood from the corrosive effects of salt water. The British were not the first to do this however – as the plating of hulls has been linked back as far as the ancient Greeks who used lead instead of copper.
Nonetheless, I’ve never coppered a hull on a build before and it felt a daunting task. First steps are to measure an accurate and straight waterline. To do this, one needs to make sure the deck of the ship is properly parallel to the horizon both port to starboard and forward to aft – this is how the ship would sit in the water with a balanced ballast (weight in the bottom of the hull). To do this, I set up a couple of different kinds of levels, then manufactured a waterline marking using a table tripod with a pencil attached. Obviously it’s critical to make sure the pencil mark is consistent along the hull as well as on both sides. The subsequent pencil mark is difficult to see on the walnut, so I marked it off with Tamiya model masking tape.


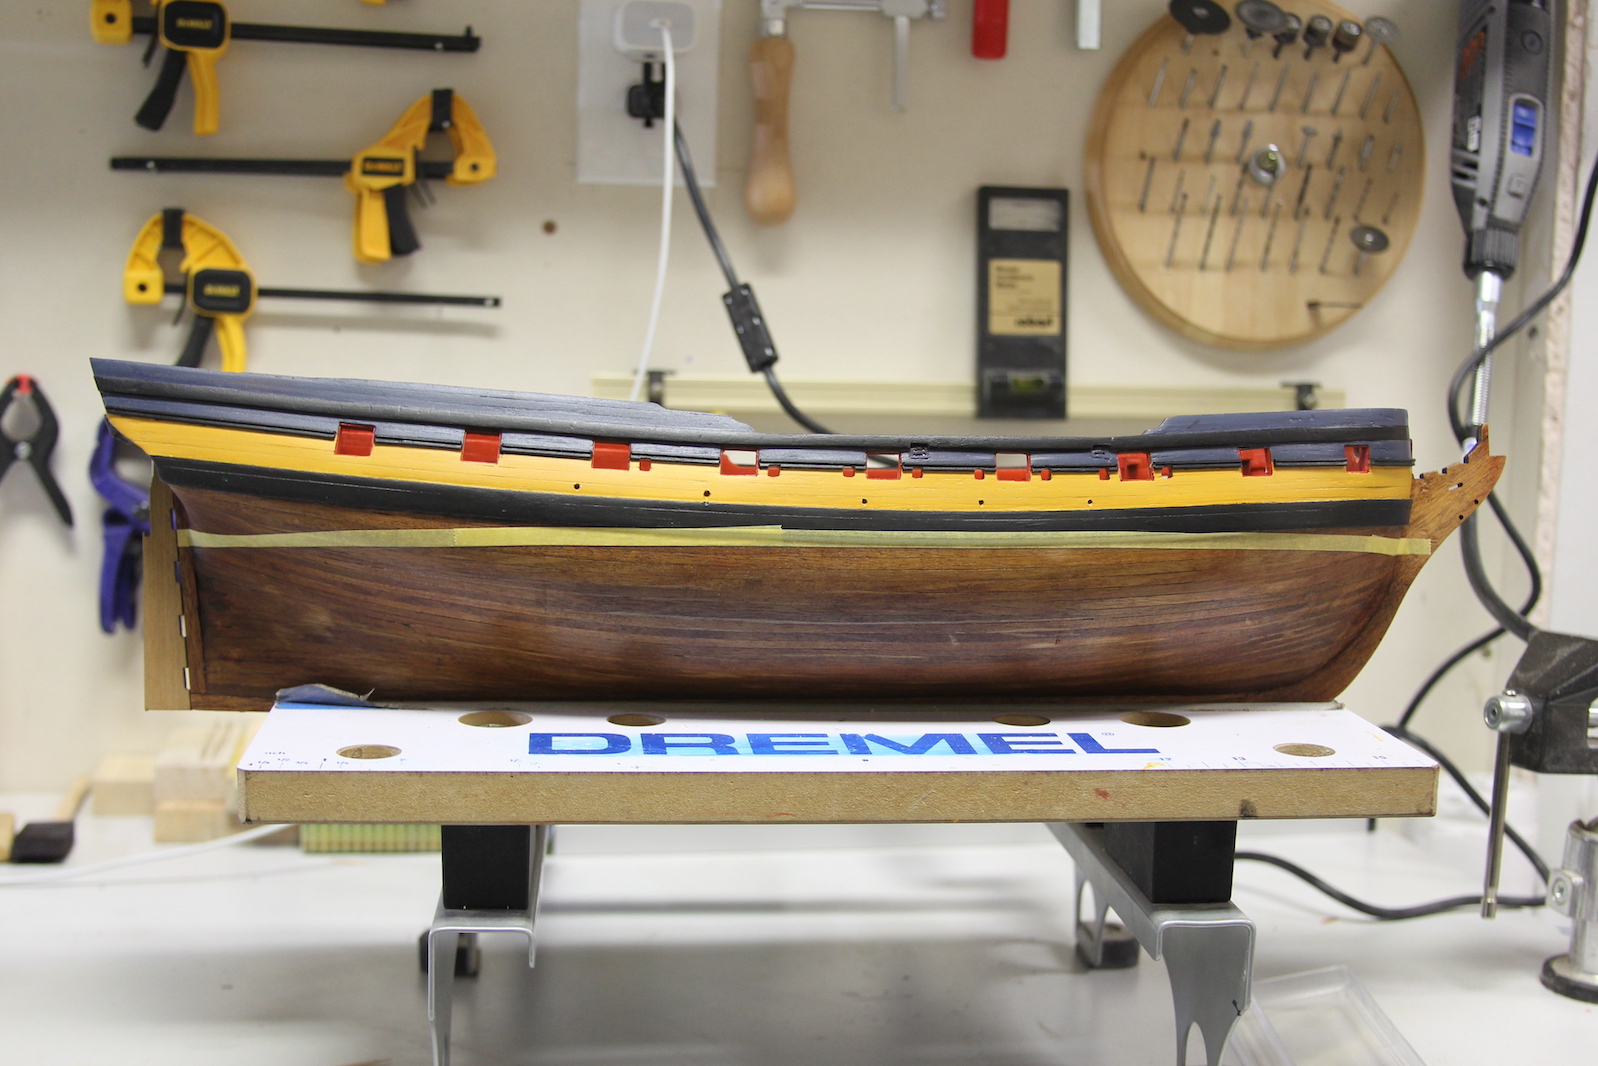

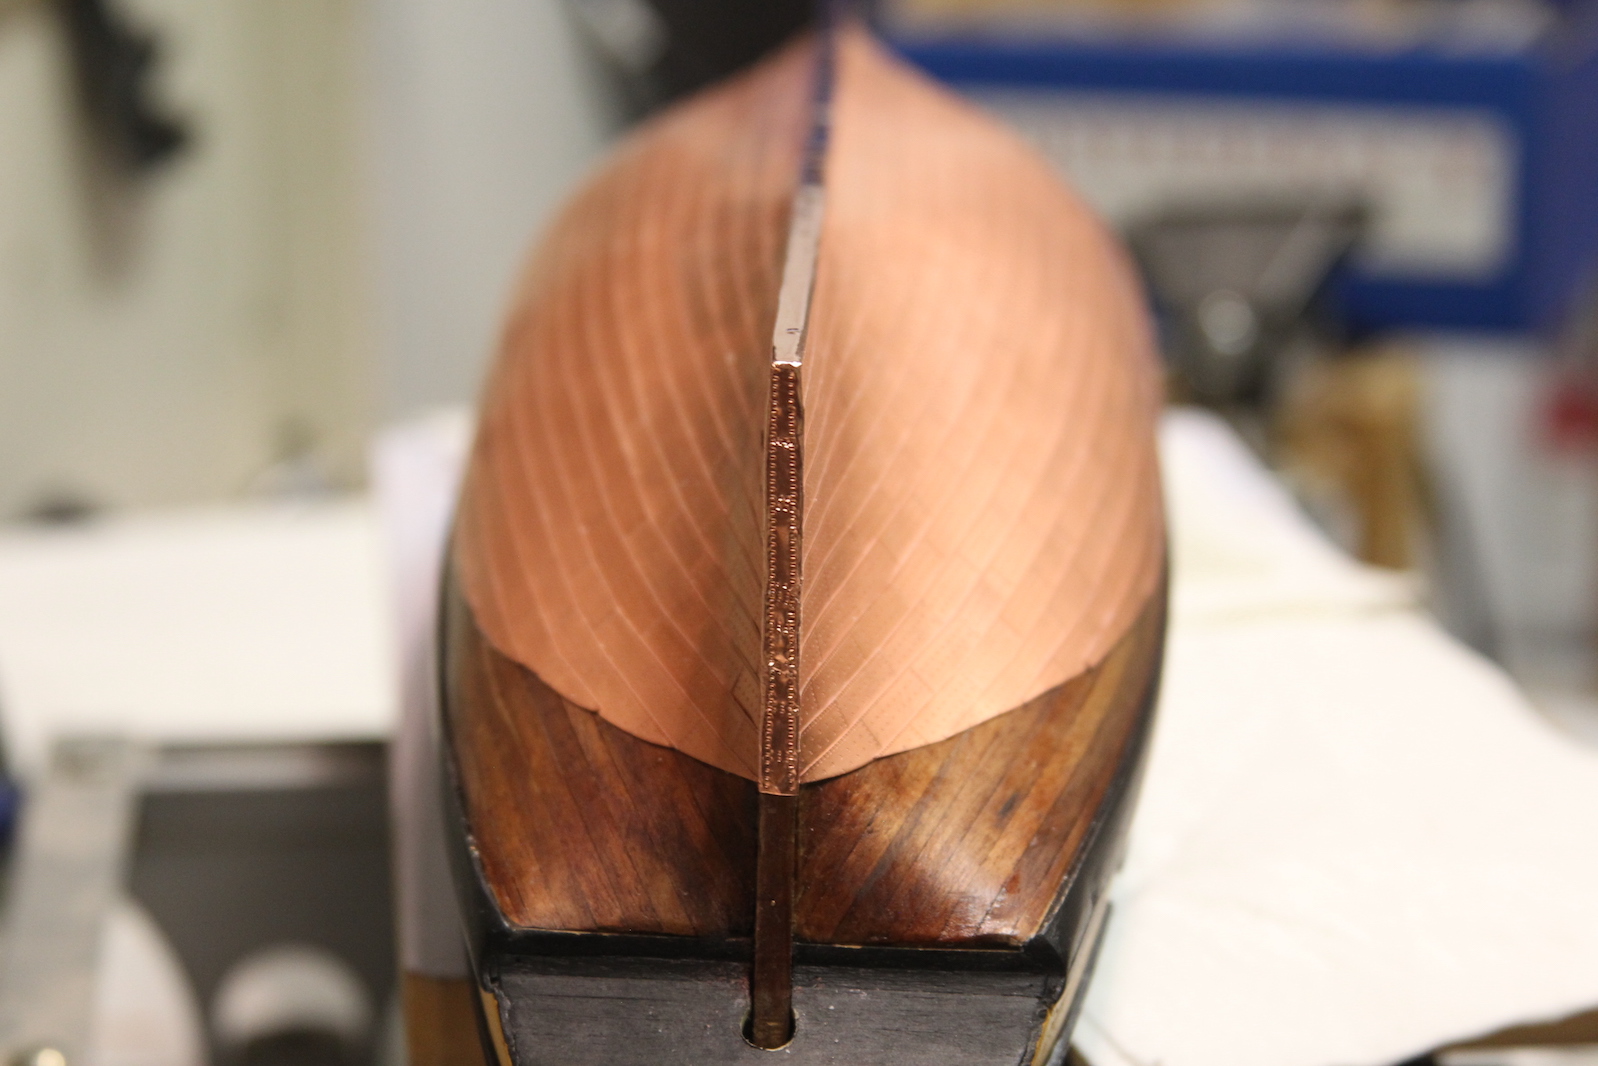
Fortunately, the copper plating itself that comes with the Peg kits is really nice stuff. I’ve seen a variety of quality and methodology during my research, and this stuff is tops. The plating comes in pre-pressed and creased panels wherein each individual plate is stamped with a bolt pattern and can be removed easily by just wiggling them back and forth. This affords the opportunity to snap them off either in singles or a strip. The bolt pattern is directional and specific to either side of the ship, so I marked the plastic to reflect the proper side.

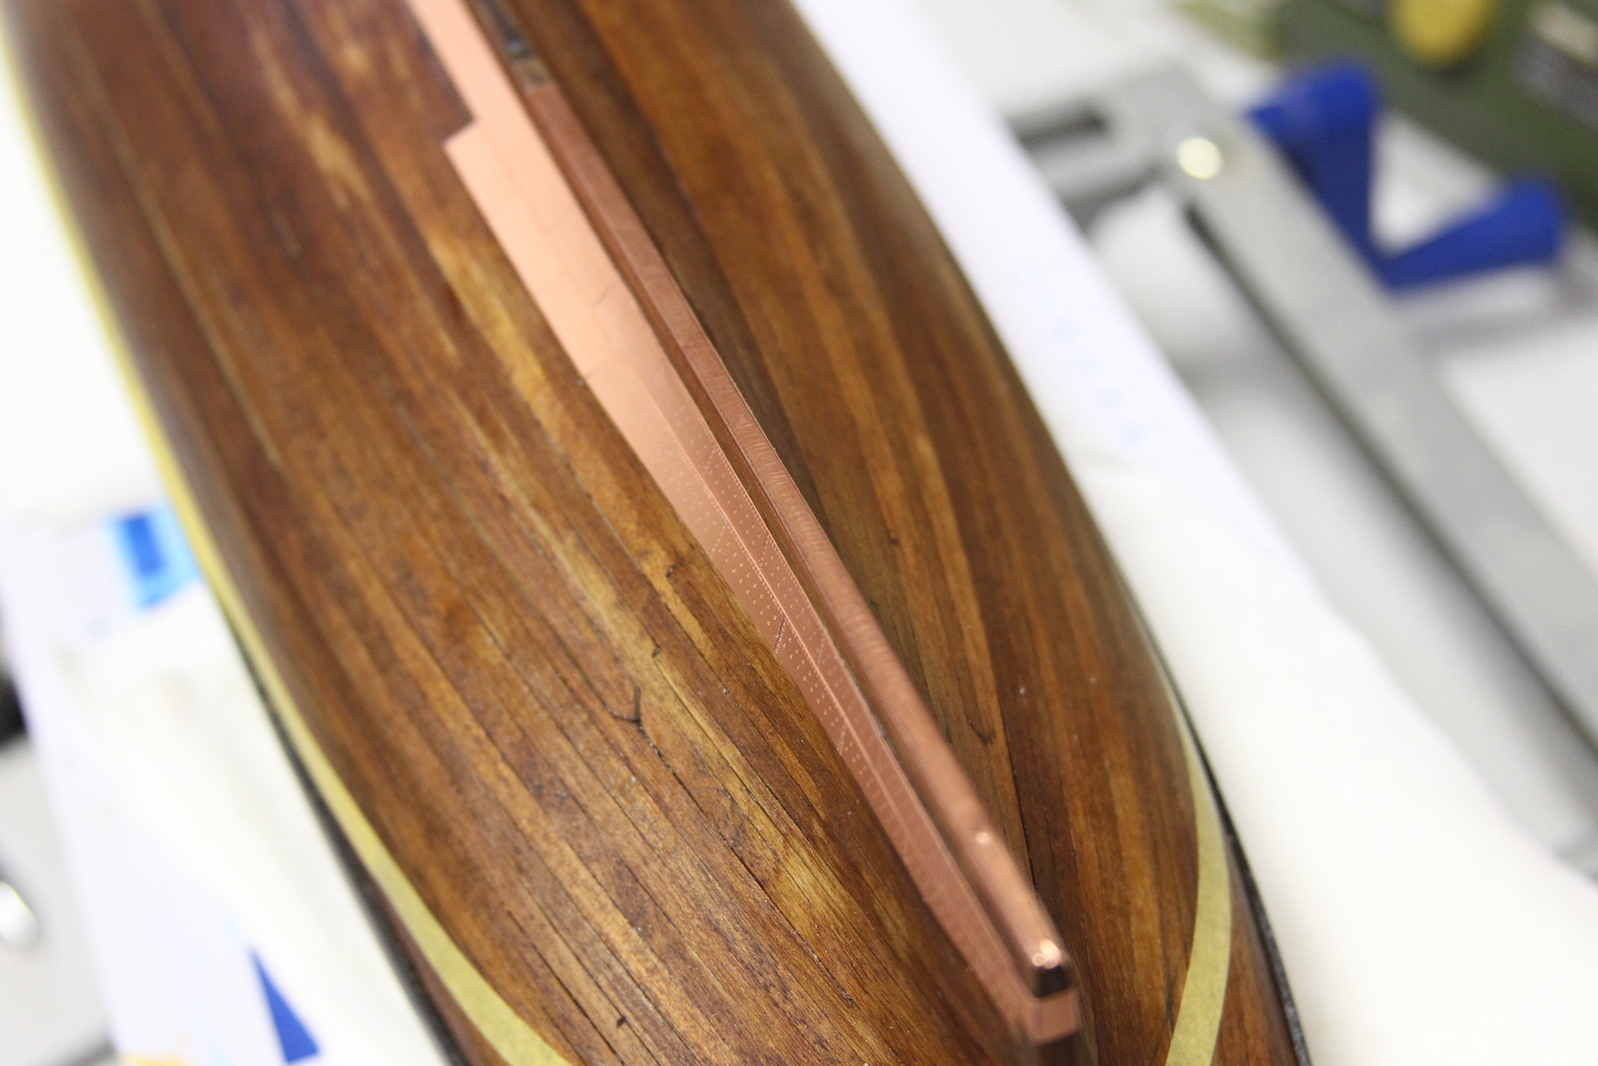
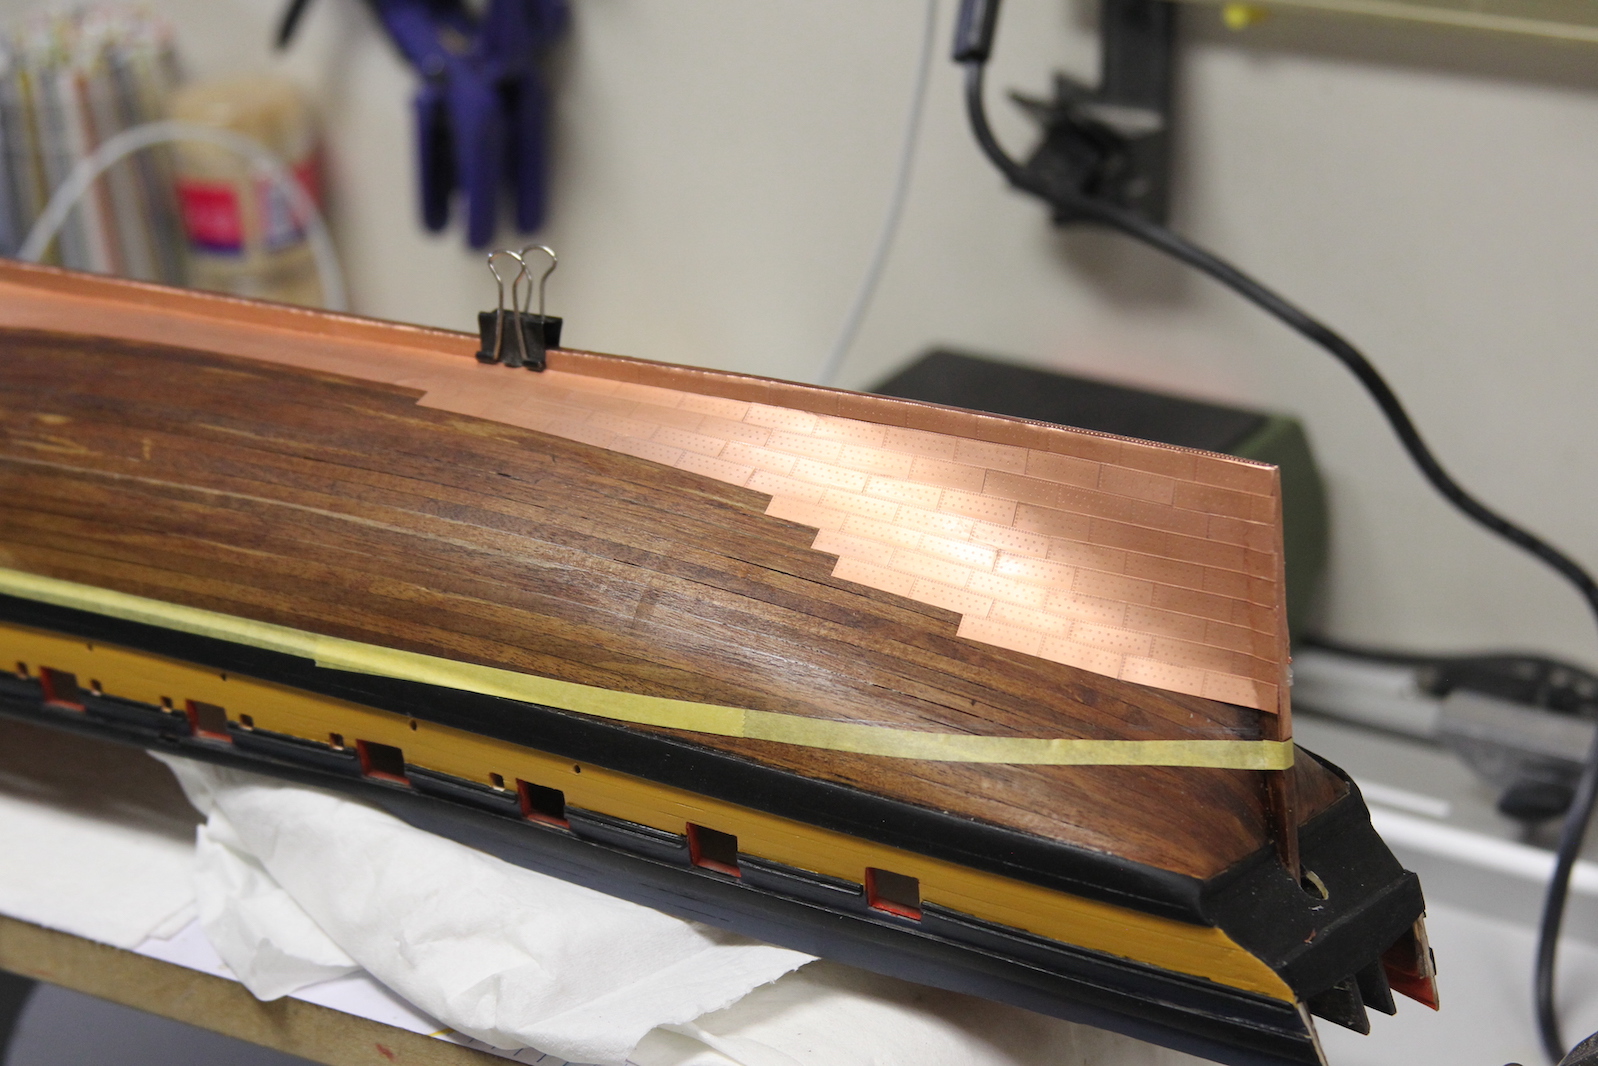
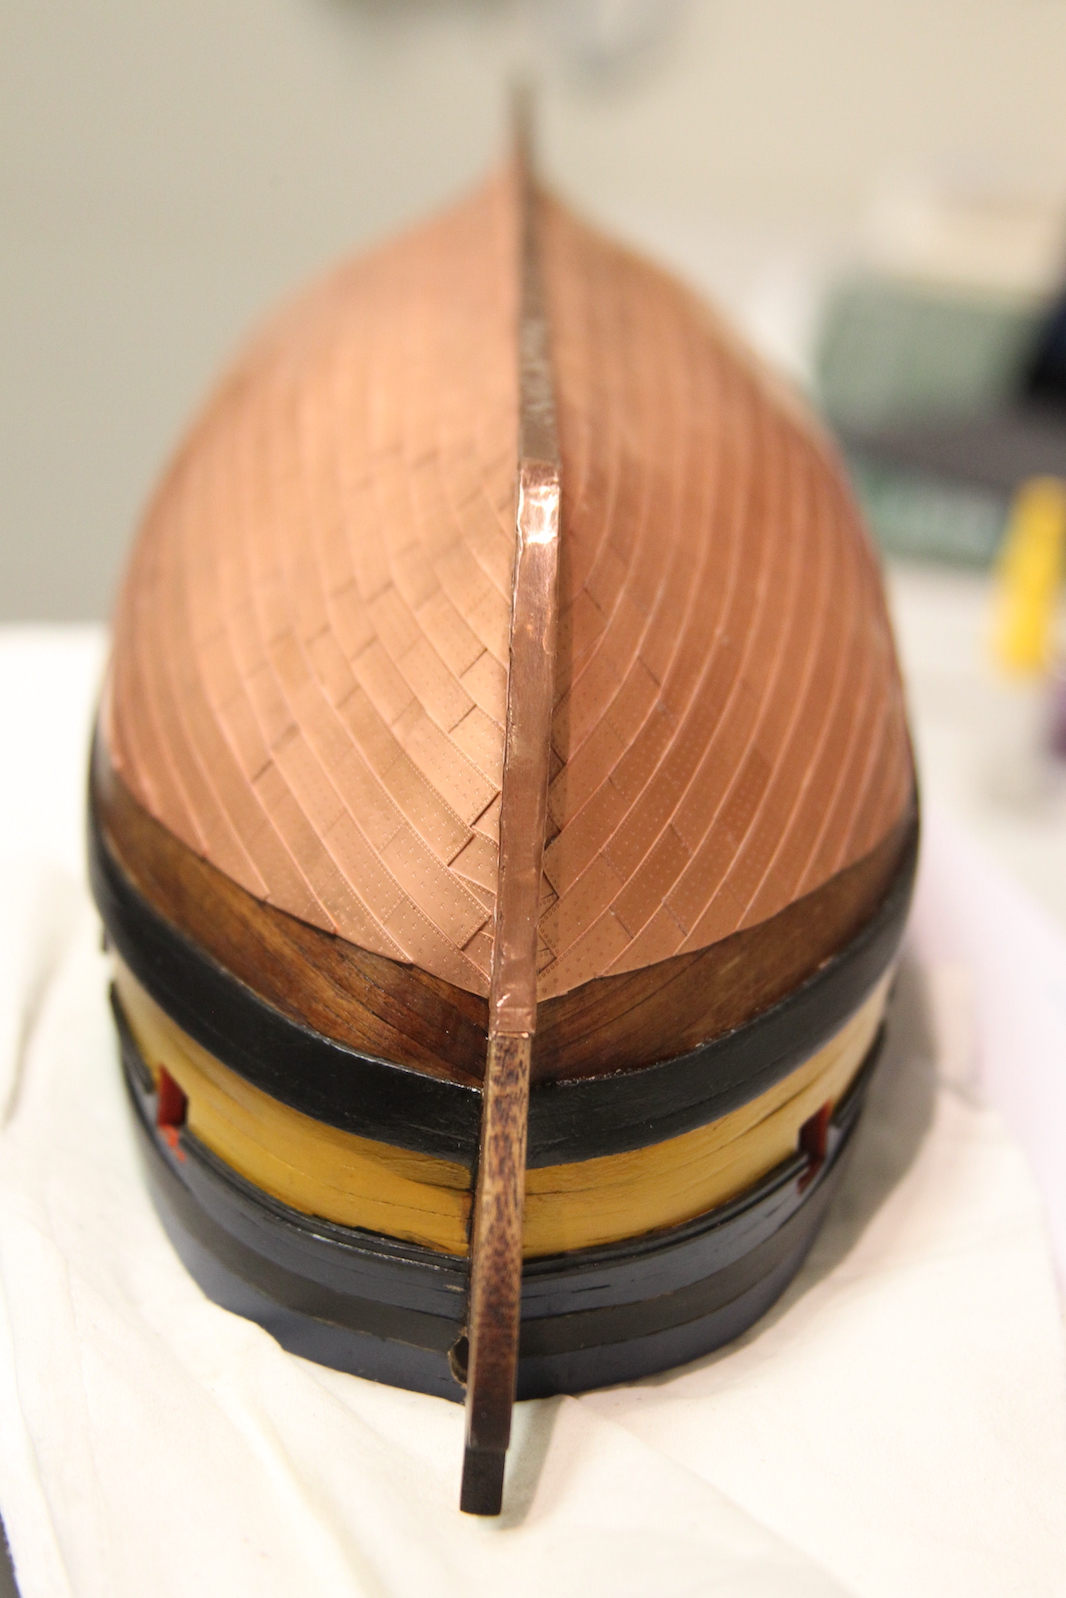
The plating itself is done parallel to the stern and each row follows the lines of the previous as you work your way up from the keep with the absolute slightest overlap from the previous row. The plates begin to angle as they follow the lines of the hull from stern to bow, and some very, very tiny adjustments to the angle need to be made along the way. Once the plates reach the waterline they’re trimmed off to create a straight line. For the keel itself (and the bow and sternpost) I used a copper strip which will then be marked with a bolt pattern and the strips along the sides are trimmed flush. The bottom of the ship will eventually have an additional “false keel” over the copper. This was done in case the ship ran afoul on rocks or other items in the water – the false keel was much easier to replace than any damage to the hull itself.


On the starboard side (which I did first) I started to get a little nervous as to how the plates were overlap at the bow and stern, so I patterned out the stern to get an idea of how the strips would go. From there it’s just a repetitive – and very slow – process of ensuring that each plate is done consistent and overlaps a proper amount.

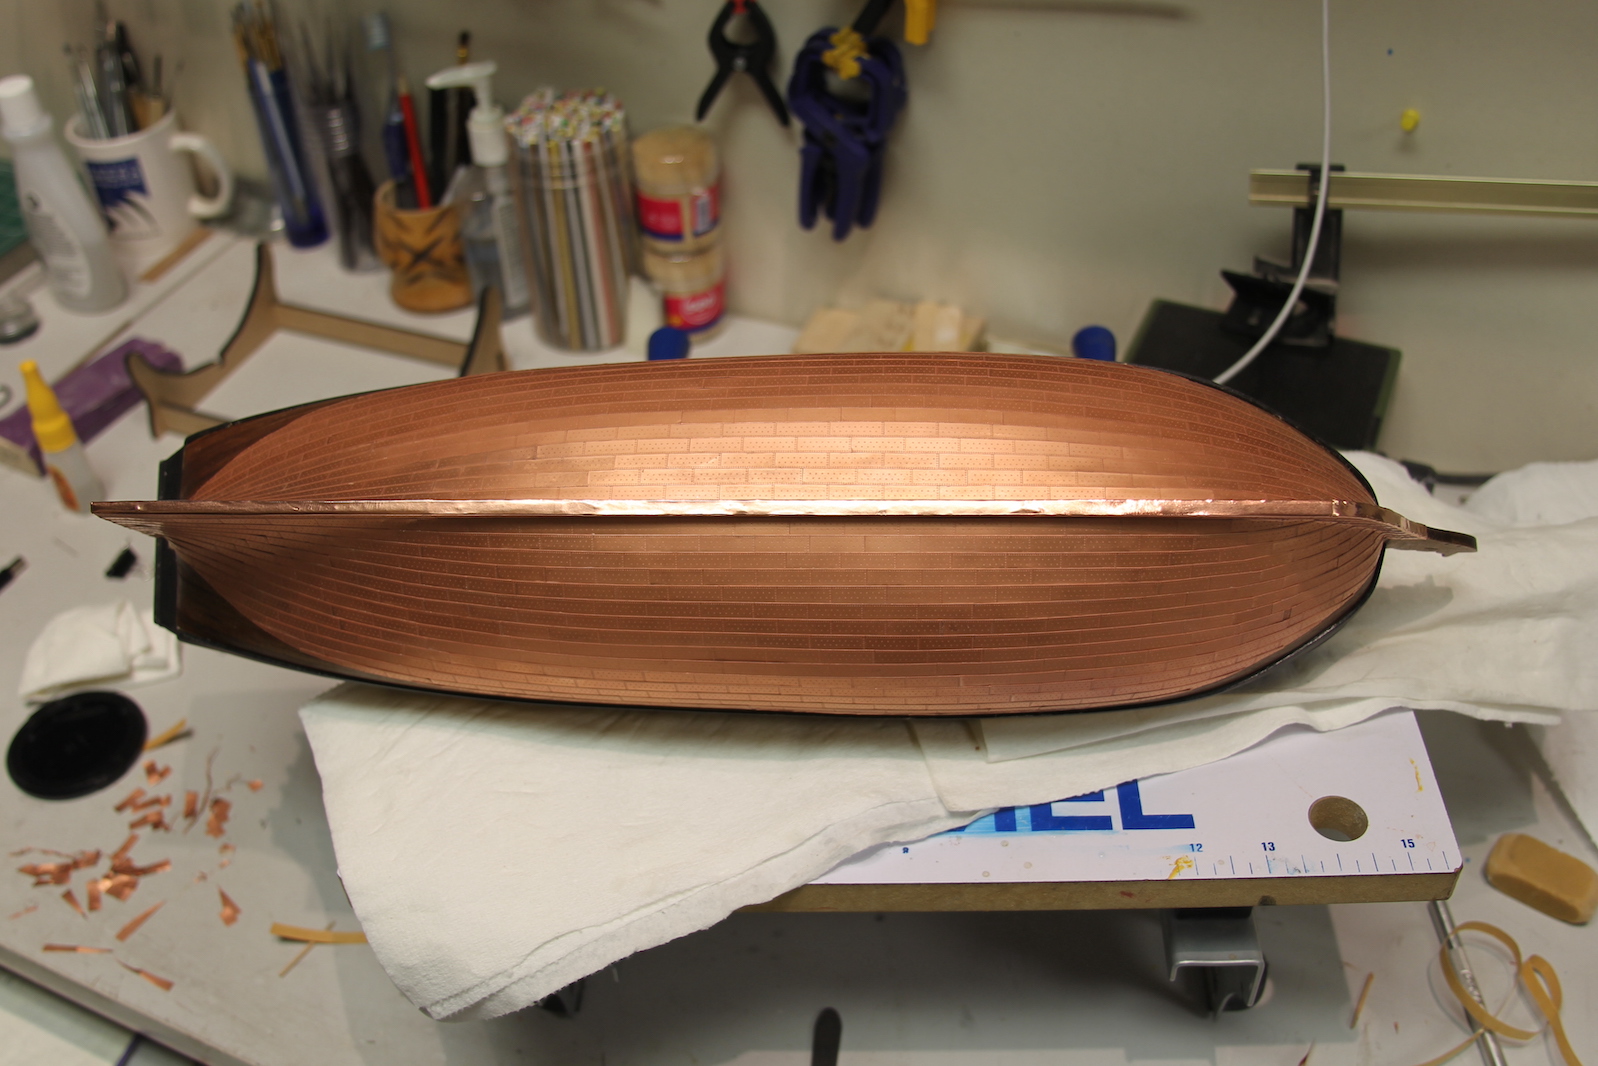
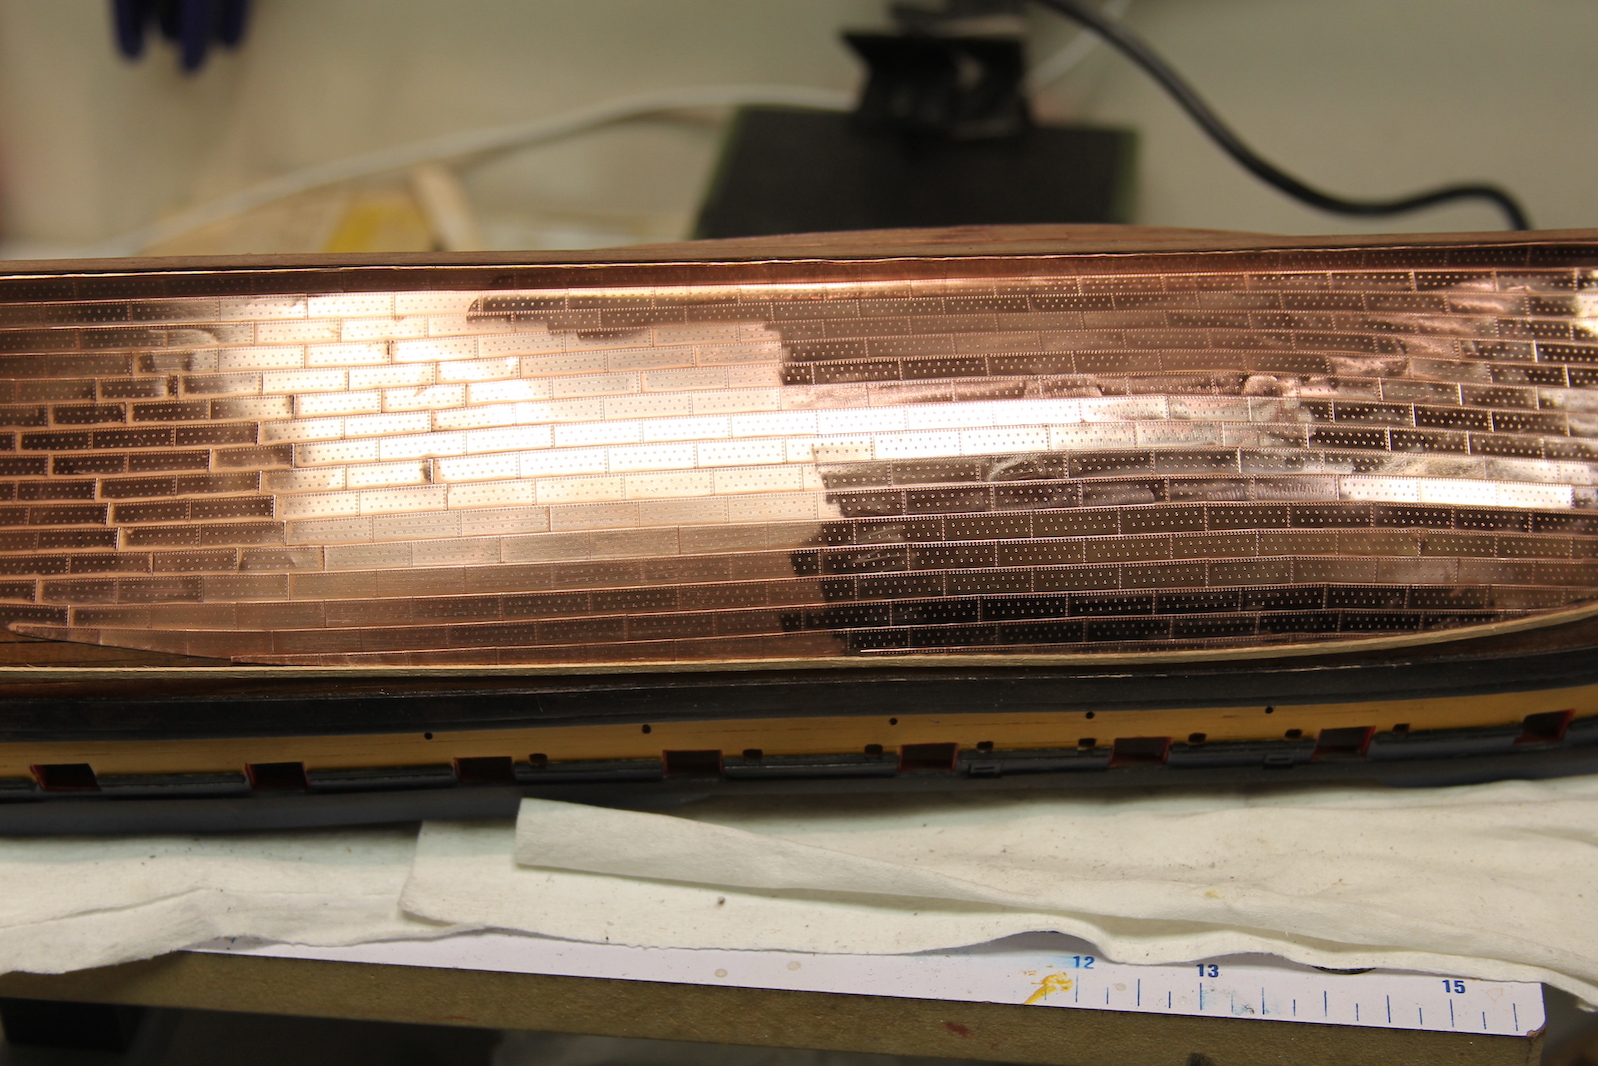
After the entire hull is done, an additional ‘batten’ is added along the waterline to seal the copper – I’ve represented this by using a walnut strip to match the color of the exposed hull planks. Much of the time this area is panted black along with the main wales, but I’m choosing to leave it as it’s natural color. From there, it’s time to polish up the copper. I started by using a 600 grit soft sanding sponge so I could get into the nicks and crannies without fouling up the copper. This is done VERY lightly so as to not catch the corners of the plates and bend them out of ship (which I still did on a couple of occasions).

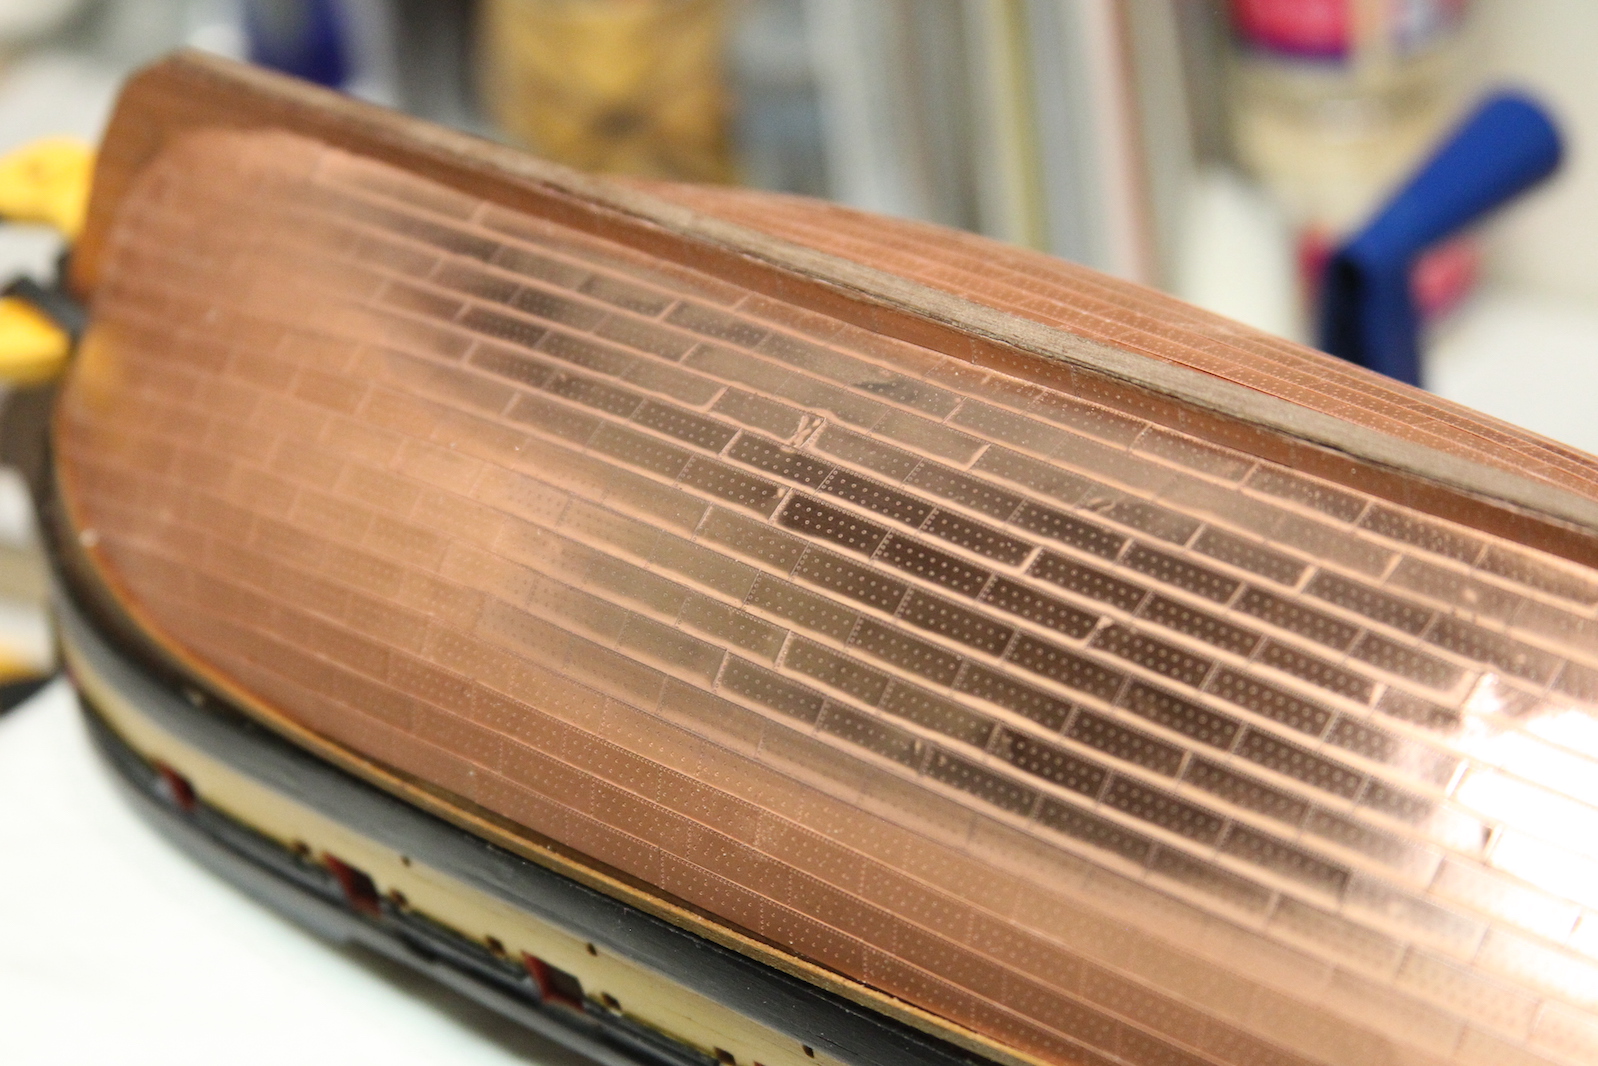
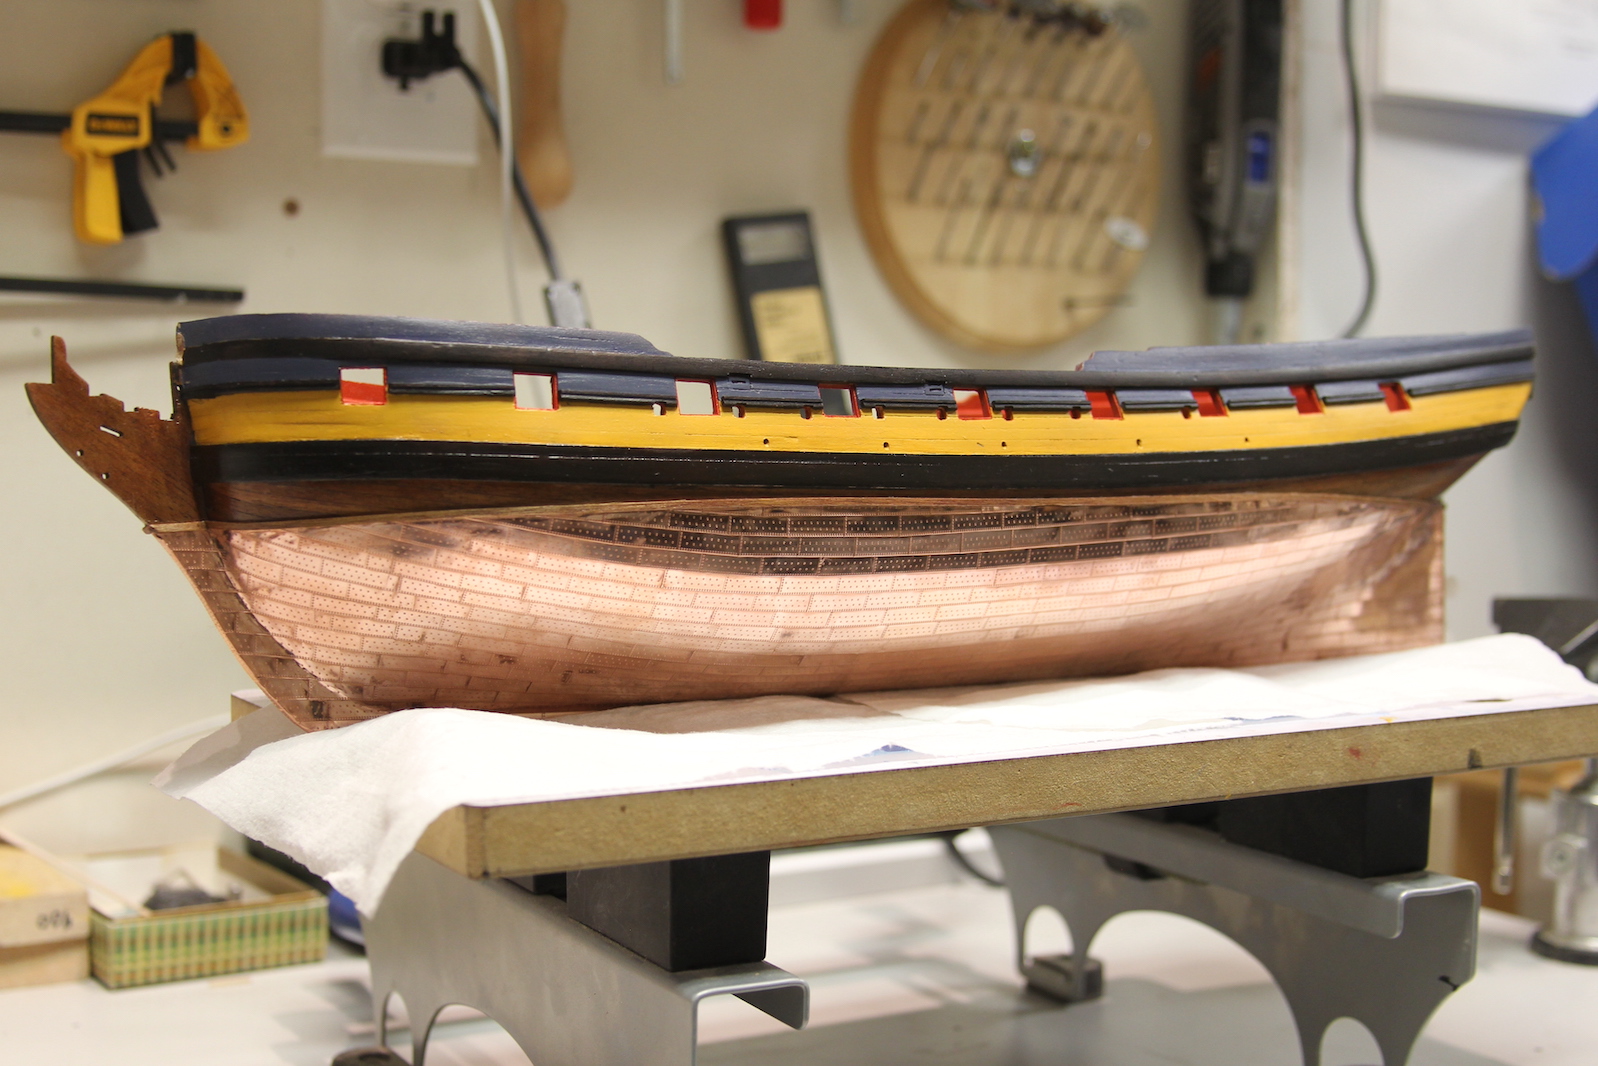
Second round of polishing (to clean out the lines where the plates meet one another) was done with a soft wire brush attachment on the Dremel tool. This was done at medium speed and very lightly going over each plate barely letting the brush touch the plating. Here’s a shot halfway through the hull to see the before/after effect.
Here are the final shots of the copper plating after buffing with a cloth and sealing the batten with tung oil.


Next up will be determining what to use to cover/seal/protect the copper from tarnishing too much over the years. Particularly since this ship will be a ‘straight off the dockyard’ representation rather than weathered like I did with the Santa Maria.

Fantastic work. I’ve never seen the copper polished before and the results are stunning. Could I ask what you used to seal the copper to stop it from tarnishing?
LikeLiked by 1 person
Good morning Robert, thanks for looking in. This was the first time I’ve coppered a hull (usually I prefer the natural color of the wood) so I’m kind of winging it. I sealed the copper with a single coat of wipe on poly. This cut down the finish a tiny bit as I felt it ended up
a bit bright.
LikeLike