
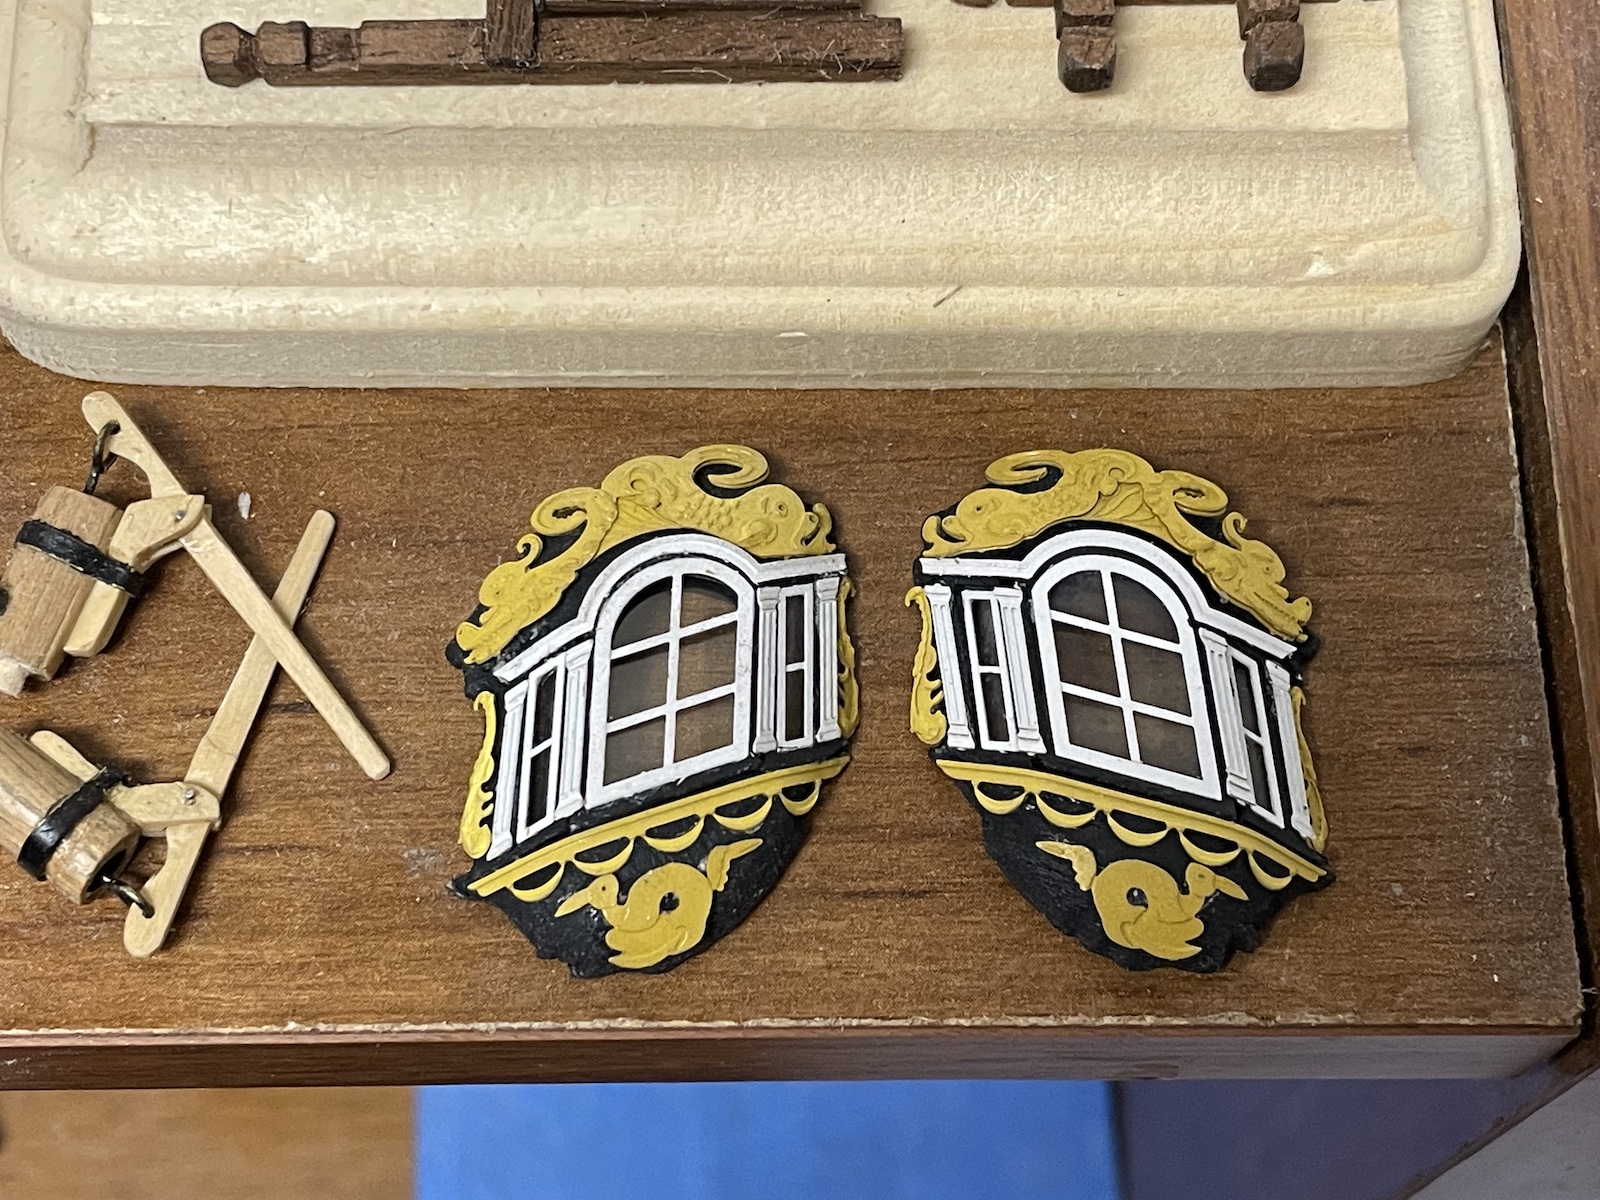
Quarter galleries are a fun, prominent feature of most ships and adorn the sides of the stern castle. They basically served as little balconies in most cases, though with smaller ships such as the Peg they were often just windows.
The plans for the Pegasus (and associated fittings) call for flat quarter gallery windows, which although sometimes accurate, don’t provide the most pleasing profile. So based on some modifications made by fellow ship builders, I decided to create a more three dimensional look – which is suggested by the three paneled profile from the National Maritime Museum plans.
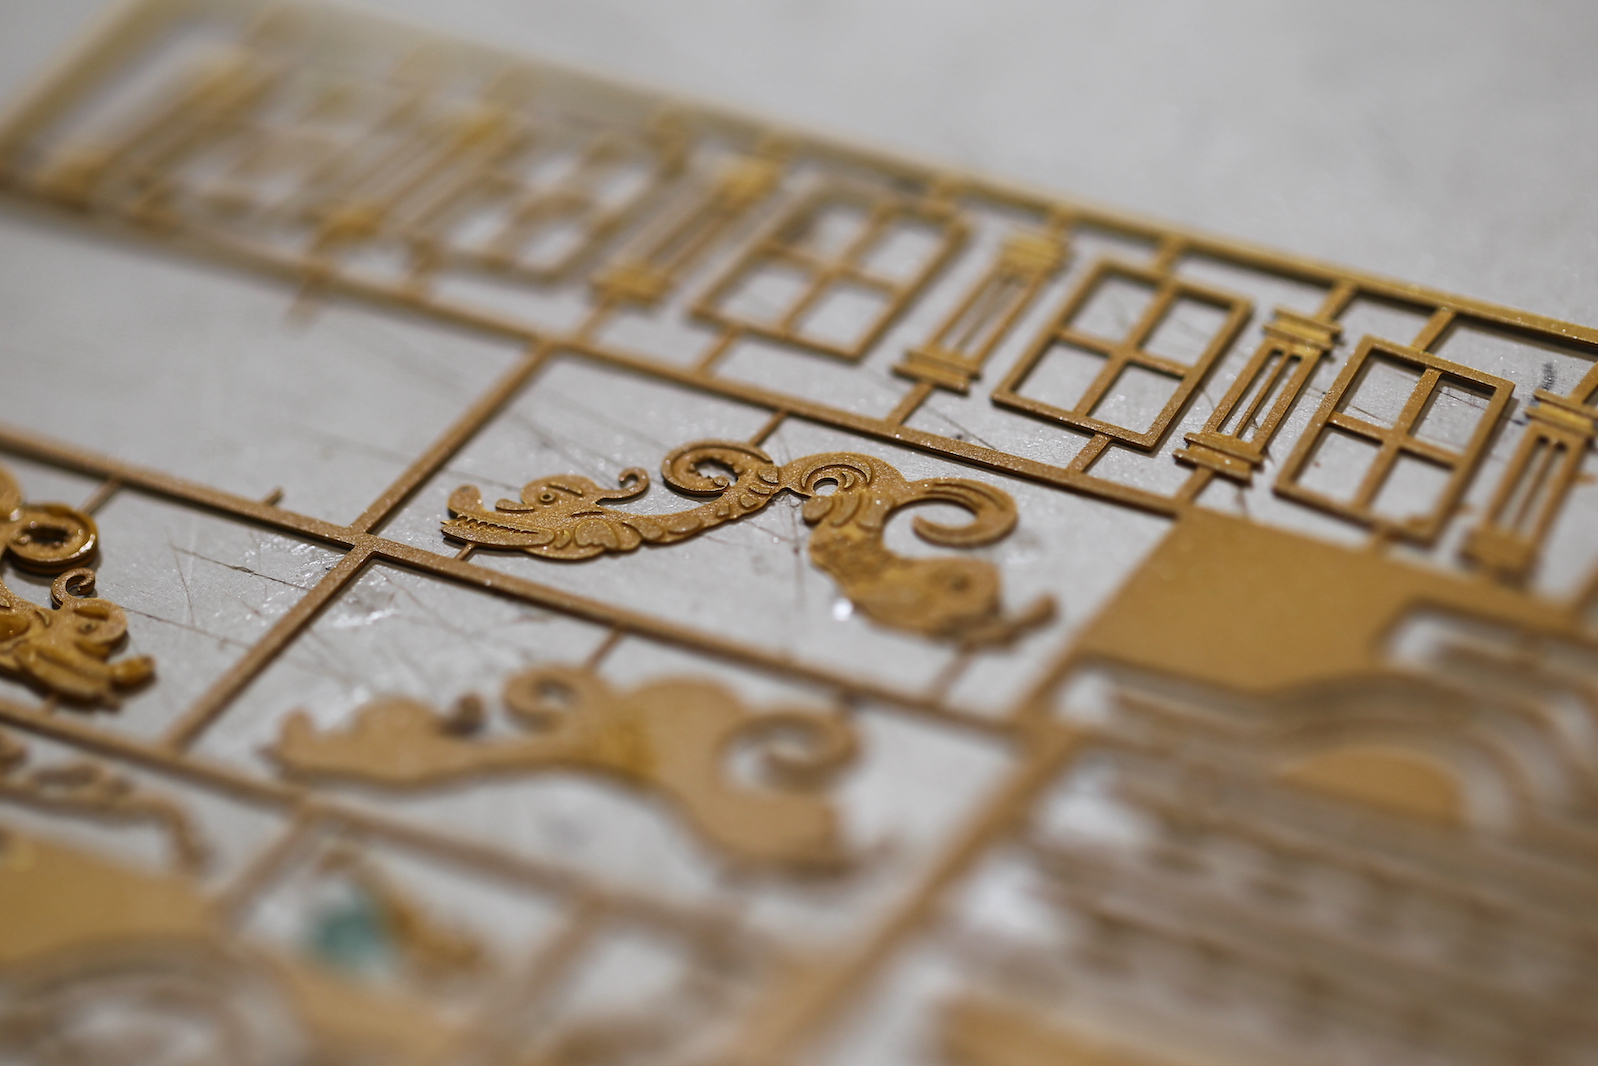
I started by adding some additional dimension to the frieze and carvings. The Amati kit uses a couple different layers of photo etch that are subsequently stacked on top of one another to try to create carvings, but I felt I could add a little more. So I coated the photo etched pieces with yellow ochre air brush paint, then I went through and carefully dabbed some areas with bits of yellow ochre acrylic and then let it dry. Then I went through and air brushed a VERY light coat of white, then back over it with Vallejo’s yellow ochre “air”. The intent was create an impression of carving.


On to the quarter galleries themselves. First step, I marked out where they’re going to be, then made room with the trim, drilled out the space to create a cabin inside, then painted it black. Next up, I cut out and shaped some balsa affixing it to the top and bottom of the quarter gallery frame to give it some dimension. One of the most difficult and delicate parts of this operation was separating the window frames which were laser cut as one piece. I used a jeweler’s saw with my thinnest blade and very gentle cutting to separate the frames. The frames are then realigned and glued into place with any little gaps filled with “wonderfill” wood filler and then the whole thing is painted black and the photo etching is added. I didn’t take photos of that bit, but extra care is needed to bend the pieces to fit the now three dimensional gallery.


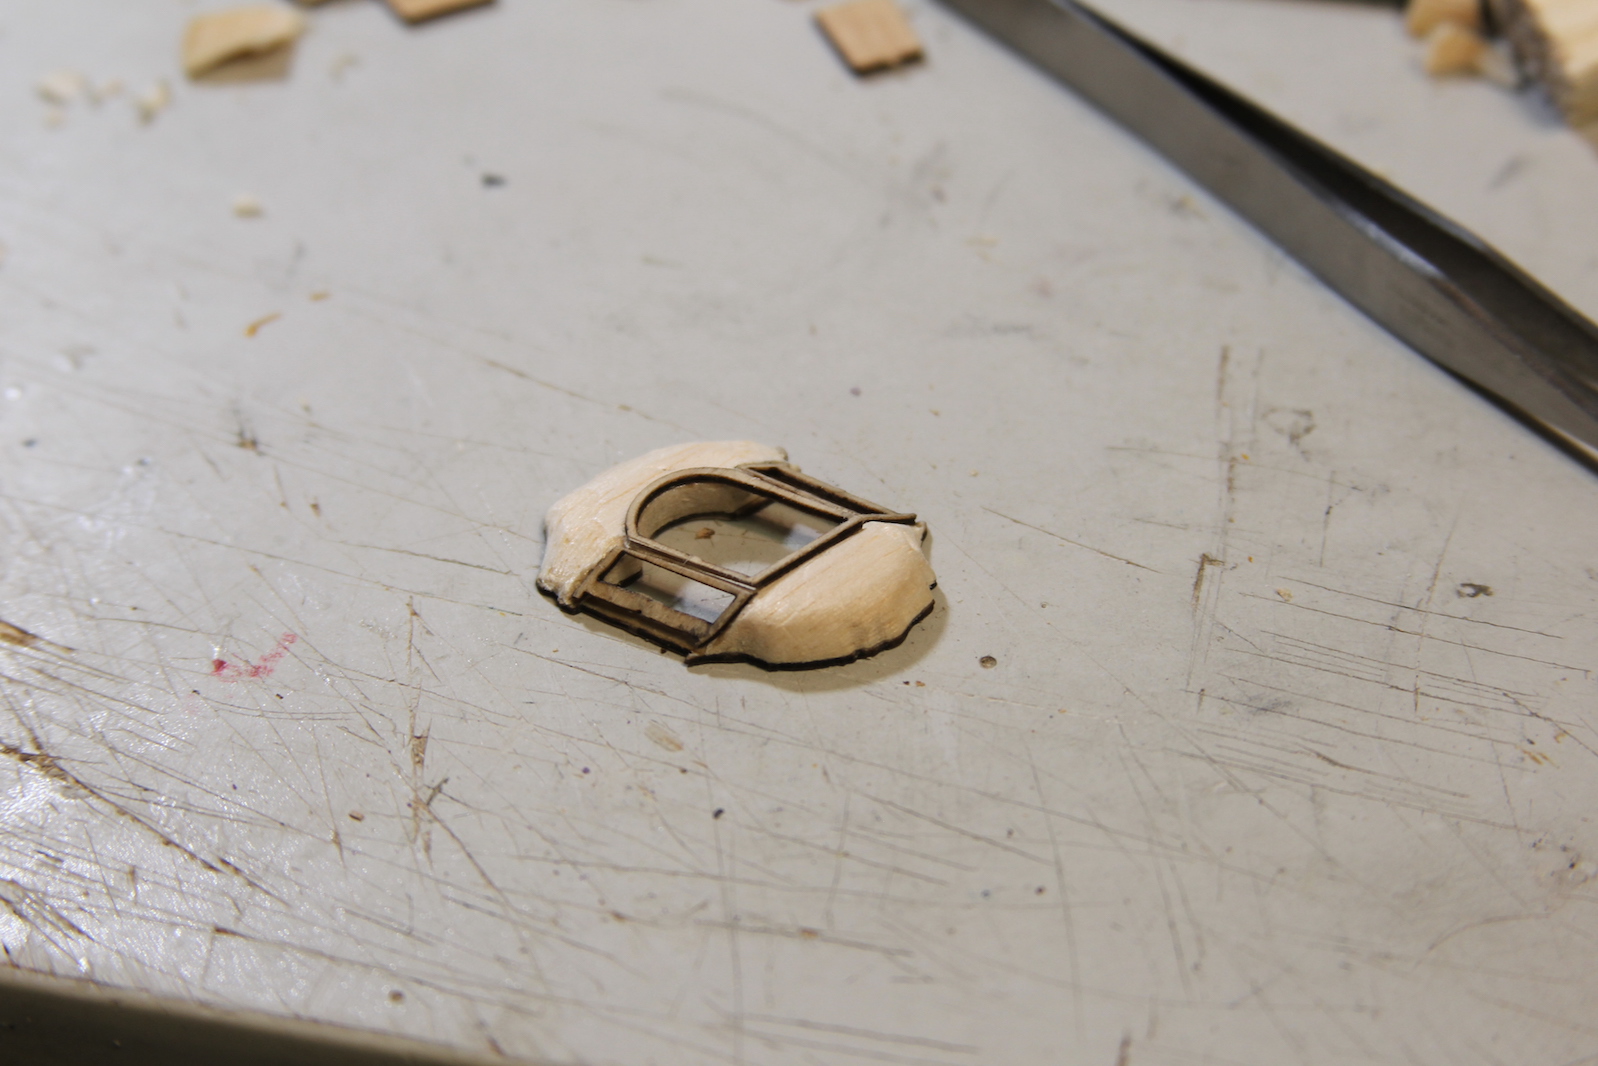

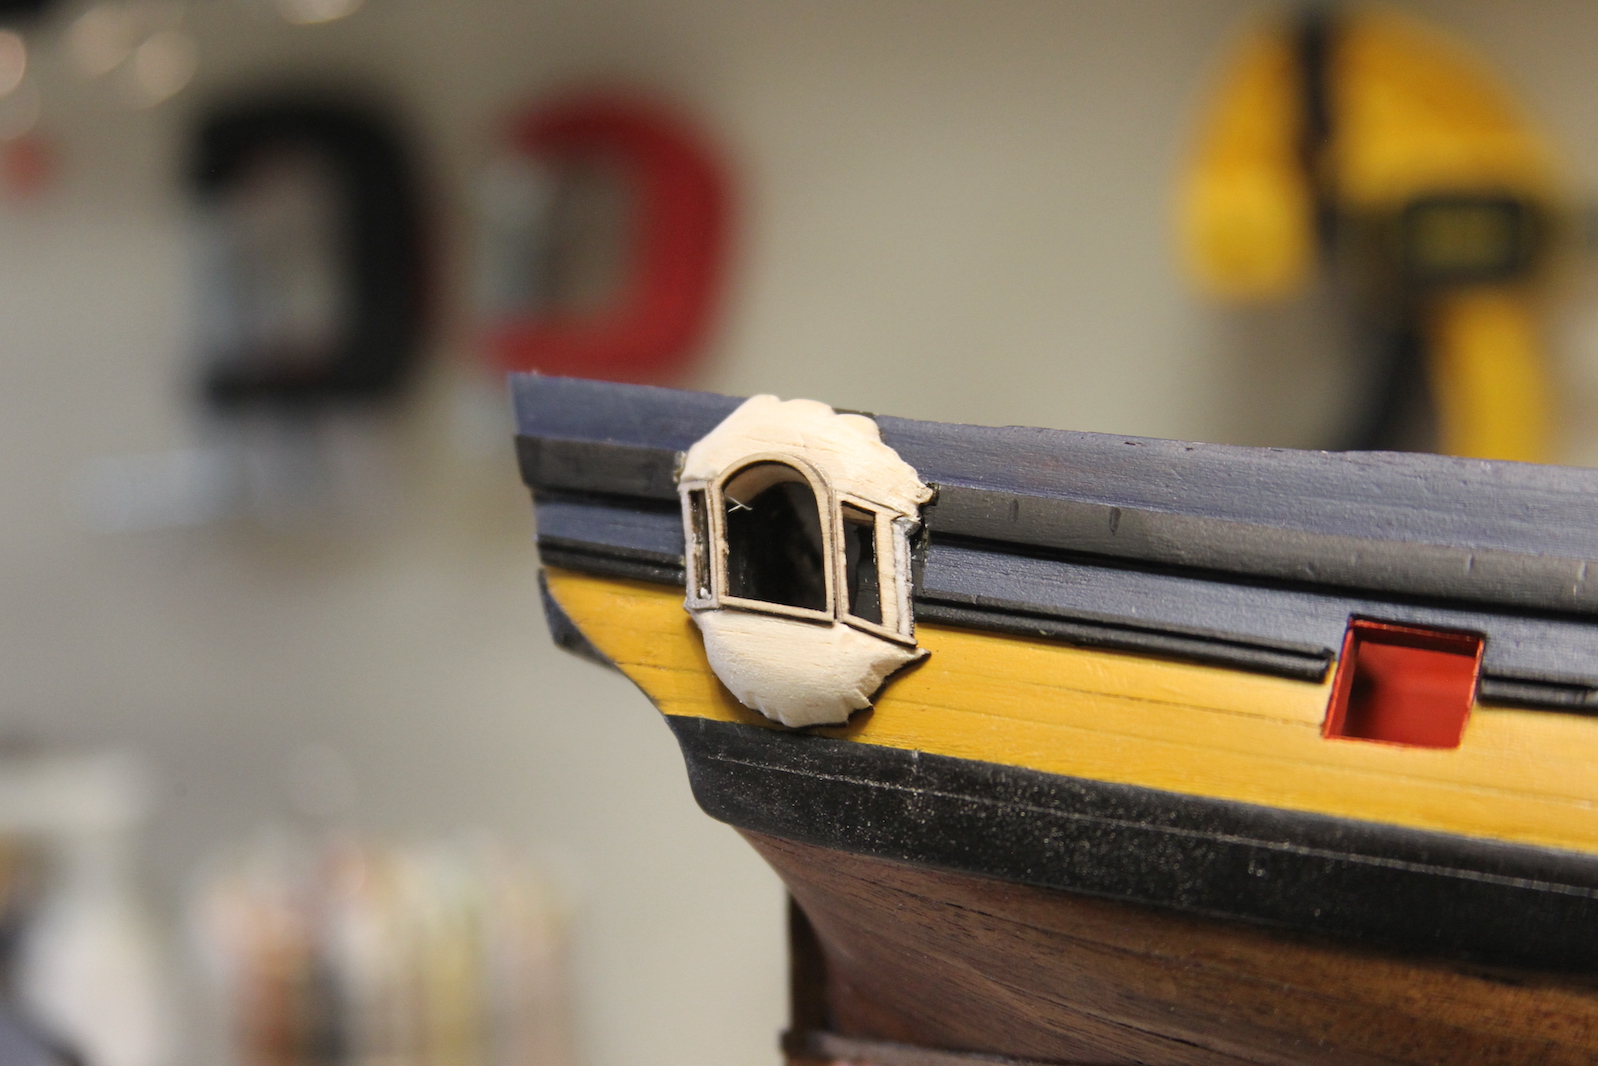

Now, my favorite part! I finally figured out that the best way to shape my little microscope slide covers (used on the Companionway housing) is to carefully hold them against the belt sander. I marked the shape I needed with a sharpie and just barely let it touch the sander which was fast enough to not shatter the piece and also half melt – half sand the glass into shape a tiny bit at a time. It’s a good thing I ordered a hundred of these things, because I went through five or six with each effort to get one right. It was then glued in place using white glue that dries clear. I actually prefer fabric stitch glue here because it’s tackier. The galleries are just sitting in place for the moment and will be permanently mounted later.


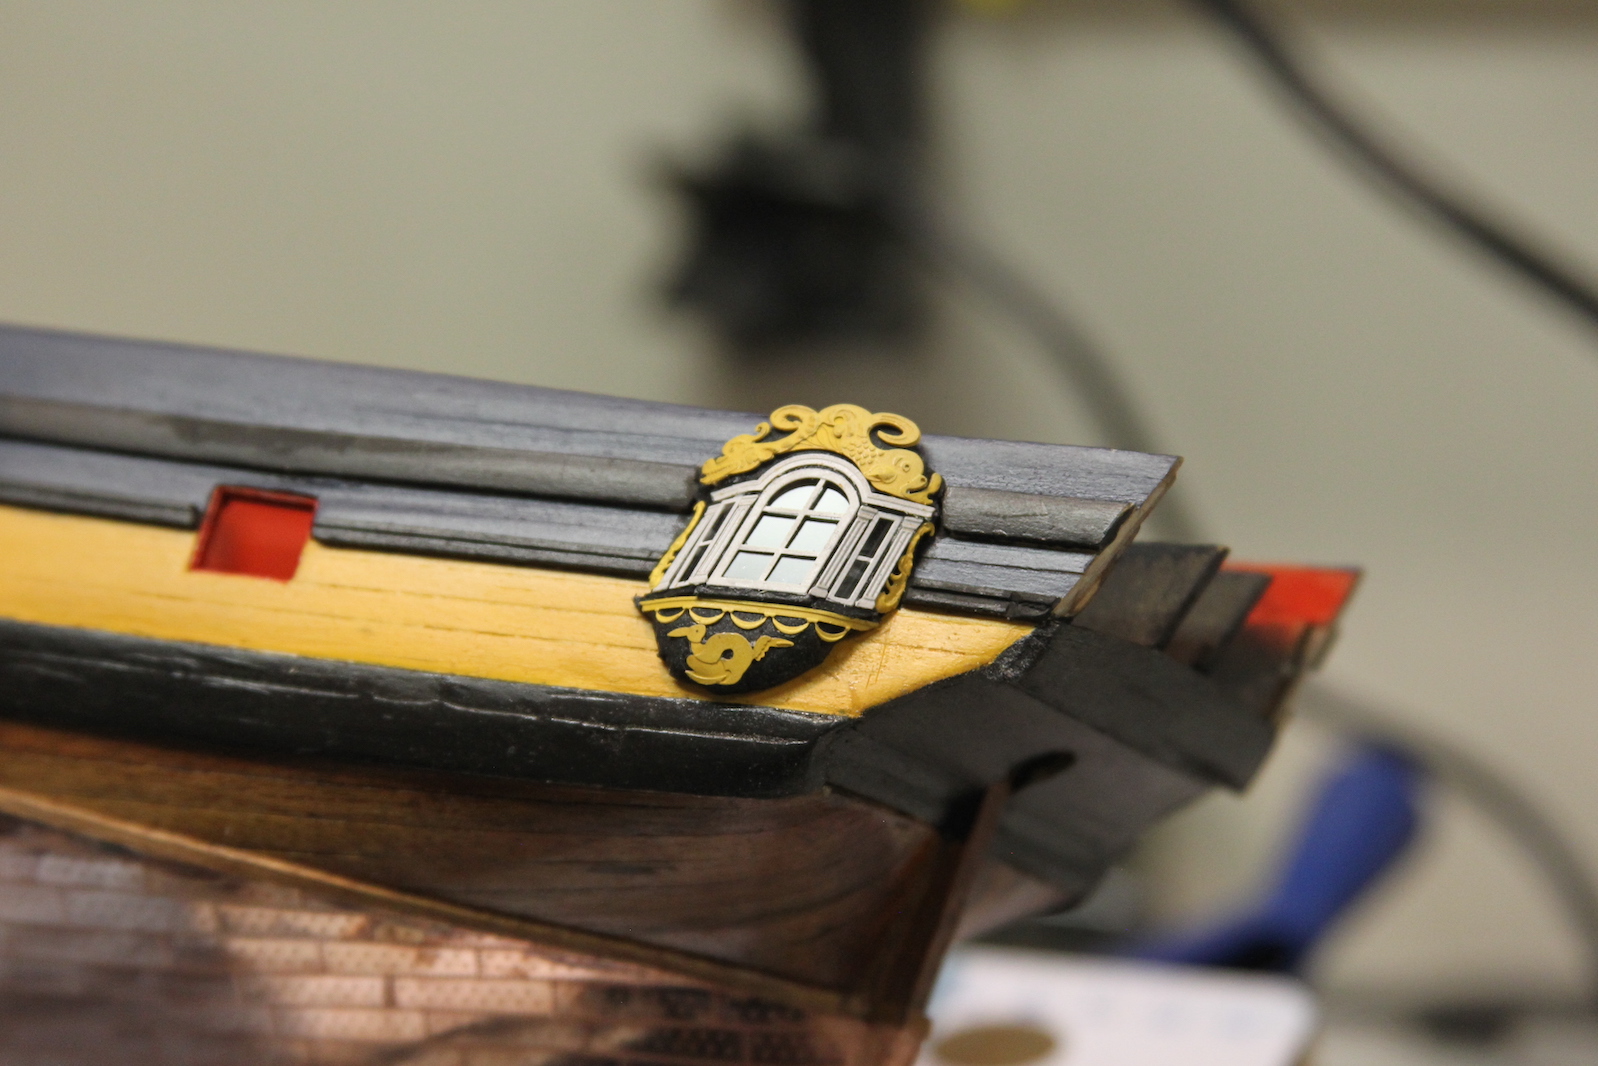


The glass is a bit of a pain obviously, but ended up looking really good. I purposely took pictures with an angle where the light reflected on the glass so you can see it, but the photos don’t really do it justice. Really clear straight on, then catches the light.
