
The transom which houses all the cool decorations, windows and Captain’s cabin is by far the most notable and visible areas of the ship. For that reason, it’s imperative to get it just right and as accurate as possible. That’s no easy feat given the sheer number of details.

Before I could get too far along there were some significant flaws that needed to be addressed. On my ship, the area where the transom would meet the stern was rounded – where as the NMM plans clearly show that area as straight then forming a concave curvature as it meets the helm port, rudder, etc. So my first job was to reshape the back end of the ship.
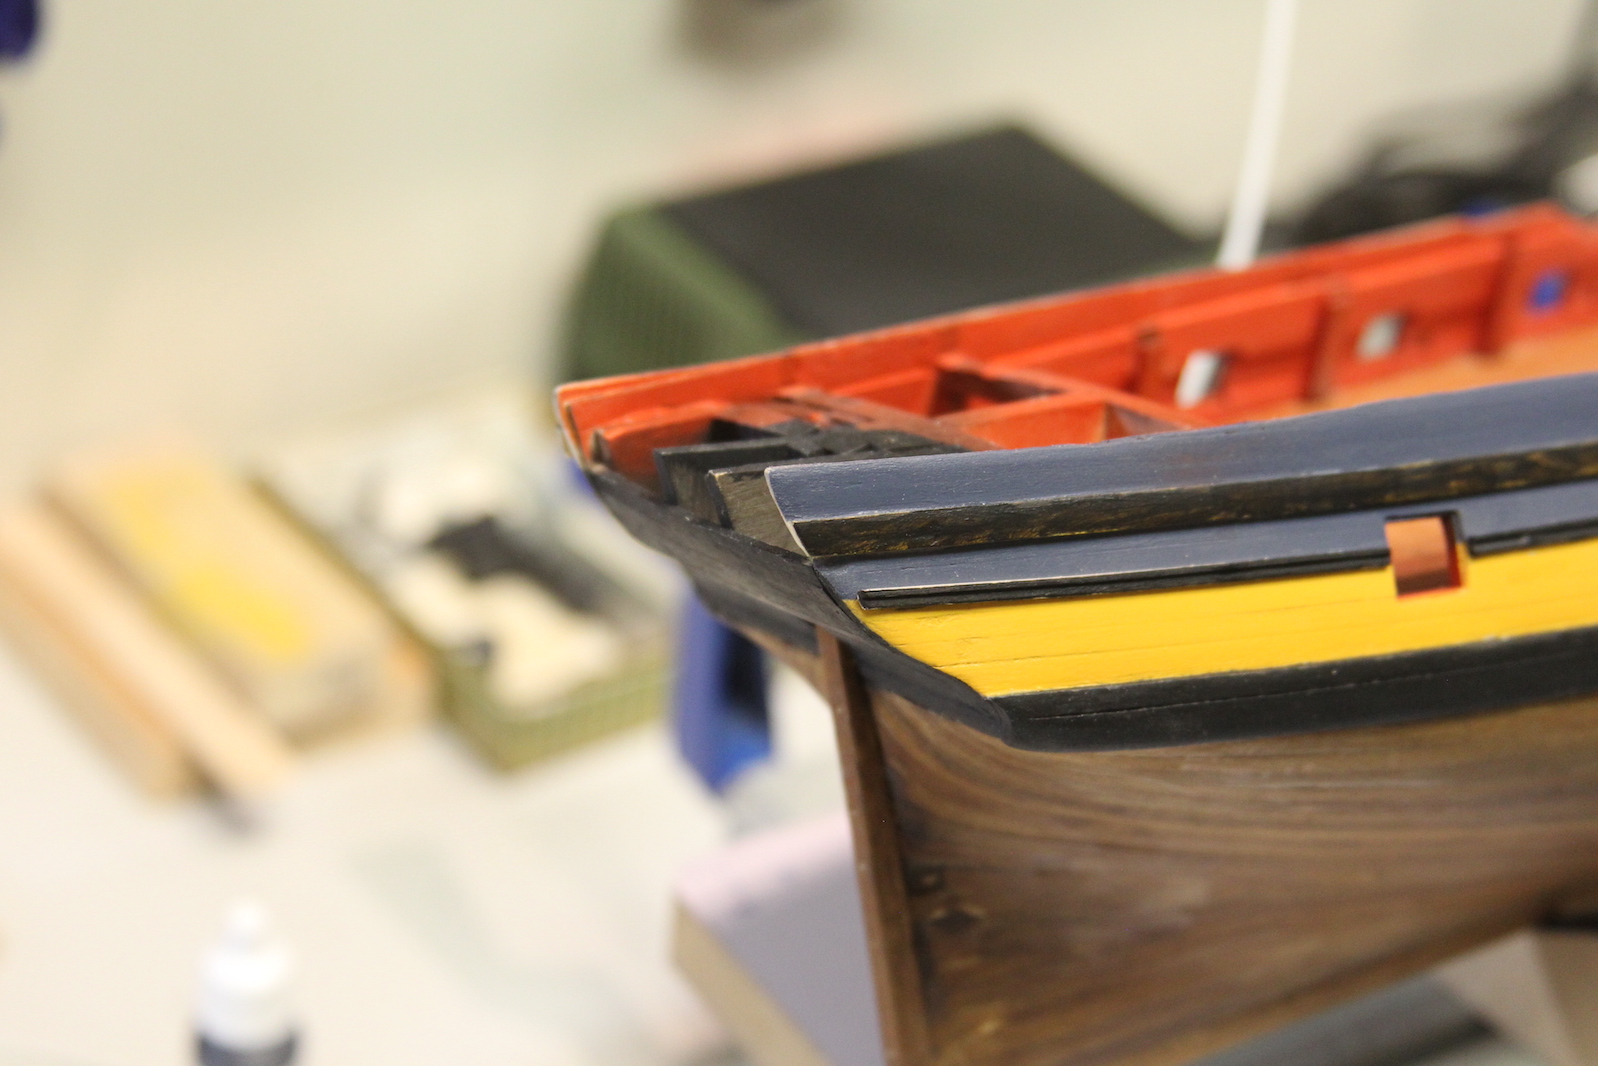

The other significant flaw was the sides of the transom itself – as you can see in the first photo, they just hang out over the edge of the stern and are cut off, which makes no sense at all. Every transom (especially based on the plans above) meets the sides of the hull in some fashion. It was almost as though some extra piece were missing. At any rate, some reshaping was definitely required.


After reshaping, I added the paneling along the stern that separates the cabins from the helm port which creates a very important area – the name.

Though the reshaping of the transom both looks much better and is more accurate, it does create a subsequent problem that needs to be fixed – the fitting of all the carvings and decorations. Obviously, the kit provided decorations (which are photo etched brass) are made to specifically fit the kit shaped transom. So – how to fit the decorations into a smaller, differently shaped area? First, I painted them with a few different layers and shades to try and create a more three dimensional look – the same technique as I used for the quarter galleries.
Then, I installed the windows – because I know that the window locations are fixed and will serve as my benchmark for placing the rest of the decorations. Once again as with the quarter galleries, I am using the thin microscope cover glass as ‘real window panes’ in my windows.


Then, I installed the windows – because I know that the window locations are fixed and will serve as my benchmark for placing the rest of the decorations. Once again as with the quarter galleries, I am using the thin microscope cover glass as ‘real window panes’ in my windows.

The decorations themselves come in layers to facilitate somewhat of a 3D ‘carved’ look. I used a technique to add to that later. But first, I cut apart each decoration so that it is a separate piece which allowed me to place them individually. I started withe the Pegasus centerpiece, then added the two soldiers on the outsides (the poor soldiers had to be ‘trimmed’ to fit the different shaped transom) and then individually placed elements to fill in the gaps in between.

To further enhance the ‘carved’ effect, I filled in a small syringe with relatively thick yellow ochre acrylic paint and attached the tiny nozzle used for silver soldering. I added the painted to raised areas of the carvings to raise them even further. This took a lot of time and patience and some scraping off of extra painted when my fat-fingers splooged out too much paint on occasion.


Finally, lining up the letters was an incredible pain in the ass. First, the laser cut letters were TINY, and very difficult to remove without damaging them. Then – they were very challenging to paint, and finally – SUPER challenging to line up straight and with proper spacing. It took me almost as long to get the letters on the ship as it did to do the rest of the decorations. Unfortunately, I’m pretty terrible at painting letters or I’d have probably just abandoned the laser cut stuff and painted.
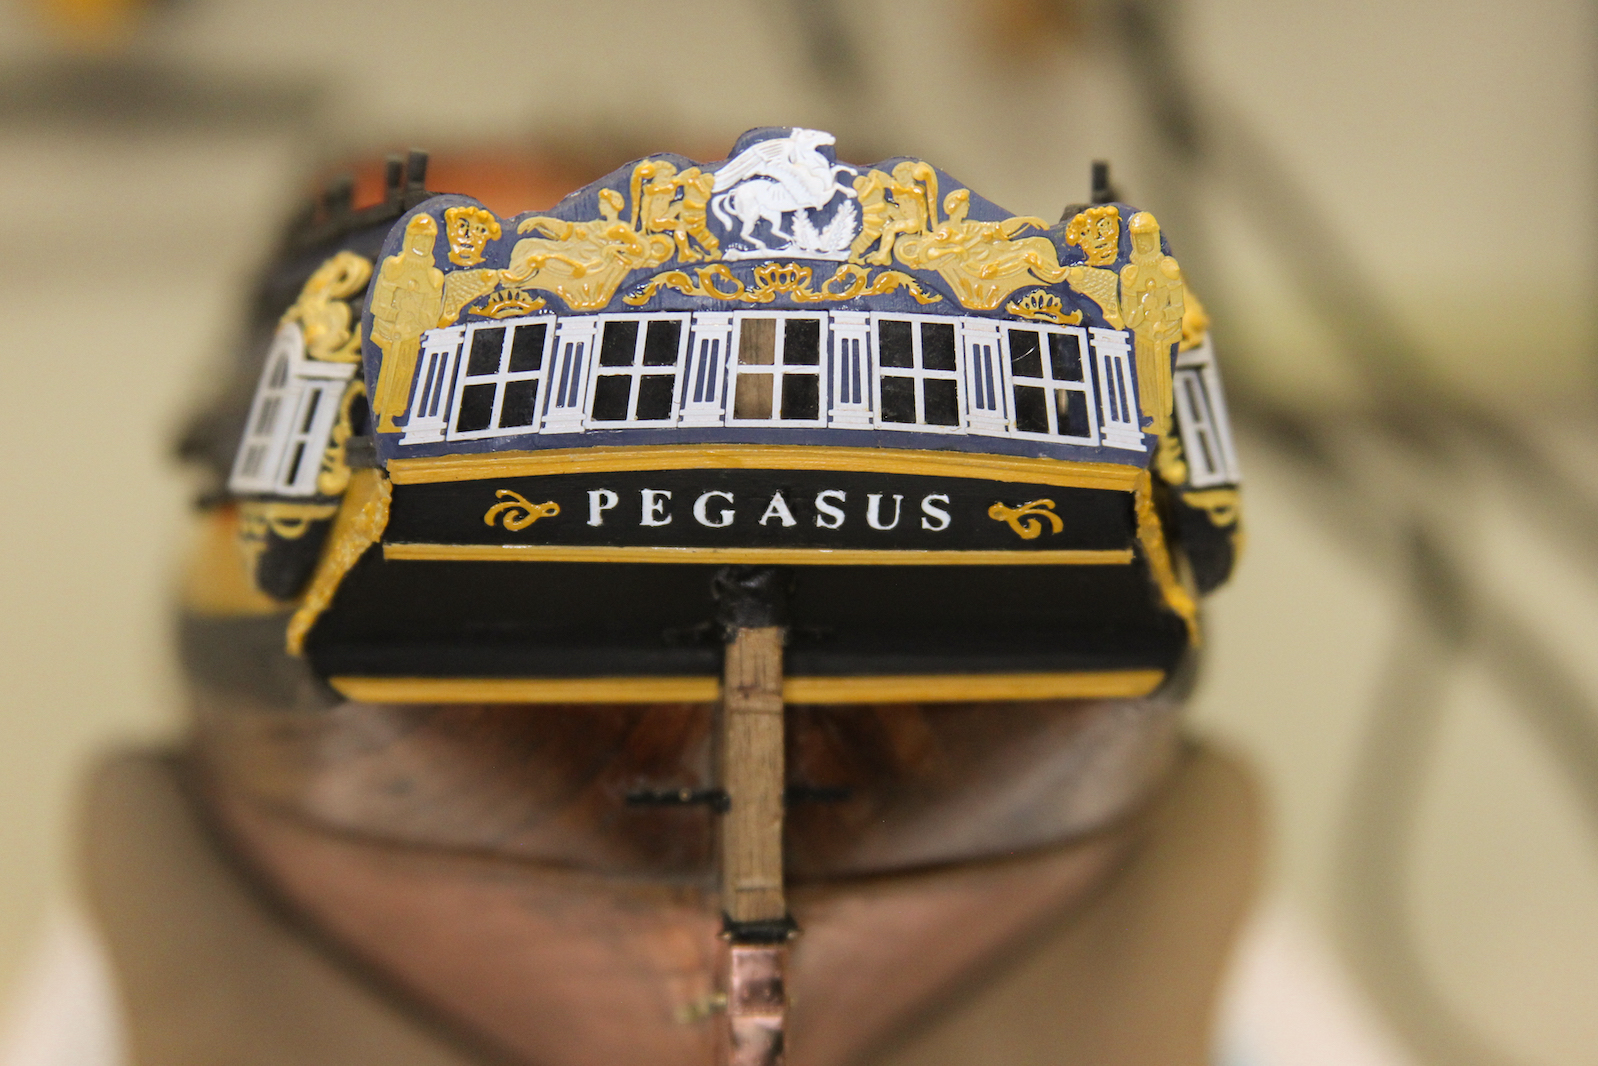
However, at the end of the day (though they’re not perfect) I think they’re pretty darn close. Of course the macro-lens shots show all the flaws, and I overall it looks better to the naked eye than represented here. Next steps were to create a cap rail along the transom so it would match the rest of the ship. I’d seen builds with and without this rail, and although I knew it’d be a bit of a challenge to get right I wanted to give it a shot. I started by thinning out a 5 x 2 mm strip of basswood and soaking it, then using a hair dryer to bend and mold it along the curves. I used the gel gorilla glue CA to glue it down as I went along.


It was a pretty slow, delicate process not to dry it too quickly and snap the wood, but it was worth it in the end. After some trimming of the edges toward the bottom where it meets the wales, a little bit of filler in some gaps, and sanding it was ready to paint. After it’s all said and done, I am pretty pleased with the overall results.


