
The open hatches on the deck which contain stairs also need to have some sort of safety railing around them or else the sailors would surely fall to their discomfort. These railings are often made by simply mounting long eye bolts and running a string/rope along them – much like you’d see entering a movie theater. Since this is neither particularly accurate or (more importantly) cool, I wanted to elaborate a little.
I fabricated my stanchions out of these T-Pins that I snapped off. I wanted something with a pointy end that would facilitate mounting. I then soldered some rings to them.


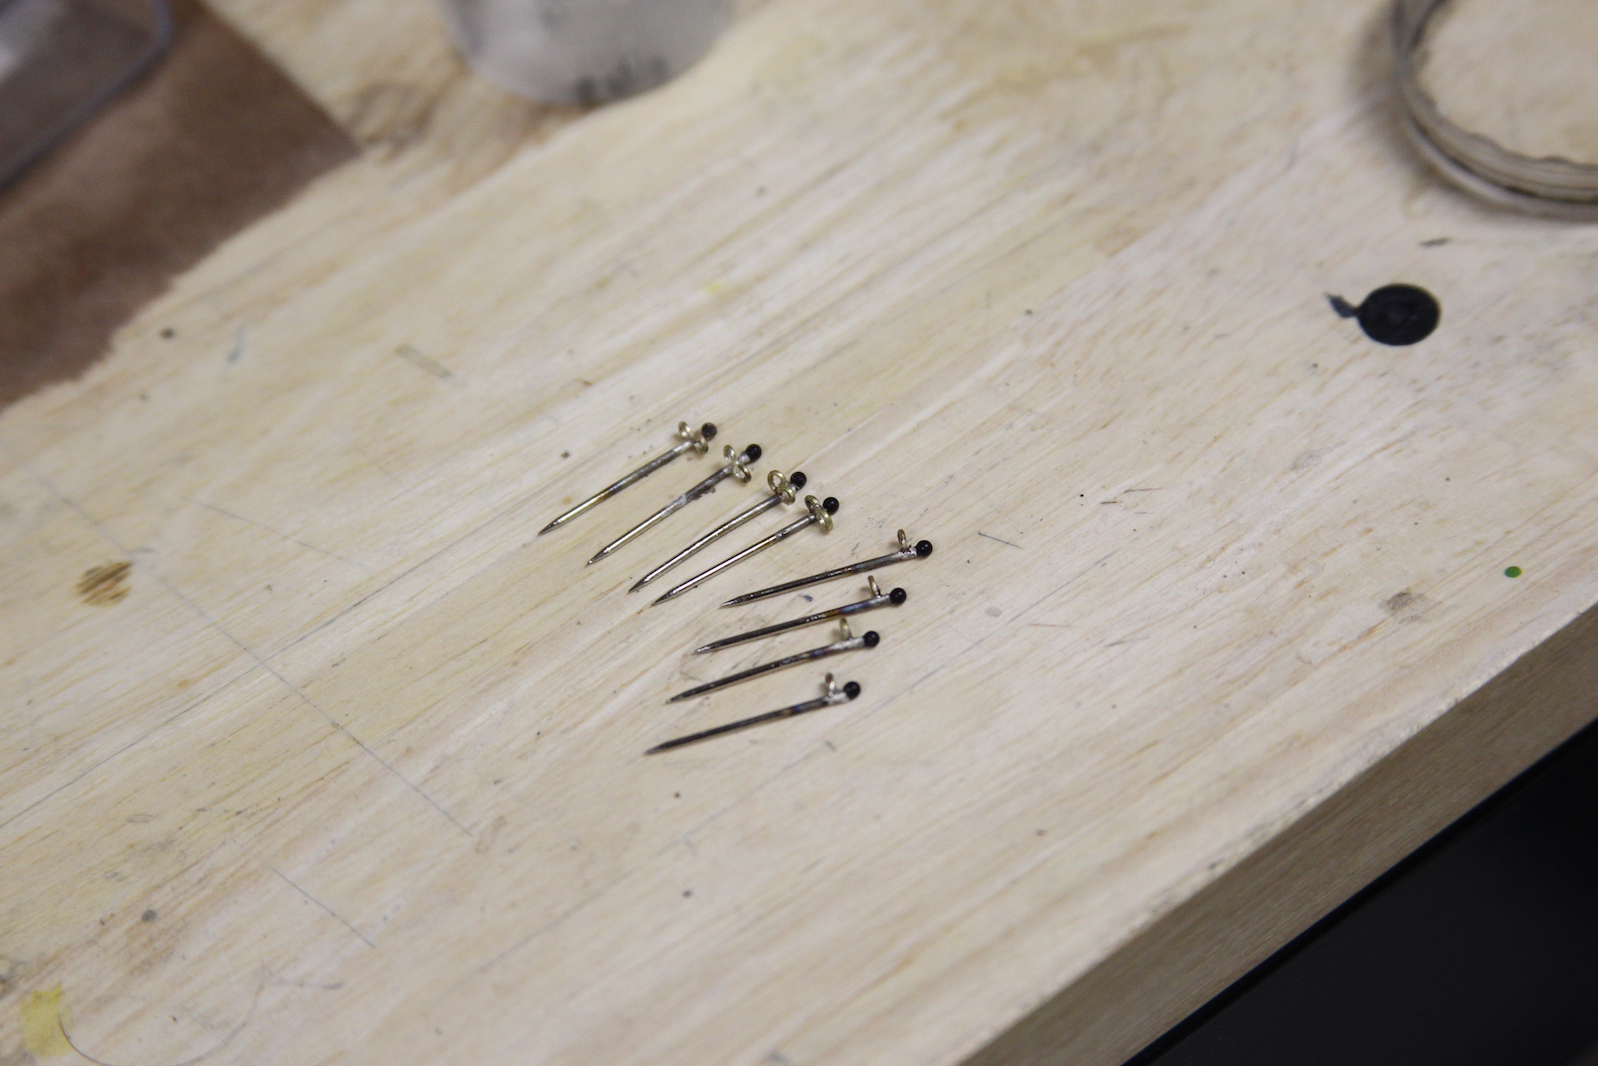
After running around trying to find tiny little beads or something to serve as railing toppers (including raiding my teenage daughter’s stash of beading supplies) – I onIy came up with about half of what I needed. So – I made the rest on my own by using half-dried clumps of acrylic paint, rolling them into tiny balls, and then letting them dry. Then painting over them with Model Master enamel paint. The toughest part was getting all the little balls perfectly round and the same size. Pretty hard to tell the difference if you ask me…
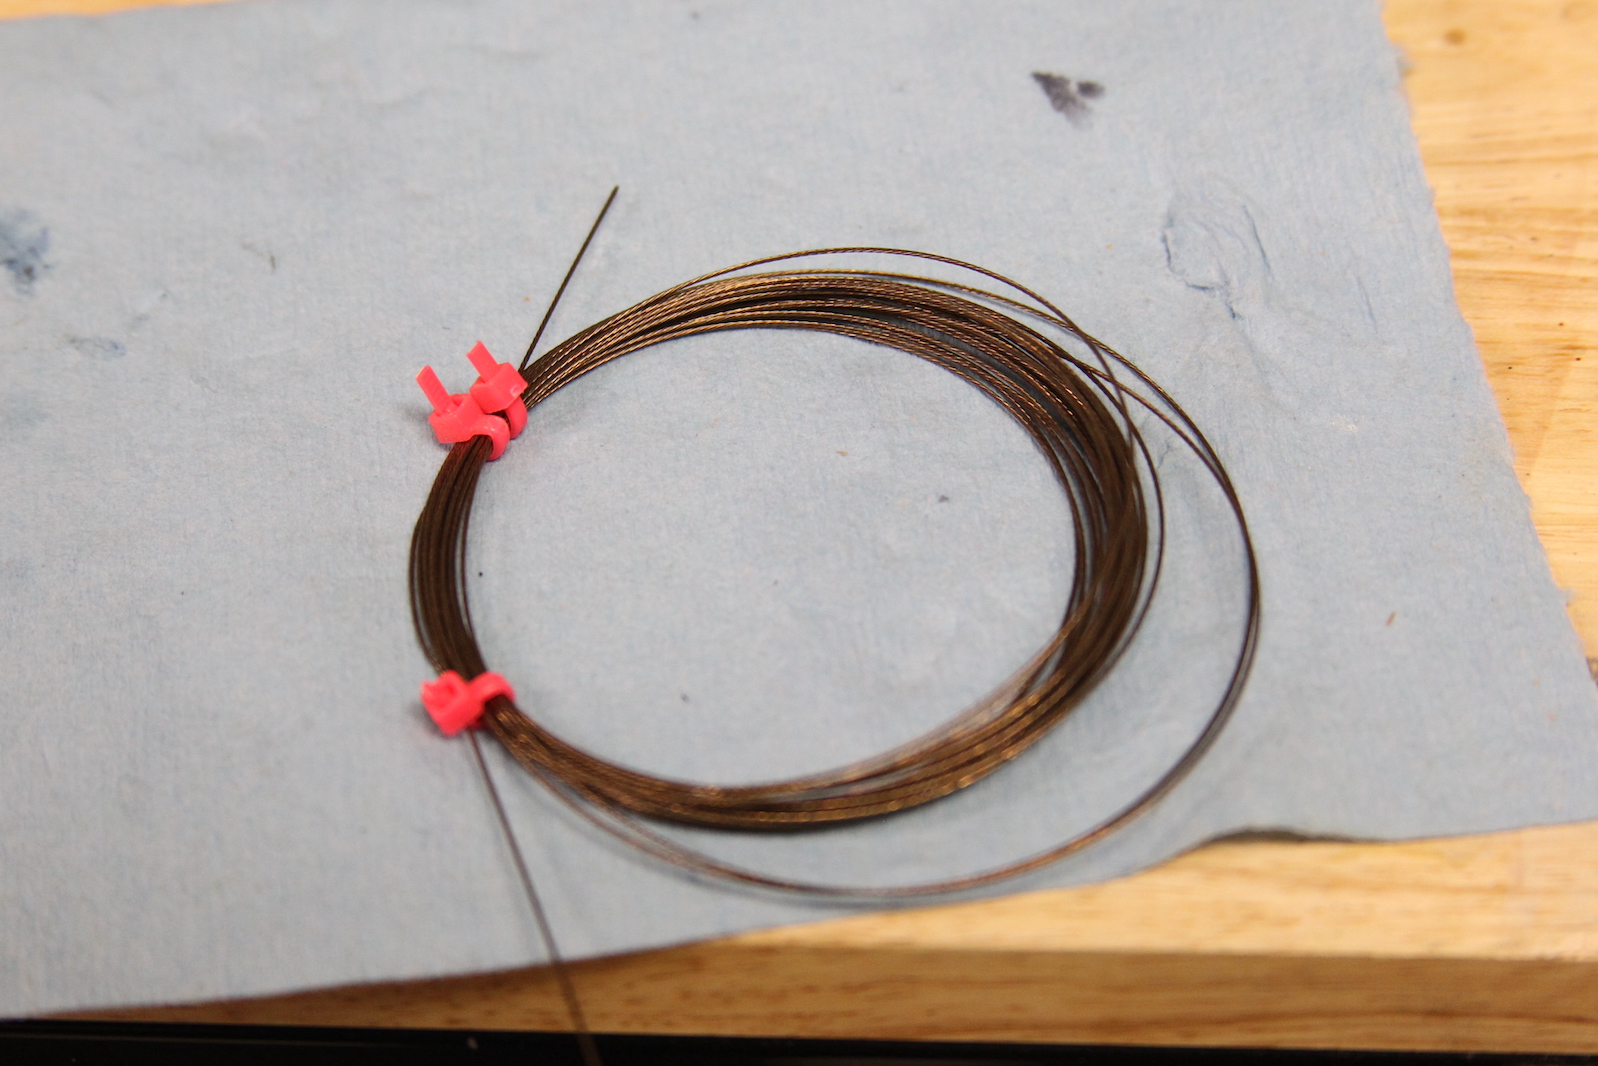
For the railings themselves, I’ve seen metal/wire used and I’ve seen rope. I decided to split the difference and use this pretty cool little cable wrapped wire I had lying around. Although not entirely accurate, I think it’s important to remember that while we all strive for a certain degree of accuracy, sometimes it’s also important to remember that these are our pieces of art, and that often calls for some deviation for our own benefit.

We all also seem to have our own “Mr. To-Scale Guy” with whom we test our sizes, etc. My guy comes from an old S-scale (also 1.64) Train set. He looks like that because he was pushing a lawnmower at one point.
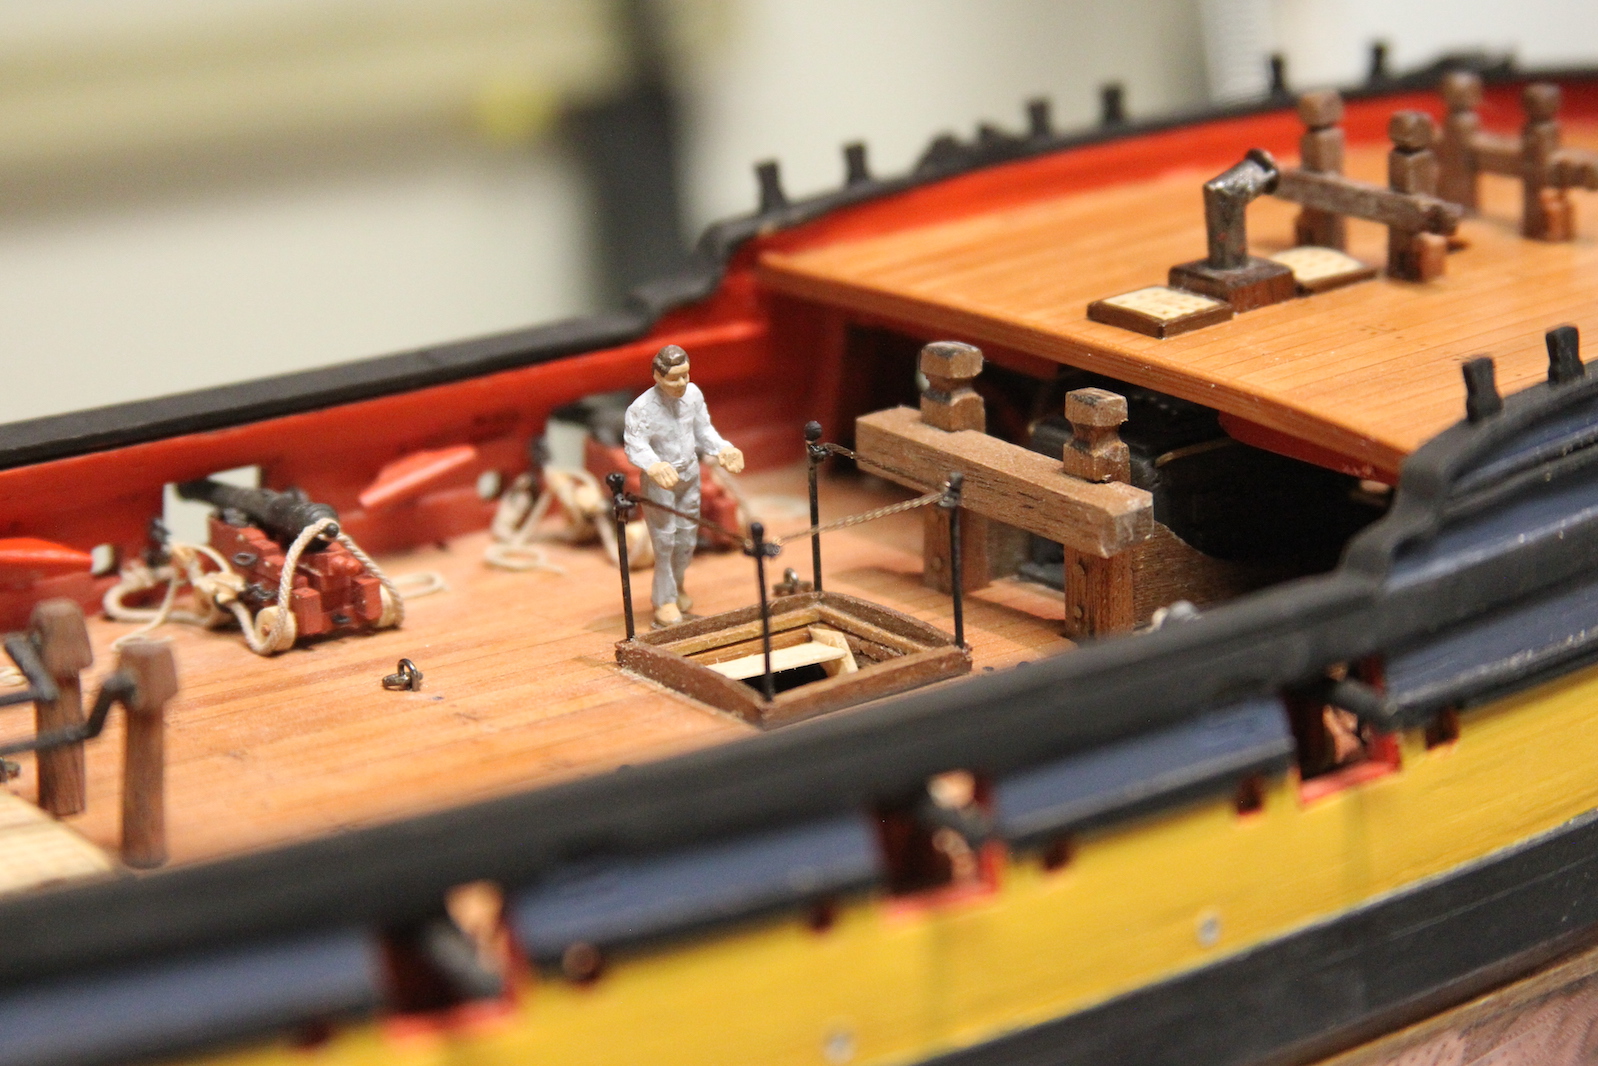
On another note – these macro shots remind me that I’m going to have a lot of dusting and cleaning up do do. Sheesh. Either that or I need to just start using a crappier lens.
