The first step in the accomplishing the standing rigging among the main portion of the ship is “stepping the masts” or rigging them into their proper place. This is generally the most visible portion of the rigging and where most people’s eyes are first drawn when they look at a model, so it is vitally important to get it as accurate and clean as possible.
The lower standing rigging is made up of a series of shrouds that run from the mastheads to the deadeyes along the the sides of the ship and hold the masts in place in the athwartships direction. The shrouds end in ‘lanyards’, or series of looped ropes lashing the deadeyes together, provide flexibility for the masts to shift in place during sailing. The shrouds are obviously very stout and high tension lines. Another thick, sturdy set of standing rigging lines called ‘stays’ connect the masts to one another and the ship along the centerline fore and aft and also stabilize the masts.
This ship is generally rigged from aft to fore starting with the mizzen as it creates easier access as the other masts are rigged. Once the mainmast shrouds are fitted it makes rigging the mizzen forestay much more difficult.
Mizzen Shrouds
The mizzen shrouds on a ship this size are 4.5″ circular and are served for about the first 6′ from the masthead. At 1/64 scale, this equates to a.57 mm diameter line served for about 2″ down from the masthead. First, I measured my line and marked where they’d be served, then I used a .60mm line served with Mara 120 and did all the serving in advance. The shrouds are wrapped around the masthead and seized on top of the burton pendants two at a time alternating between port and starboard.


One of the most difficult parts of this process is creating consistency where the shrouds attach to the deadeyes. Oftentimes you will see varying distances of the lanyards that lash the deadeyes together. While it’s not the end of the world – I think that it is more noticeable (in a good way) when all the lanyards are virtually the exact length along deadeyes. That lanyard distance is dictated by the size the of deadeye – i.e. the smaller deadeyes have shorter lanyards and the larger deadeyes have slightly longer lanyards. In order to create consistency, I manufactured a couple of metal spacing jigs using straight pins. I measured my needed lanyard distances, bent the straight pins to the right length, sanded down the points, and then attached a small ‘handle’ with silver solder.
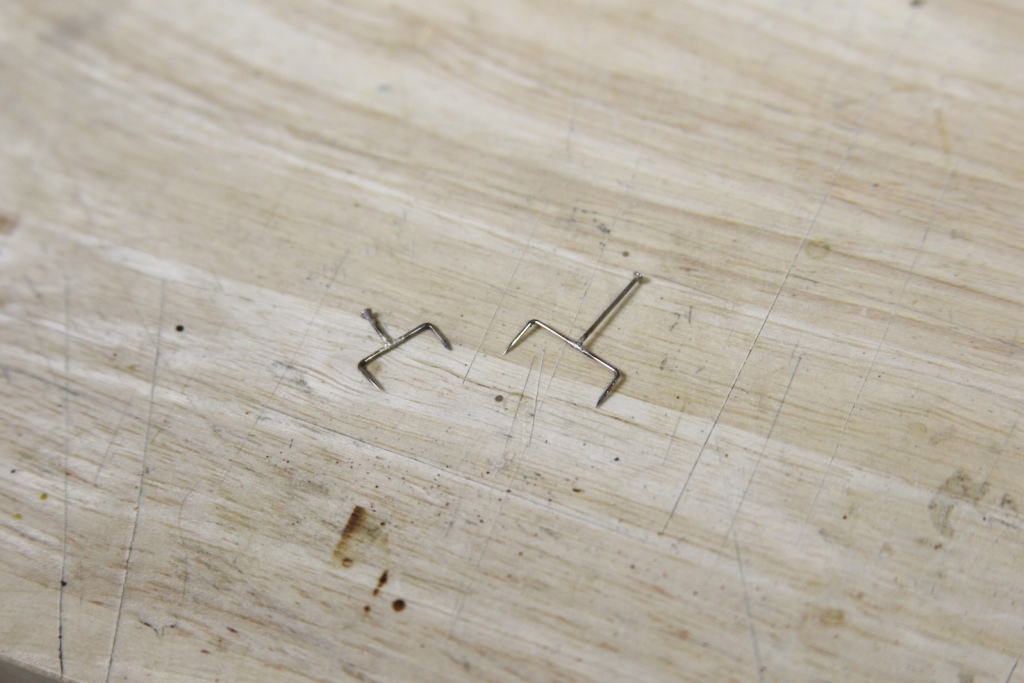
These spacers allowed me to measure the bottom of the shroud and keep it place with a touch of CA before seizing it to the upper deadeye. The lanyards themselves are 2.5″ circular which works out to a .30mm diameter line at scale. I did have to slightly bore out the holes of my smaller deadeyes to accept the lanyard. As mentioned above, the lanyards allow for flexibility and therefore are not tarred like the standing rigging lines. As such, they are a natural tan color and not dark.


Like anything – the lanyards are fed through the deadeyes in a very specific way. Starting with the foremost hole, they’re fed through the rear of the top deadeye looping alternately through each hole until they are seized along the bottom of the shroud.

My process toward getting consistency with the length of lanyard is to feed it through the deadeye, tie off the knot from the initial feed as shown above, and leave the other end loose until I can tighten the lanyard to the proper tension / distance and lash it off to the shroud. Then I go back and seize the excess length of shroud in two additional places.


It may seem obvious, but it is vital that the lengths of the shrouds are consistent on both the port and starboard sides of the ship to ensure that the mast is perfectly vertical and not listing to one side or the other.

Mizzen Stay
As mentioned above, the stays are standing rigging lines that run from aft to bow along the centerline of the ship. The mizzen stay runs from the masthead – looped over the shrouds – down to the mainmast about 7′ above the deck. As with other standing rigging, the stay ends in a closed heart block and is lashed to another closed heart block before it is finally lashed to the mast itself. Like the deadeye lanyards, these lashings provide some flexibility with the masts as the ship adjusts to wind and seas.
The Mizzen stay gets rigged prior to the mainmast shrouds ensuring that I have proper access to the mainmast – particularly regarding the collars which I find to be a little fiddly anyway. Starting with said collar – the Mizzen stay is 5.5″ circular on a ship this size, so I’m .60mm line served with Mara 120 for the strop that makes up the collar and .75mm diameter rope for the Mizzen stay itself. The collar is pretty straightforward and is seized the same as the bowsprit collars on previous posts. The hearts are closed and for these I’m going with Chuck’s Passaro’s product from Syren Ship Model Company – easy to put together and work with – including filing an indentation around the edge within which the strop will fit. The lashing is .15mm tan line for mostly aesthetic reasons – it’s the smallest rope that I have that still retains some “visual to the naked eye” detail.


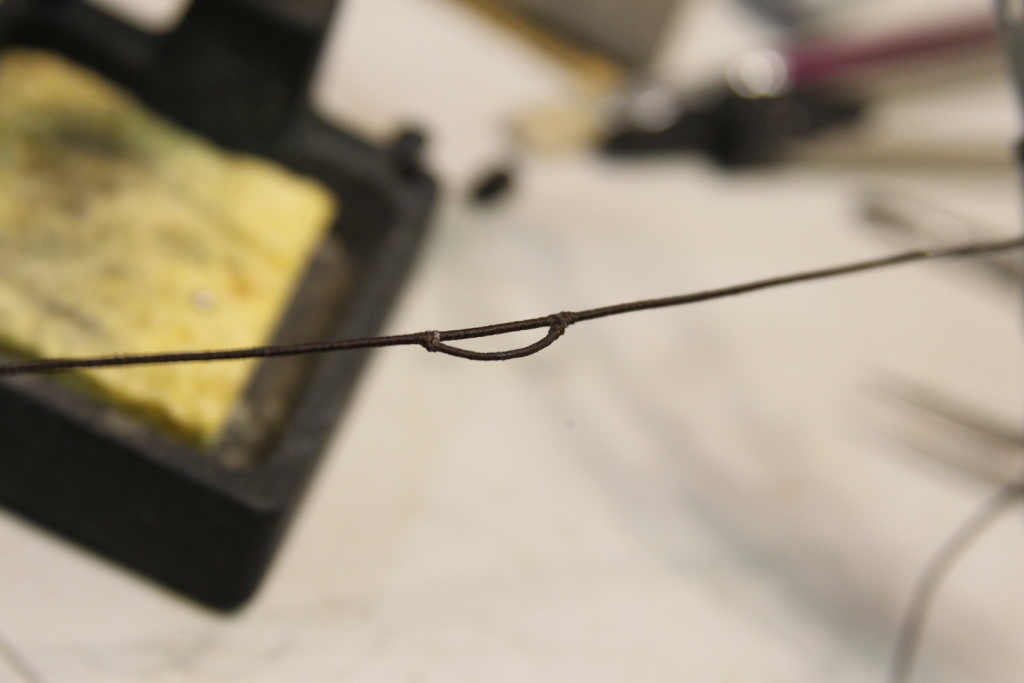
The stays themselves have a “mouse” near the masthead. The mouse is essentially a woven bulk of line that allows for adjustments to the stay. It’s basically a ‘stopper’ for the line after it is wrapped around the masthead. The challenge with a mouse is getting the proper texture so that it looks ‘woven’ and realistic to the eye. The top portion of the stay is also served to just below the mouse with an eye into which the rest of the stay is inserted. To get the serving correct, I started by looping the end of the stay then feeding my serving line (mara 120) into the stay via sewing needled. The eye portion was ‘hand served’ then I was able to load the entire thing into my serving machine to do the rest of the portion that needed it.


To make the mouse, I sanded a dowel then drilled out a hole just big enough to accommodate the served line. I don’t have an exact diameter of the bit that I used because I started with “very small” and then gradually increased bits until the serving line was just barely able to snug its way through.


I’ve seen quite a few different ways to simulate the ‘woven’ texture of the mouse. After quite a bit of noodling through what to do – my option was this bandage. This particular fabric bandage had the look and feel of weaving at the correct scale. The added bonus is that it has adhesive – though I did had a dab of CA to ensure it does not come loose.


The size of the mouse is listed in Steel’s reference book as three times the diameter of the stay, but the bandage added a little bulk – so I did have to scale the mouse down a tad as my original effort was a little big for my taste. Ultimately I just ‘eye-balled’ it until it looked right to me. The mouse is then painted first black, then brown to try and match the color of the stay. Finally, the lower end of the stay is seized to a twin closed heart to the collar and lashed. One note in the second picture below – although the lashing behind the mast looks much lighter – that’s a trick of the camera where my overhead light was shining – all the lashings are the same color.


Mainmast Shrouds
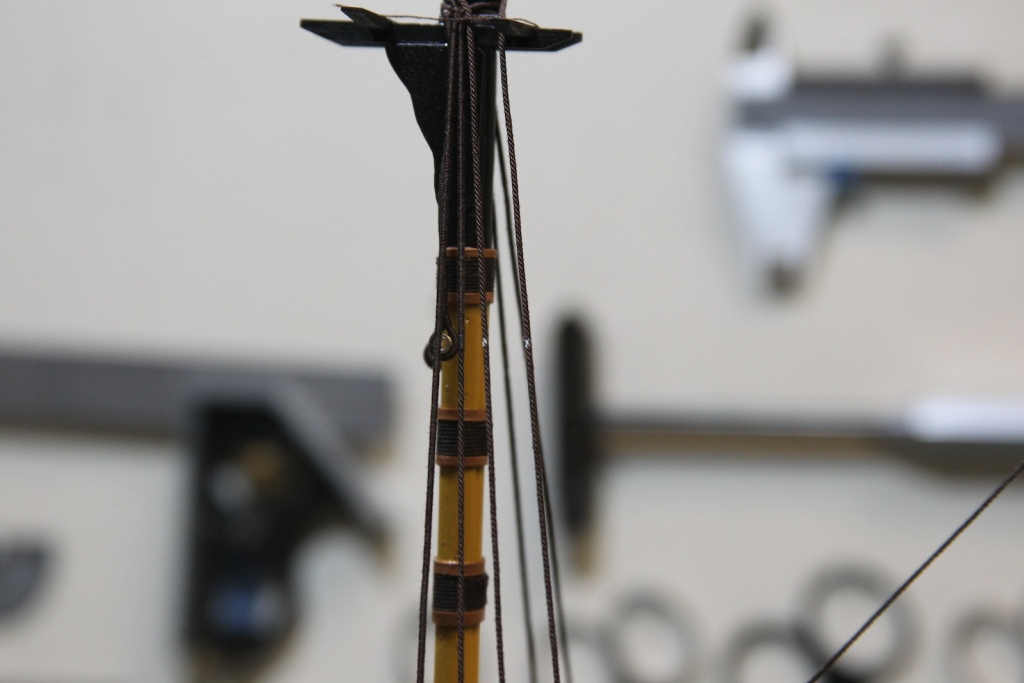
The mainmast shrouds are done in an almost identical way as the mizzen shrouds with a couple of key differences. The main shrouds are a larger rigging line – 7″ in circumference, which translates to 1/64 scale as .88 mm diameter, my rope is .85 which of course is an inconsequential visual difference. The second difference is that the foremost shroud for the mainmast (as well as the foremast) is served for its entire length while the remaining shrouds are served for the first 8′ scale feet. There are eight shrouds which hang over the masthead in pairs (like the mizzen) and extend down to deadeyes that are also larger than those that hold the mizzen shrouds. Otherwise the process is same; measuring the shroud, serving the line, looping and seizing the shrouds at the masthead, then attaching the deadeyes using my handy (slightly larger than the mizzen) spacer. This time however, I measured each shroud around the mainmast and marked the distance of where I’d need to serve with a touch of white paint. The total length needed to serve is slightly different for each shroud as they each angle shallower as they move from fore to aft. Overall, a slow process which took three days to complete for the mainmast.


Main & Preventer Stays
The mainstay and the preventer stay each extend from the masthead of the main mast toward the bow of the ship with the preventer stay attaching to a collar on the foremast and the main stay attaching to the previously built mainstay collar looped around the bowsprit. As the largest line on the ship, the mainstay is a whopping 10″ circumference translating to 1.26mm at 1/64, or in my case 1.25 – which I had to take the time to spin since I didn’t have that size immediately available. I created this diameter by spinning four lines of Gutermann Mara 15 thread.
After doing a little searching and noodling, I found some evidence of the preventer stay being below the main stay, while most had it slightly above. I went slightly above for a mostly selfish reason – I was able to lash the preventer stay collar right up against the bottom of the cheeks rather than adding a couple of cleats to keep it in place. The closed heart on the preventer stay collar is a 5.5 mm heart and will lash to a twin using .30mm rope lanyard.


The other end of the stay – where it loops over the masthead – is held in place with a mouse just as with the mizzen stay; though this mouse is slightly larger as well. This is also true of the preventer stay. Both should be three times the diameter of their respective stay and both of mine came out larger than they should be, but about as small as I could get them and still be able to work with them. The heart on the mainstay is a twin to the one I made in an earlier post on the bowsprit collar – 5.95mm (6 really) boxwood and the whole thing is lashed with .45mm diameter (3.5″ circular per Steel) tan rope at the lanyard.

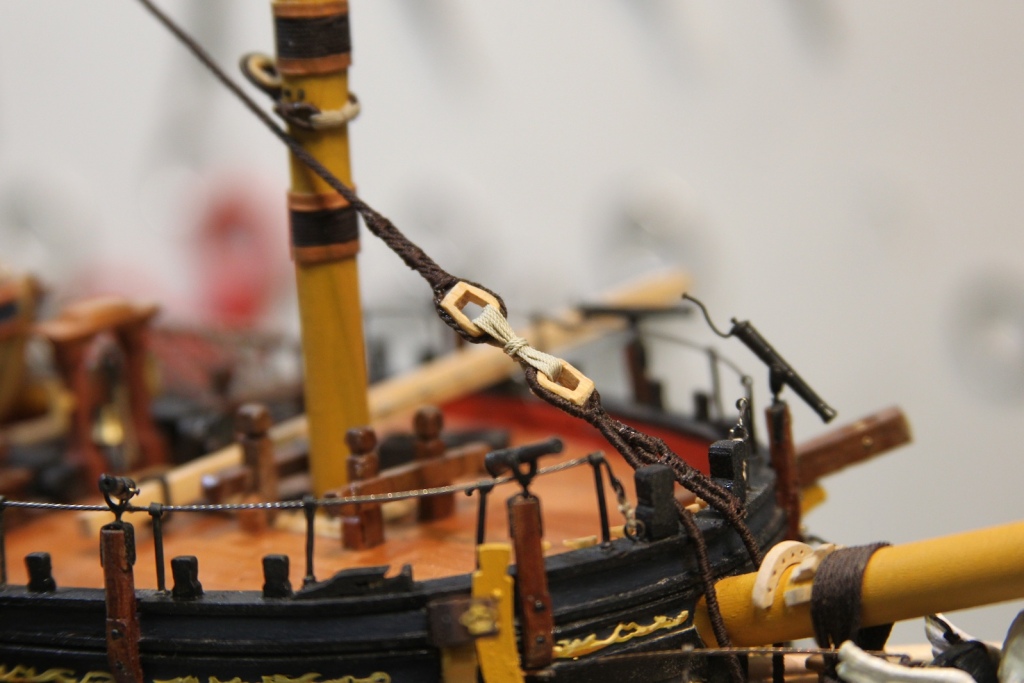
The preventer stay mirrors the main with smaller dimensions – the stay itself is 7″ (.88mm diameter) the same as the main shrouds. I measured the mouse as best I could but ended up just ‘eyeballing’ it to get it a bit smaller than the main mouse and still look right. The twin closed 5.5 mm heart is lashed with .30 mm rope. After some measuring, remeasuring, and adjusting the heart placement a couple of times, I still ended up with a bit longer lanyard than I’d like, but acceptable to me.


Foremast Shrouds
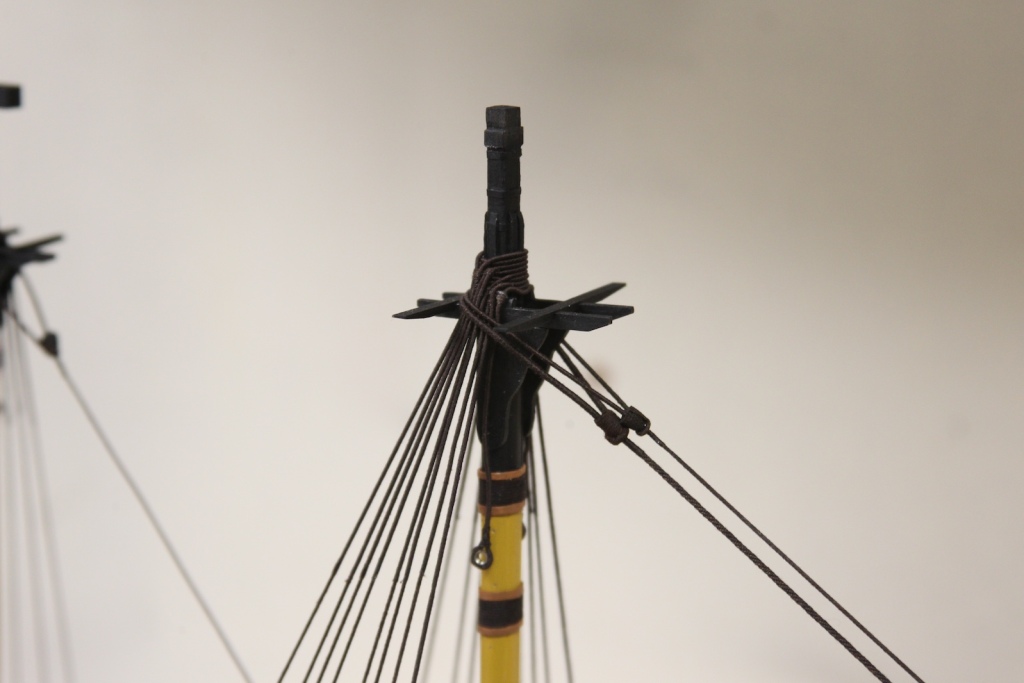
As with the other two masts, the foremast shrouds extend from the masthead down to the deadeyes at the port and starboard sides of the ship near it’s bow. Although the same process is followed as with the other shrouds, these are a bit trickier for a couple of reasons. First, they are very precisely placed to ensure the gaps for the cannon are accurate. After all – what good would a small hand cannon be if all it did was blow off part of the rigging? Second, there is an uneven number of shrouds at the foremast, seven, which means there are three sets of paired shrouds then a single shroud called a “swifter”. The swifter is the aftmost shroud and is the last one looped over the masthead with an eye splice. As with the main mast, the foremost shroud is served it’s entire length while the others are served for the first 6 scaled feet extended from the masthead. The foremast shrouds are 7″ in circumference which scales down to .85 mm.


Fore Stay & Preventer
The fore stay and foremost preventer stay are essentially carbon copies of the main stay and it’s preventer. They key differences being the sizes of the lines and where they are attached at their bottom ends. Both of these stays are lashed via lanyard to the two open hearted collars that were previously attached to the bowsprit.
The Fore stay is listed as 9.5″ circular which becomes 1.2 mm at scale with a closed heart just over 5mm. Once again I’m using the fine lasercut hearts from Syren. The closed heart at the bottom is 5.5mm and I’m using .45mm line for the lanyard, same as the main stay. The mouse is made the same as the mizzen and main stays and is sized to be three times the diameter of the line.


The preventer stay is a considerably smaller rope listed at 6″ circular which comes out to .75mm at 1:64. The closed heart is slightly smaller as well at just over 4mm as is the lanyard – I’m using .30 mm rope. As with the other stays, these lines are served at the top where they loop over the masthead and run through the mouse and an eye loop.


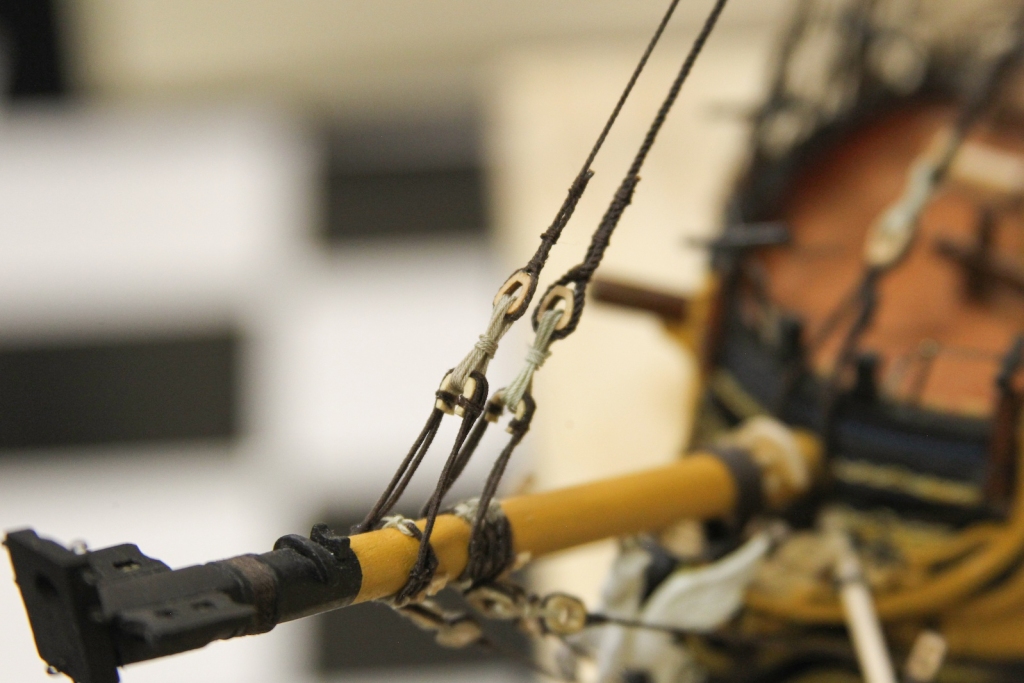
So this is where she is after just under 700 hours of labor.

